Appearance
Email Notifications
FluentBooking allows you to send automatic email notifications for various actions like booking confirmation, reminders, rescheduling, and cancellations. These notifications keep both you and your attendees updated throughout the booking lifecycle.
In this guide, you learn how to configure and customize these email notification settings for your specific booking events.
Important
You need at least one booking calendar and event before you edit notification templates—see Create New Events if you have not set one up yet.
Accessing Email Notification Settings
- Open your FluentBooking dashboard.
- From the top navigation bar, click Calendars to view your booking events.
- Find the event you want to manage (for example, Growth Strategy Discovery Call) and open its settings.
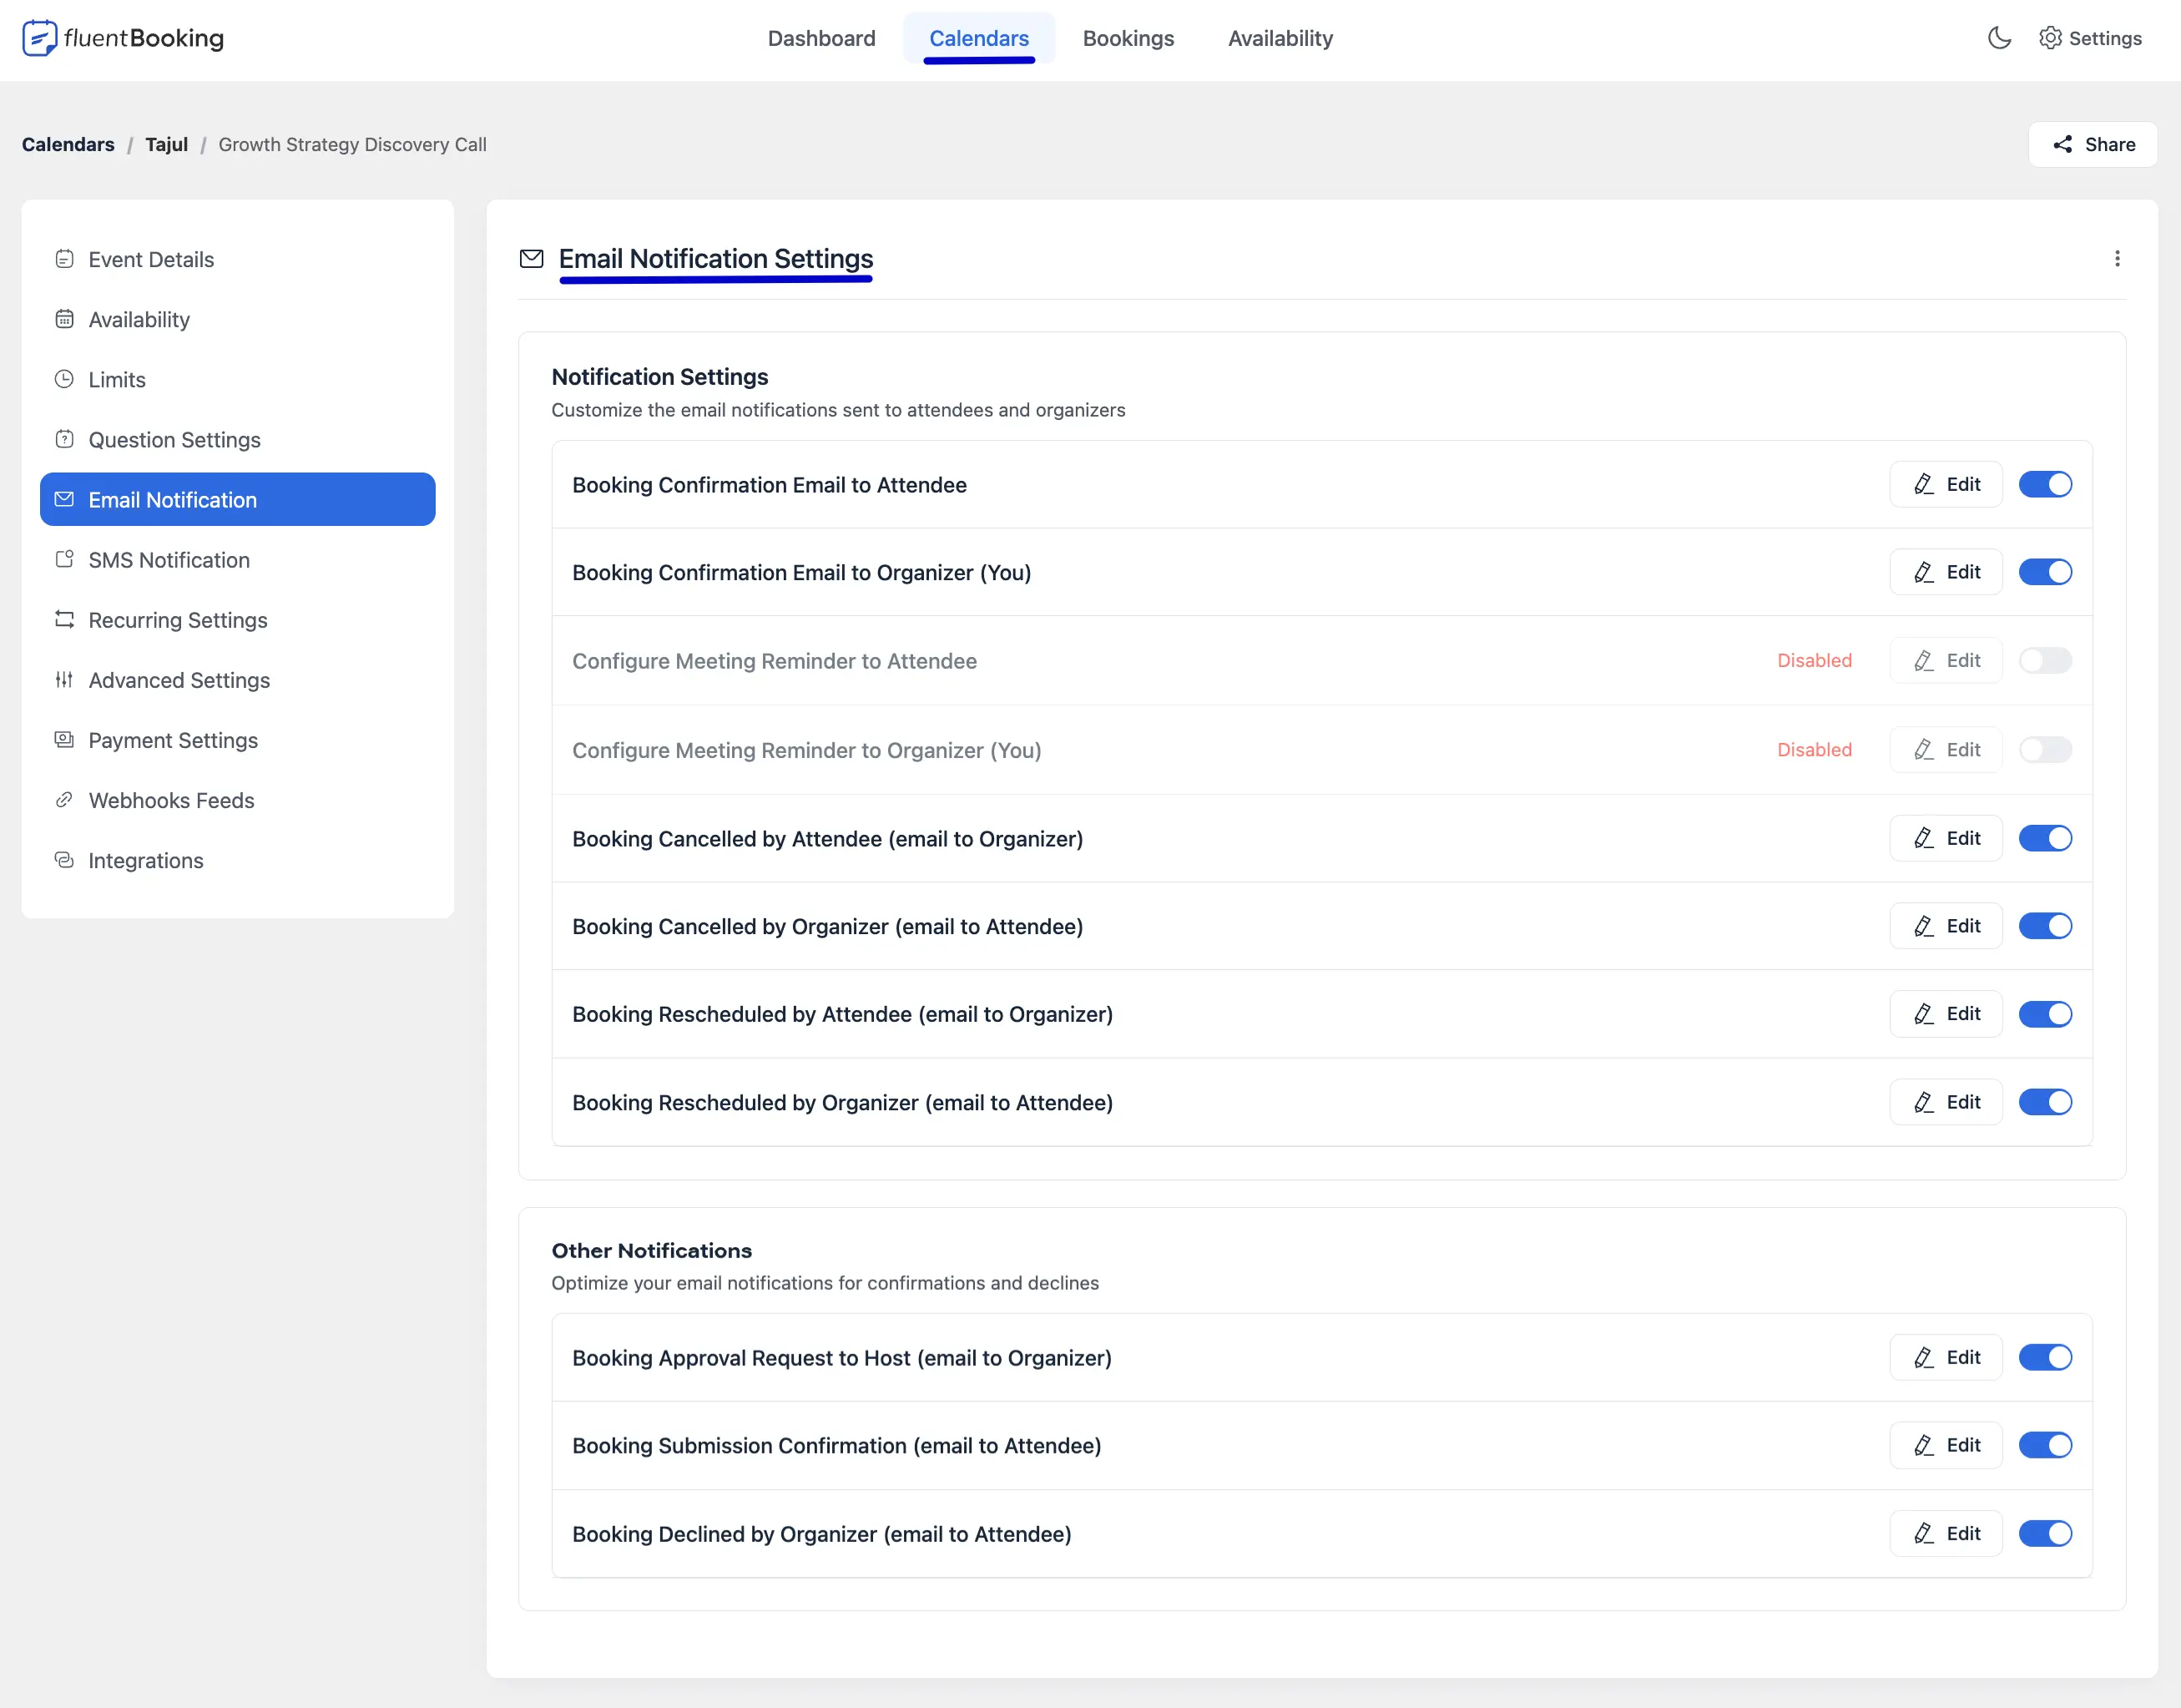
- In the left sidebar, click Email Notification.
Here you see a list of pre-configured notification templates grouped into two main categories: Notification Settings and Other Notifications.
Managing and Toggling Notifications
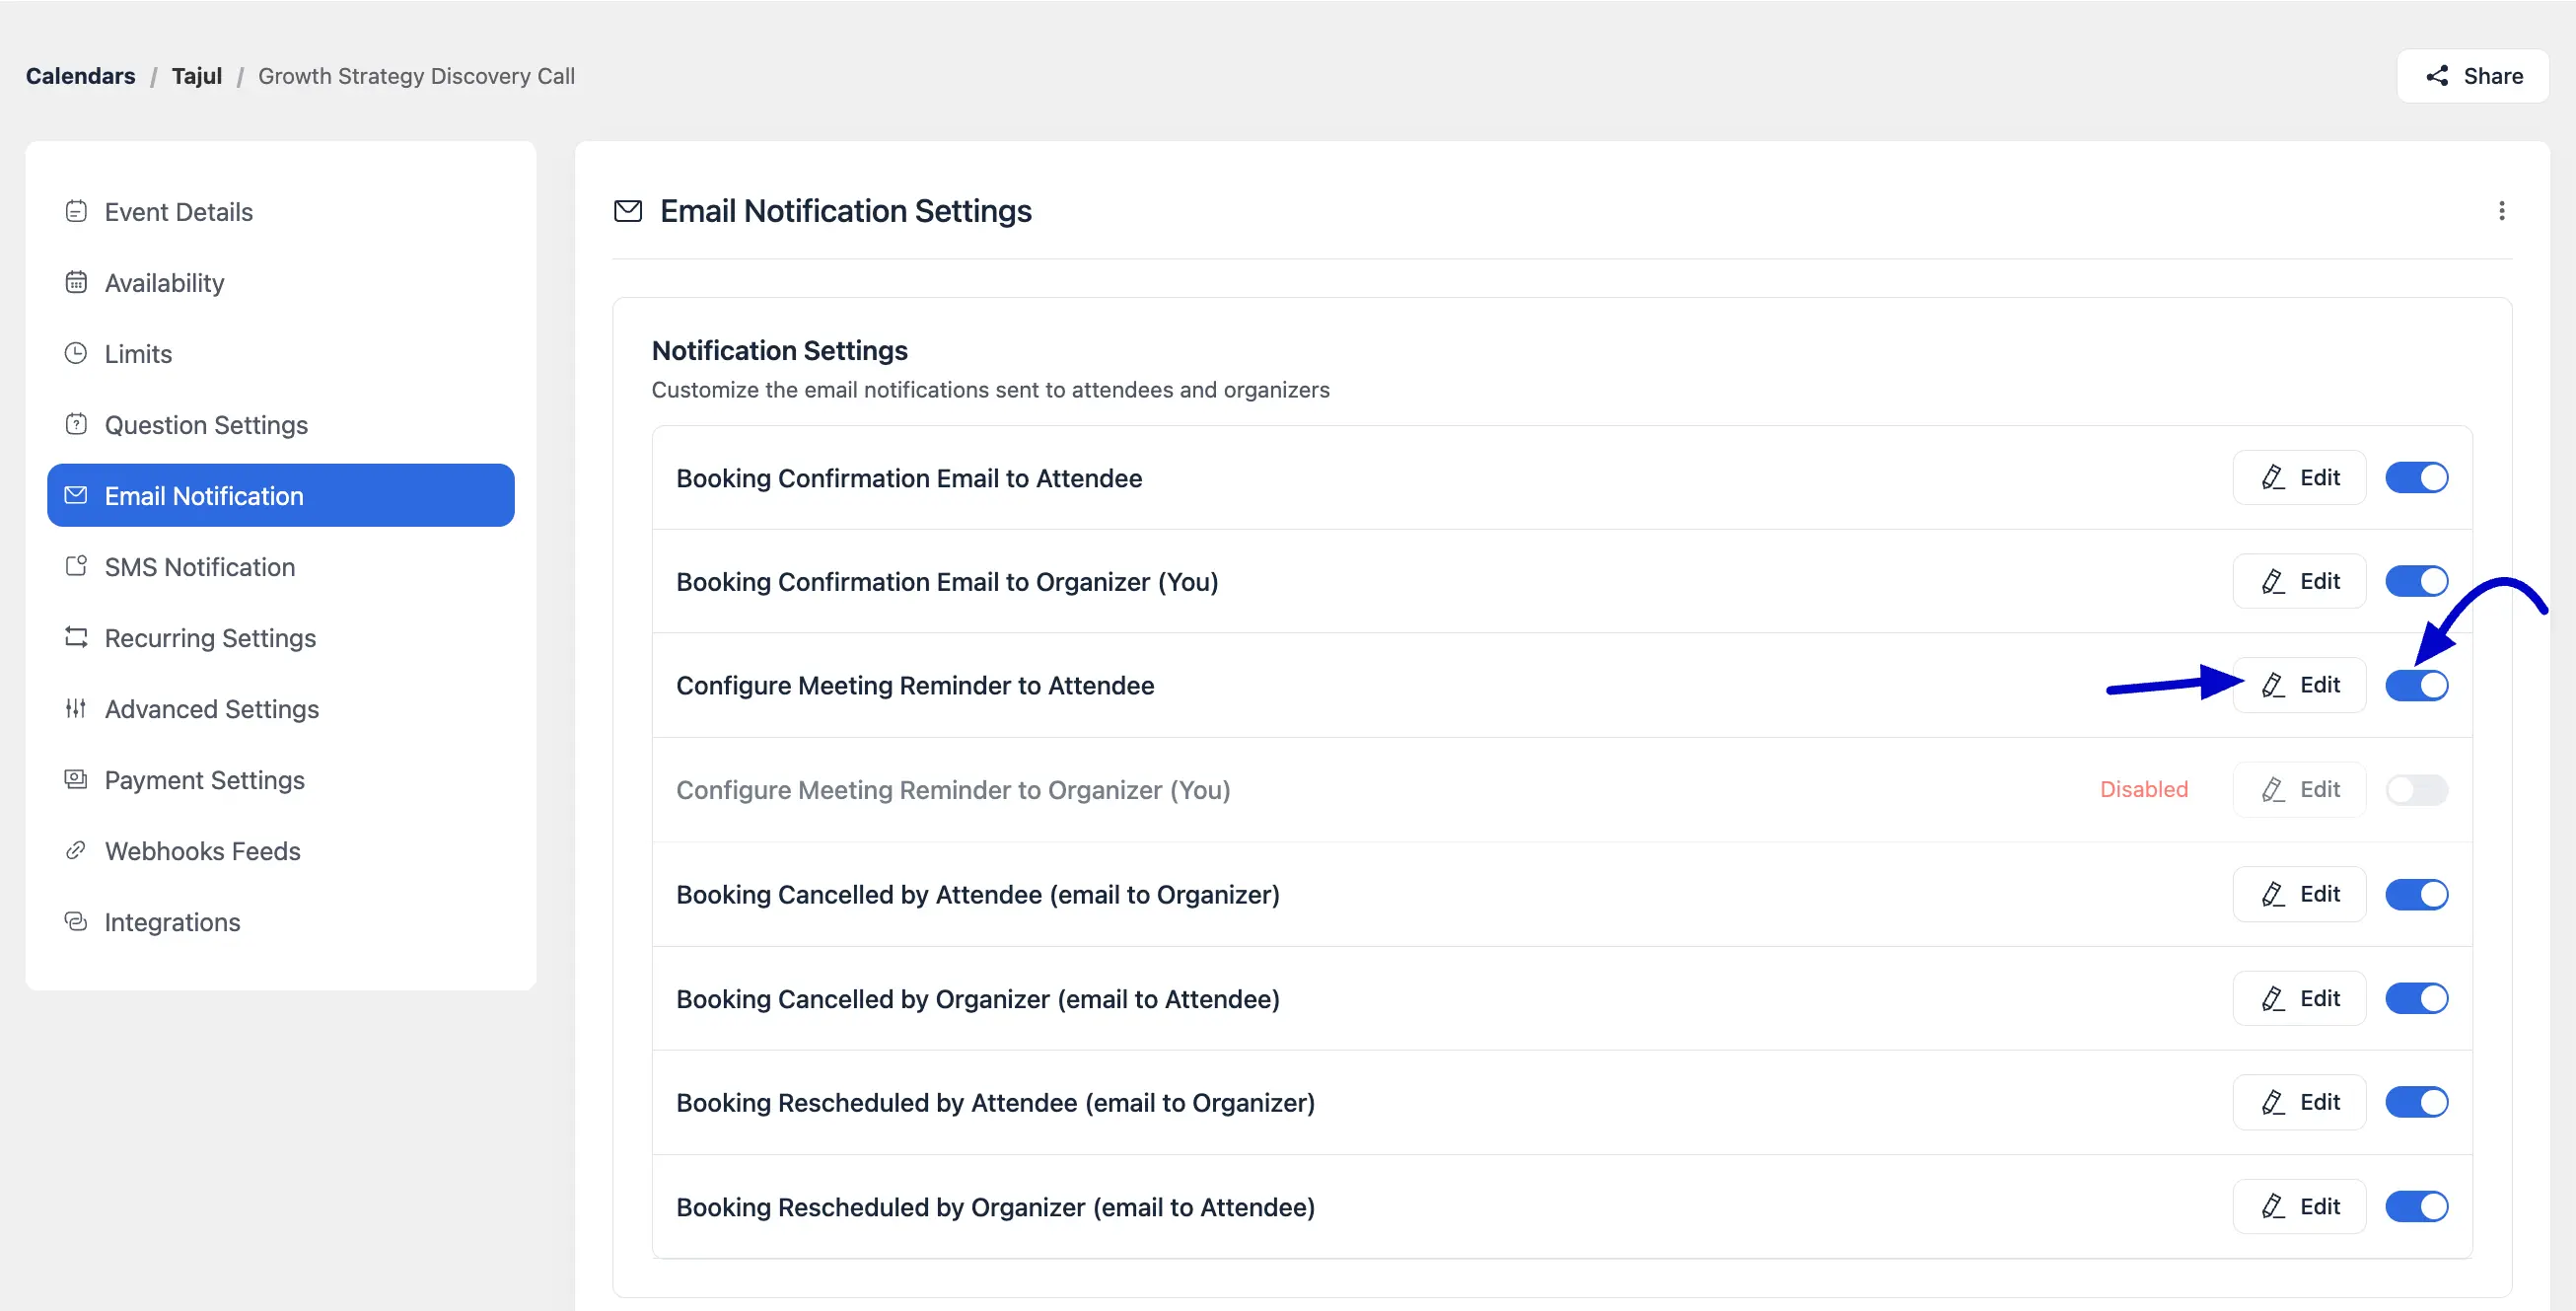
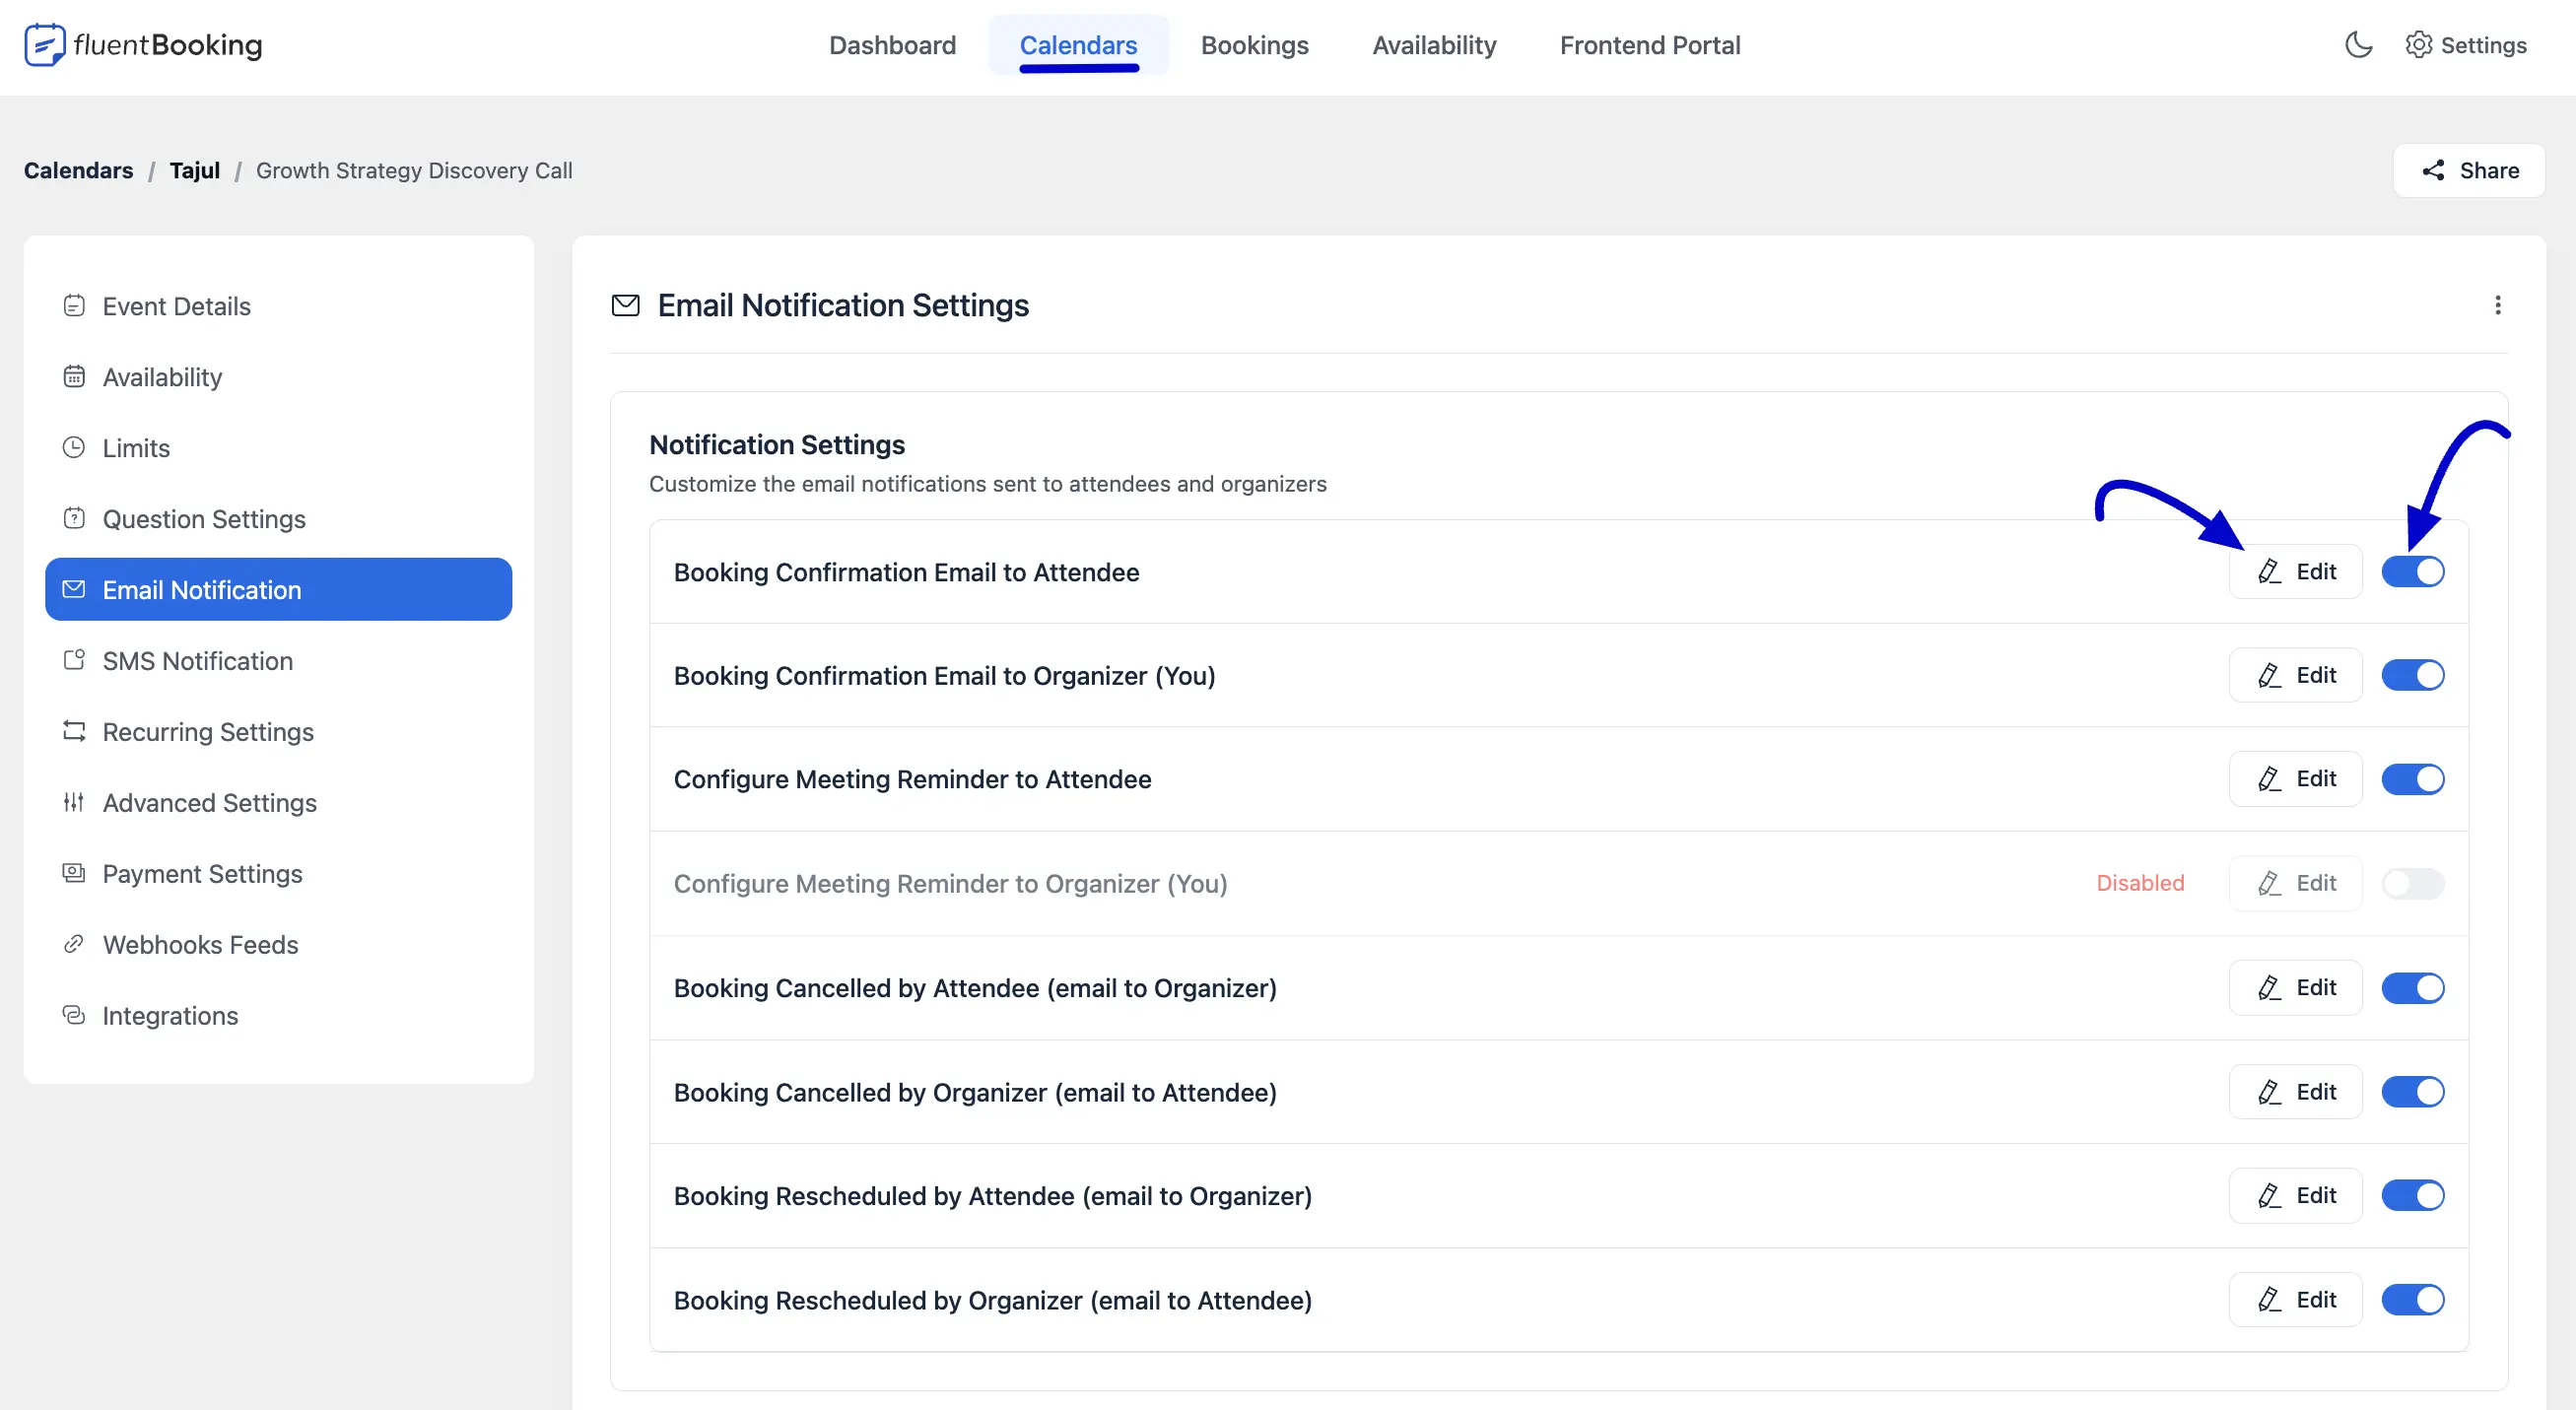
Each notification template can be turned on or off using its row controls.
- To turn a notification on or off: Use the blue toggle on the far right of any notification row.
- Disabled notifications: When a notification is disabled, its toggle turns gray, the row text fades, and a red Disabled badge appears next to the action button (as on the Configure Meeting Reminder to Organizer row).
- To edit: Click Edit next to any trigger to change its content and settings.
Customizing a Notification Template
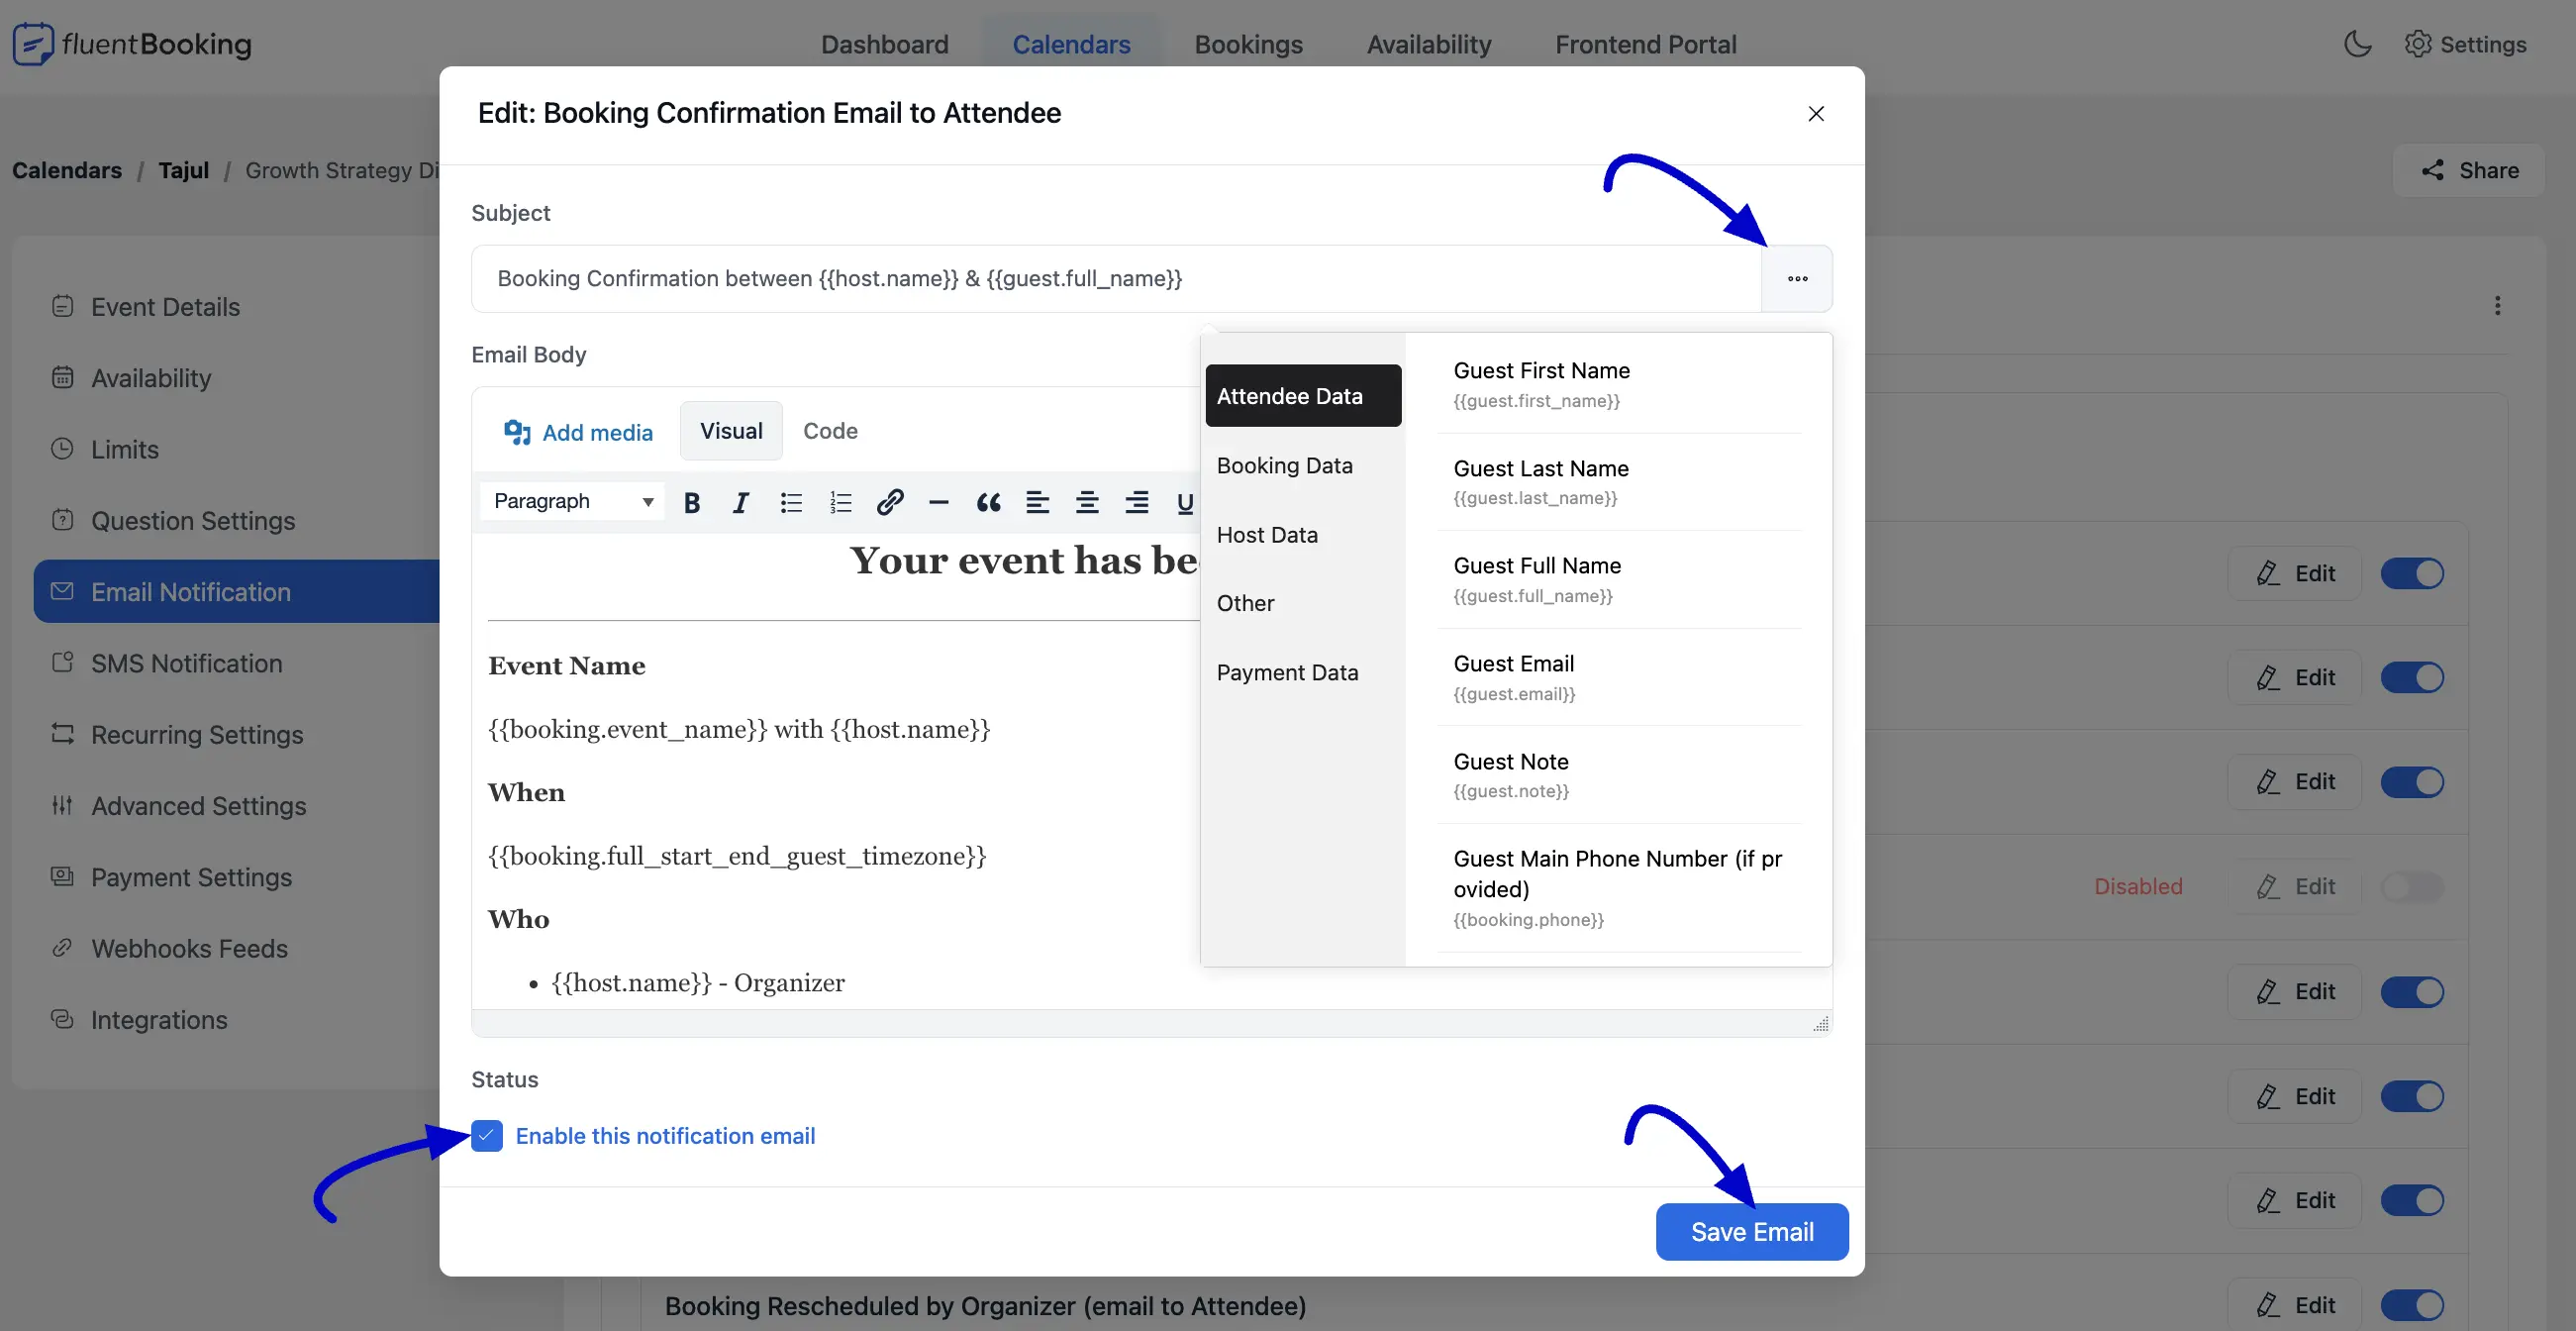
When you click Edit on a core template for example, Booking Confirmation Email to Attendee a dedicated editing modal opens.
- Subject: Enter the subject line for the email. Click the three-dot (...) icon inside the field to open the shortcode selector and inject data such as
{{host.name}}or{{guest.full_name}}. - Email body layout: The body field includes an editor with Visual and Code tabs, plus Add media. You can place dynamic tags (for example,
{{booking.event_name}}) directly in the message. - Add Shortcodes: Use the Add Shortcodes drop-down above the formatting bar to browse and insert available data tags.
- Status: Ensure Enable this notification email at the bottom is checked.
- Save: Click the blue Save Email button to apply your updates.
Customizing Other Notification Settings (with routing options)
The Other Notifications section covers transactional workflows such as manual scheduling approvals or rejections. When you customize admin-focused workflows—for example, Booking Approval Request to Host—the editing modal includes extra controls.
- Subject and body: Customize the approval subject and body. You can structure the message with headings, dividers, and time-specific tags such as
{{booking.start_date_time_for_host}}. - Additional recipients: Use the input box to enter email addresses separated by commas. Each address is copied (CC) on the notification so administrative teams or assistant hosts stay informed.
- Status: Confirm Enable this notification email is checked.
- Save: Click the blue Save Email button to update the workflow.
