Appearance
Create a Booking Event
Creating a new event in FluentBooking is the foundation of your scheduling system. This feature allows you to define exactly how, where, and for how long your meetings will occur, whether they are simple one-on-one sessions or group events.
In this guide, we'll provide you with step-by-step instructions to create new bookings. Let's get started!
Creating New Events
Important
Before creating a new event, make sure you've already created a host. You need at least one host to set up a booking event.
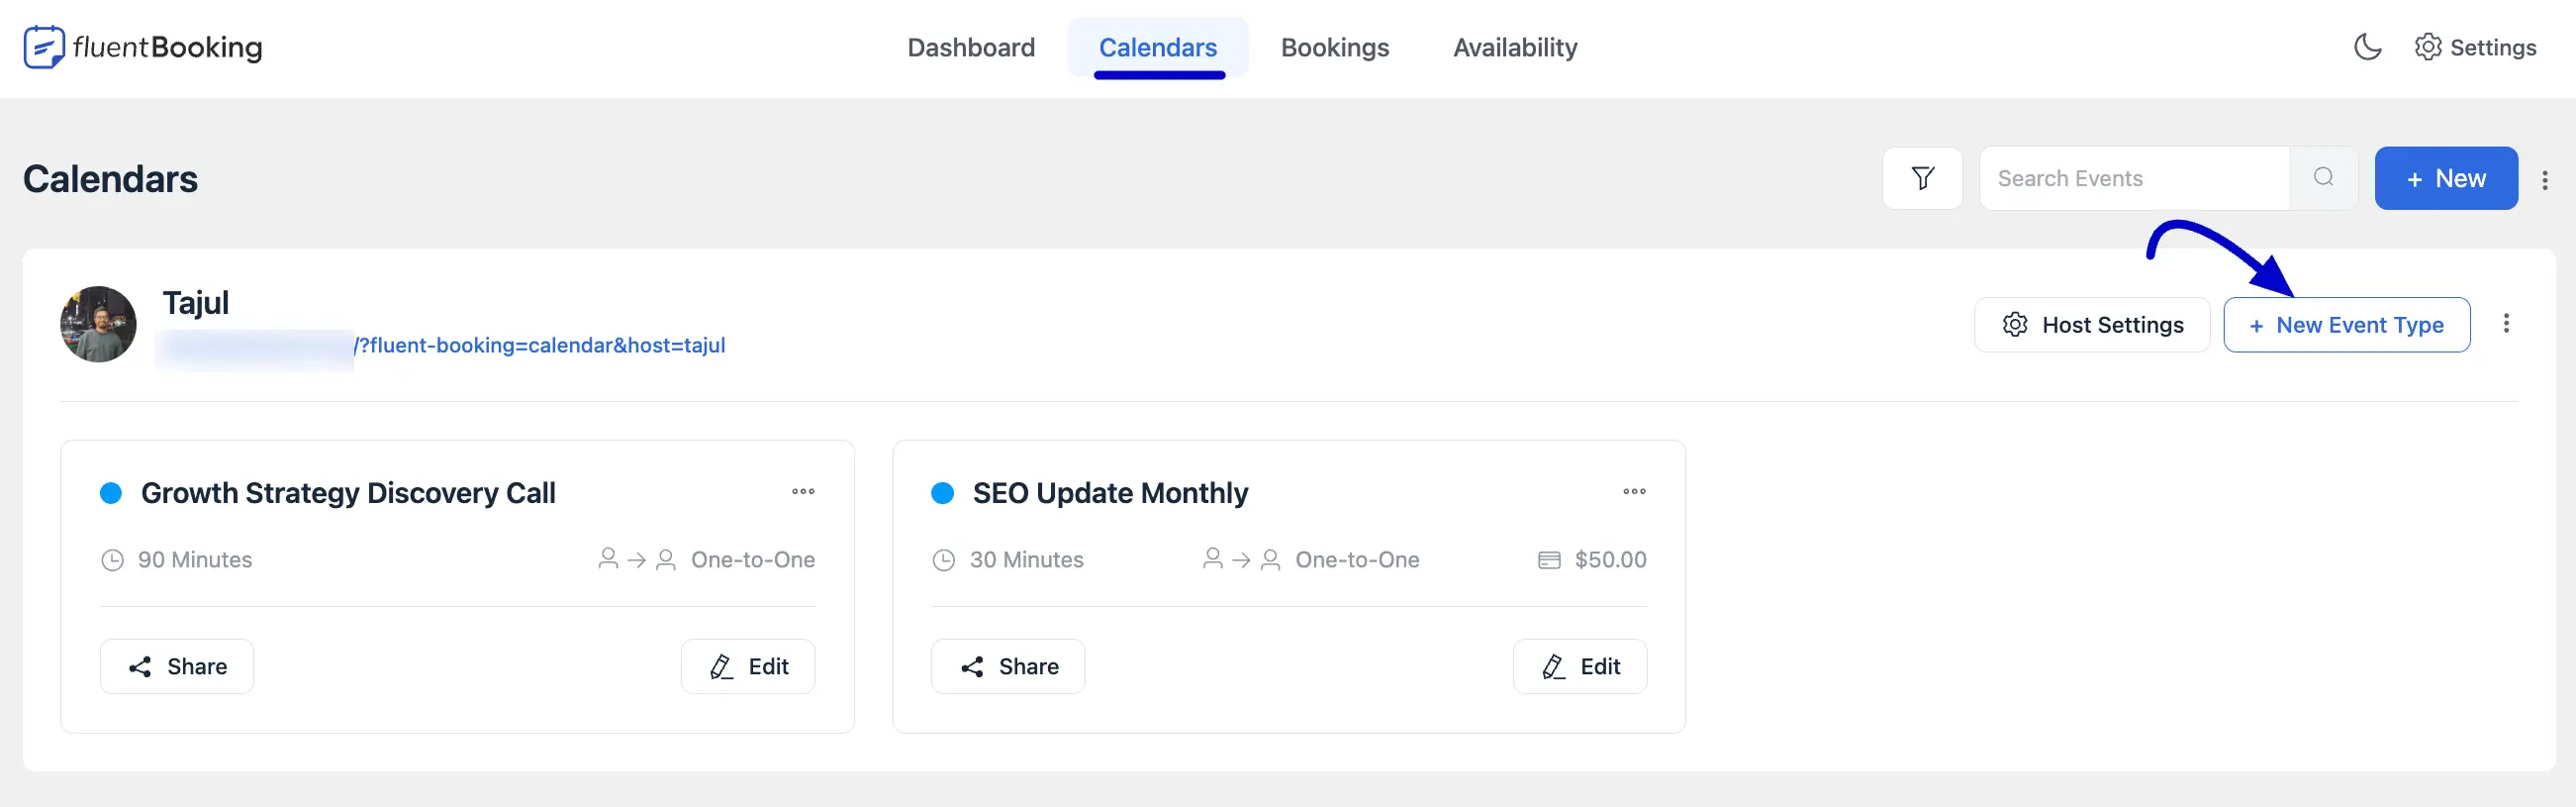
To create a new event, go to the Calendars section from the top navigation bar in your FluentBooking dashboard. Click on the New Event Type button located next to the Host Section.
Choose Events Type
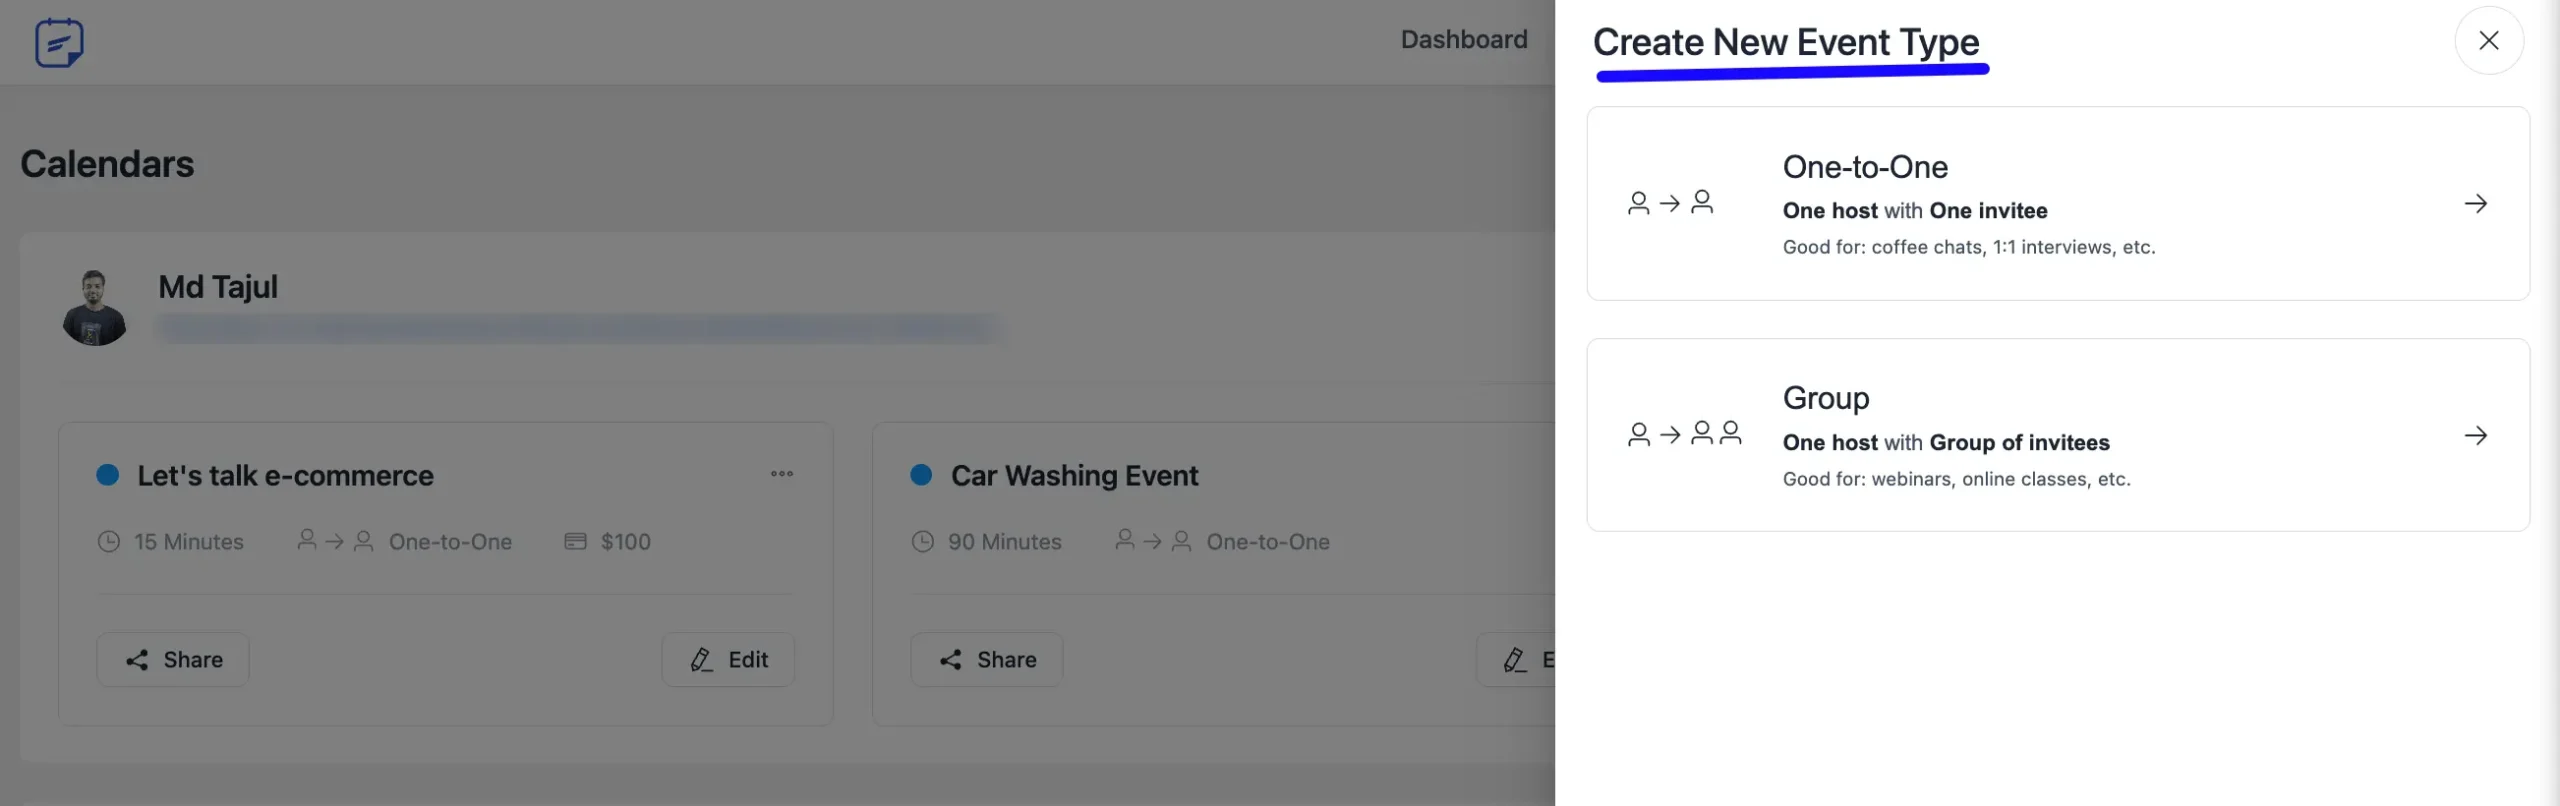
A pop-up will appear, giving you the choice between a One-to-One meeting or a Group meeting. Select your preferred meeting type.
Events Details
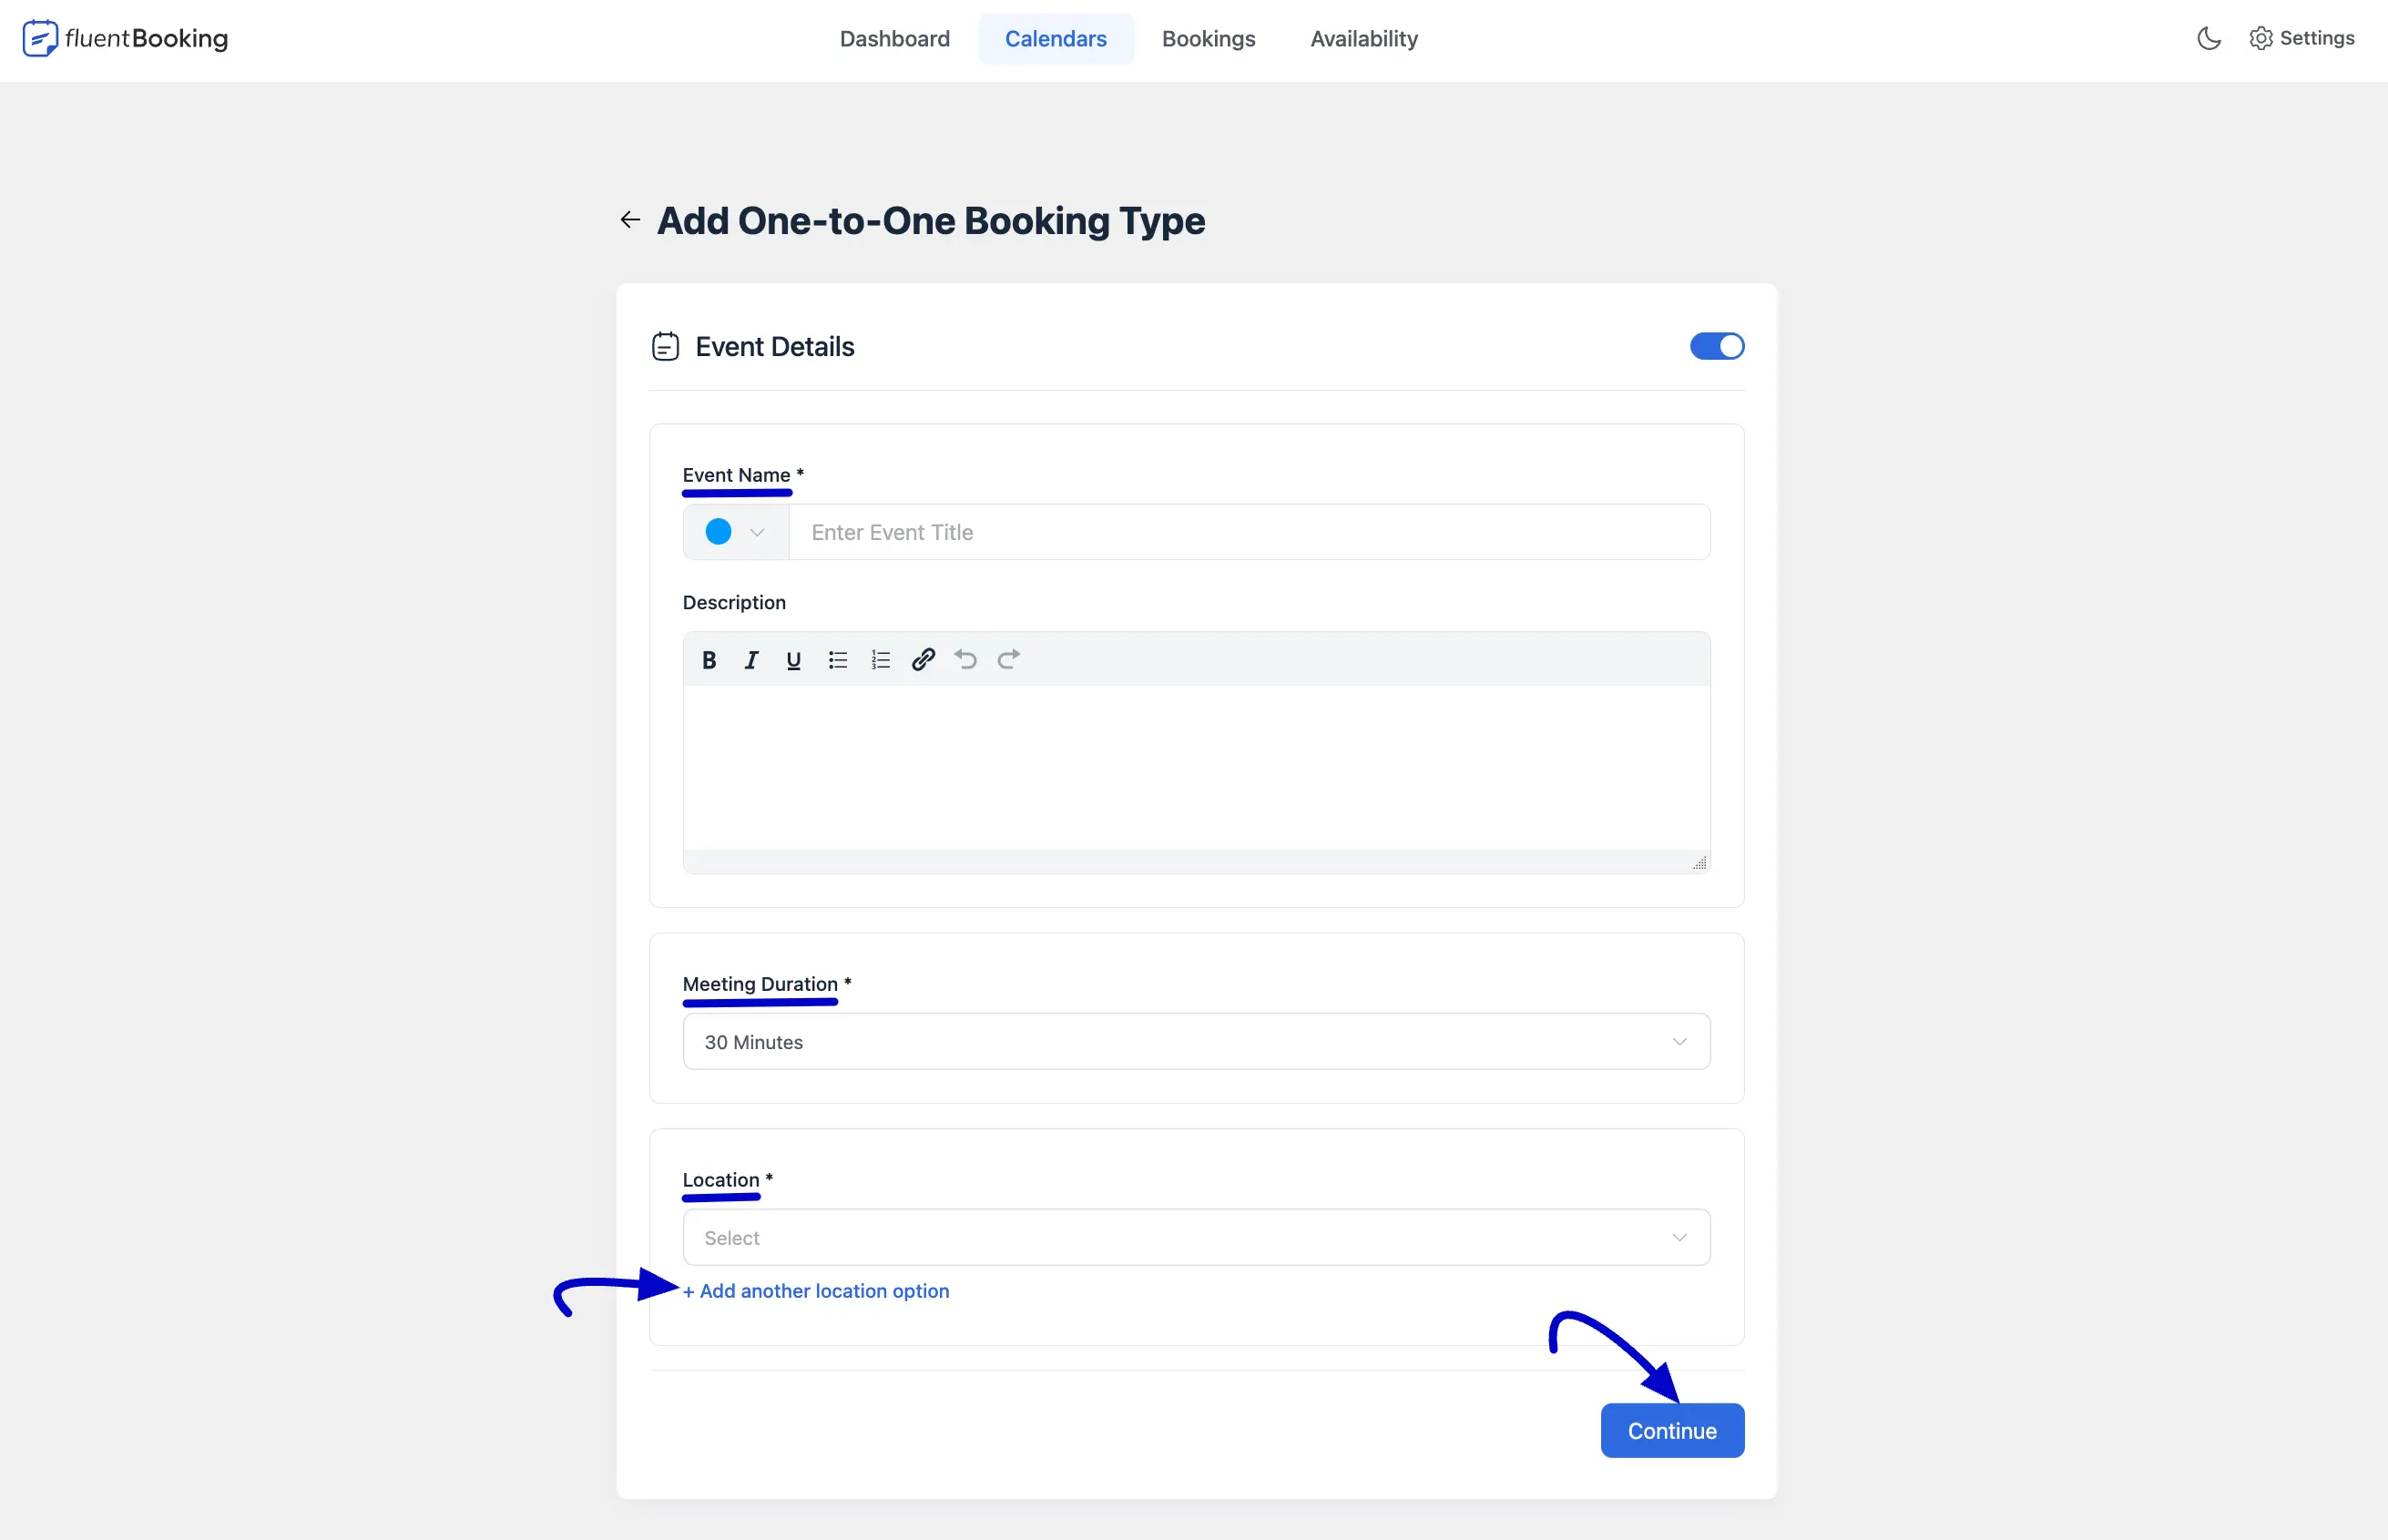
Here, you have to give the information about your booking event in the following fields
- A. Event Name: Enter a suitable title here. This will show on your booking page.
- B. Description: Add a short description of this event.
- C. Meeting Duration: Choose how long your meeting will be.
- D. Location: Choose where the meeting will take place (e.g., Zoom, Google Meet, Phone Call). You can add multiple location options by clicking on the + Add another location option button.
After that, click on the Continue button to save it.
In the next step, you’ll find settings for your booking, including:
- Event Details
- Availability
- Limits
- Questions Settings
- Email Notification
- SMS Notification
- Advanced Settings
- Payment Settings
- Webhooks Feeds
- Integrations
Once you've configured everything, click the Save Changes button to save your settings.

Search and Filter your Calendars
FluentBooking provides powerful search and filter options directly on your Calendars page, allowing you to locate specific events and streamline your workflow quickly.
Searching for a Specific Calendar
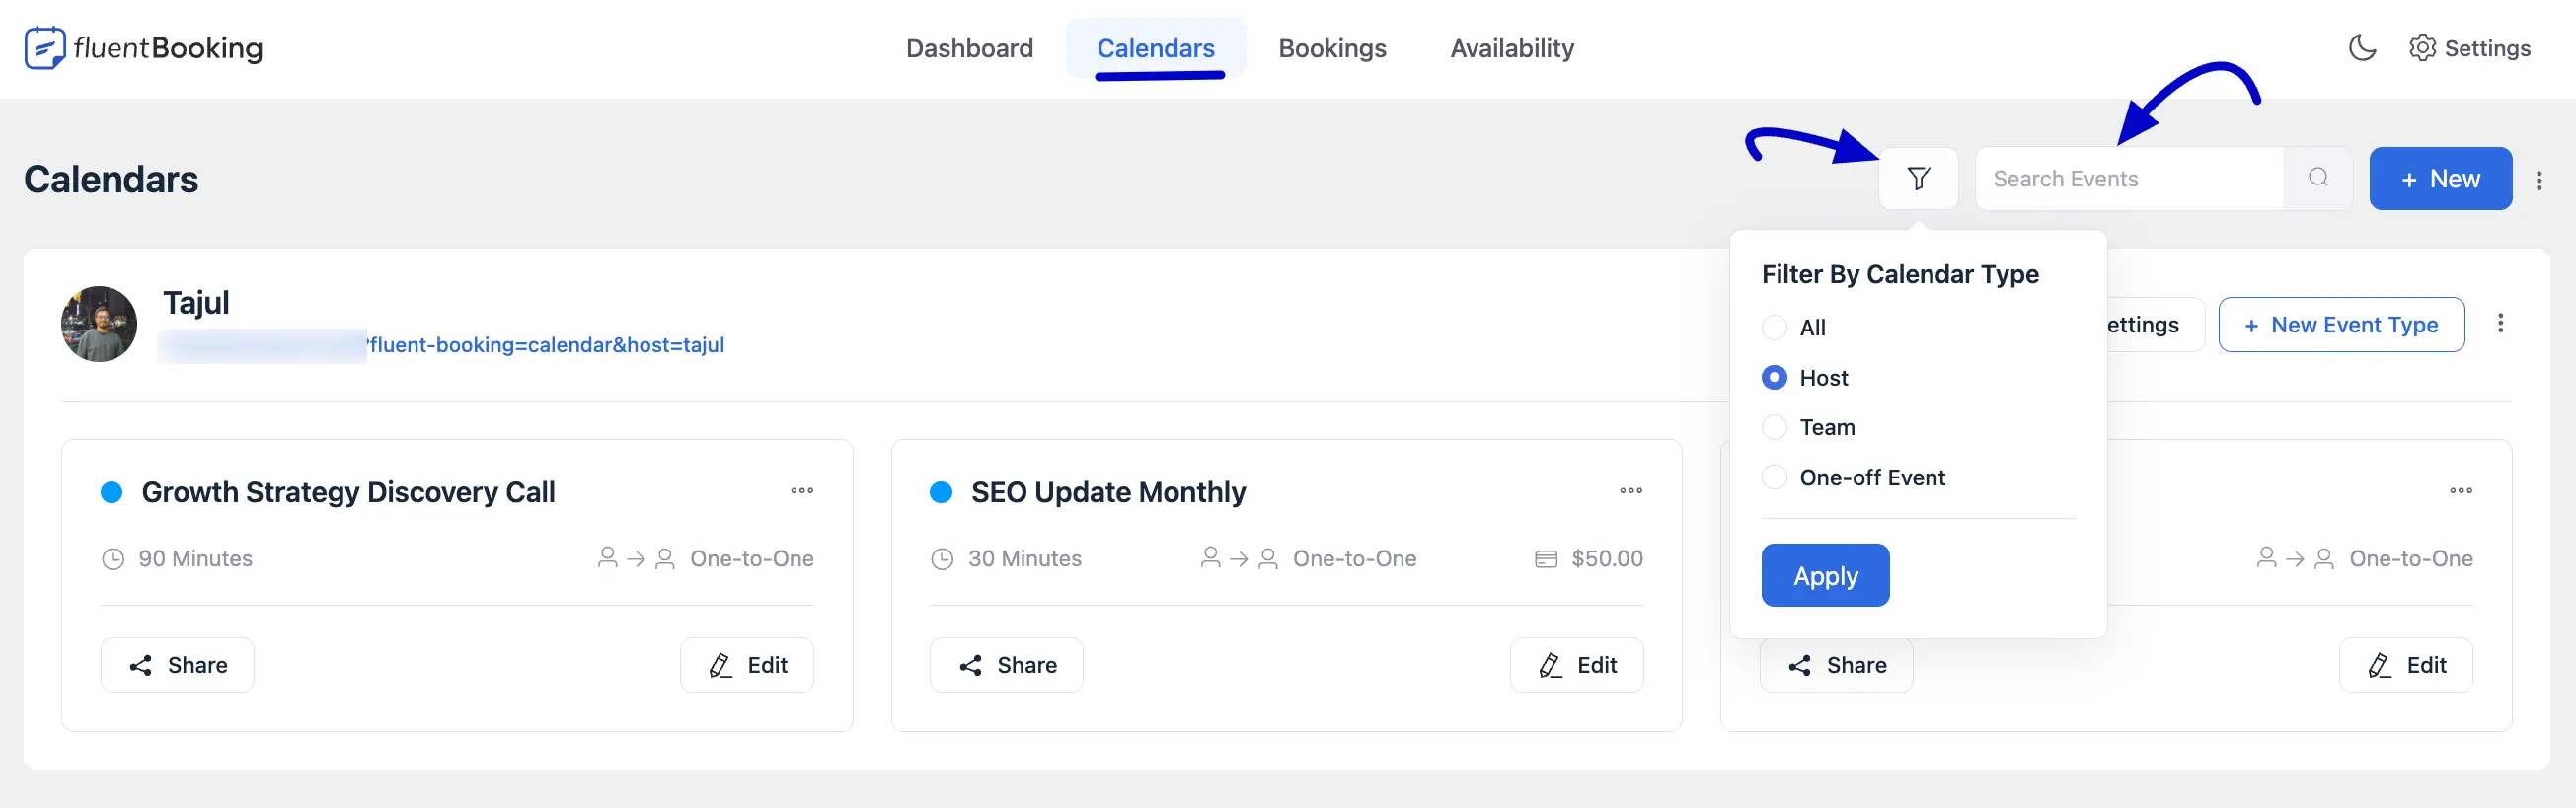
First, navigate to the Calendars section from your main FluentBooking dashboard. Locate the Search Events field at the top right corner of the page. Type the name of the event you are looking for. The list of calendars will update in real-time to display only the matching results.
Filtering Calendars by Type
From the Calendars page, click the Filter icon next to the search bar. A dropdown menu titled Filter By Calendar Type will appear.
Select the type of calendar you wish to view. Your options include:
- All: Displays every calendar and event type you have created.
- Host: Shows standard one-on-one booking calendars associated with a single host.
- Team: Filters for events that involve multiple hosts, such as round-robin or collective bookings.
- One-off Event: Displays single, non-recurring events.
Click the Apply button to update your view. The page will now only show calendars of the selected type.
You can now efficiently find and manage your booking calendars using search and filter.