Appearance
Install & Activate FluentBooking Pro
This guide walks through installing FluentBooking Pro on your WordPress site—download the plugin, upload it from the WordPress admin, and activate your license key.
Looking for the free version? See Install & Activate FluentBooking instead. You can install Pro on top of an existing free install without losing any data.
Important
You need an active FluentBooking Pro license. Purchase one from fluentbooking.com and have your WP Manage Ninja account credentials ready.
Download the Zip File
Log in to your WP Manage Ninja Dashboard with the credentials you used at purchase.
Open the Downloads section from the left sidebar. Find FluentBooking Pro in the list and click the Download button. A fluent-booking-pro.zip file will save to your device.
Next, open the Licenses section and copy your License Key. You will need it in the final step.

Install the Plugin
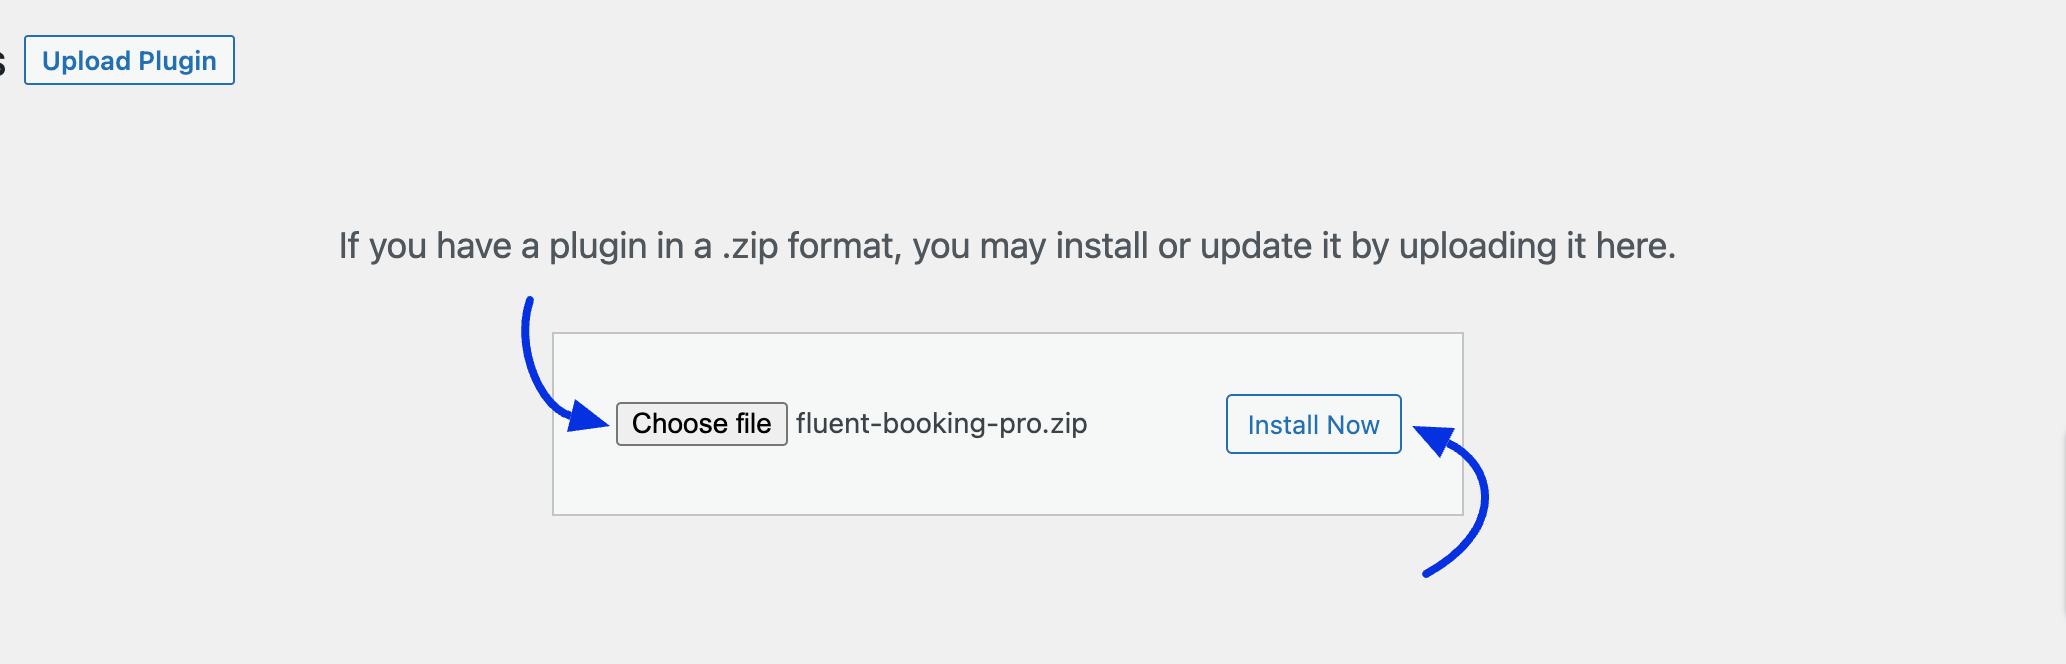
In your WordPress admin, go to Plugins → Add New Plugin and click Upload Plugin at the top of the page.
Click Choose File, select the fluent-booking-pro.zip you just downloaded, and click Install Now. When the upload finishes, click Activate Plugin.
Activate the License Key
From the FluentBooking admin, go to Settings and open the License section in the left sidebar. Paste the license key you copied from your WP Manage Ninja account.
Click Verify License. FluentBooking Pro is now activated and all Pro features are unlocked.
