Appearance
Zoom Integration with FluentBooking
Zoom integration simplifies the process of scheduling and handling online meetings, offering audio, chat, and video call options.
To integrate Zoom with FluentBoooking you need to follow some straightforward steps described in this guideline.
The Zoom integration is only available in FluentBooking Pro. You will need the FluentBooking Pro plugin to access this feature.
Important
Before connecting Zoom, make sure you have created at least one host in FluentBooking.
Setting Up Zoom Integration
To connect your FluentBooking with Zoom you need some credentials. First, go to your Zoom Marketplace and log in or create a new account.
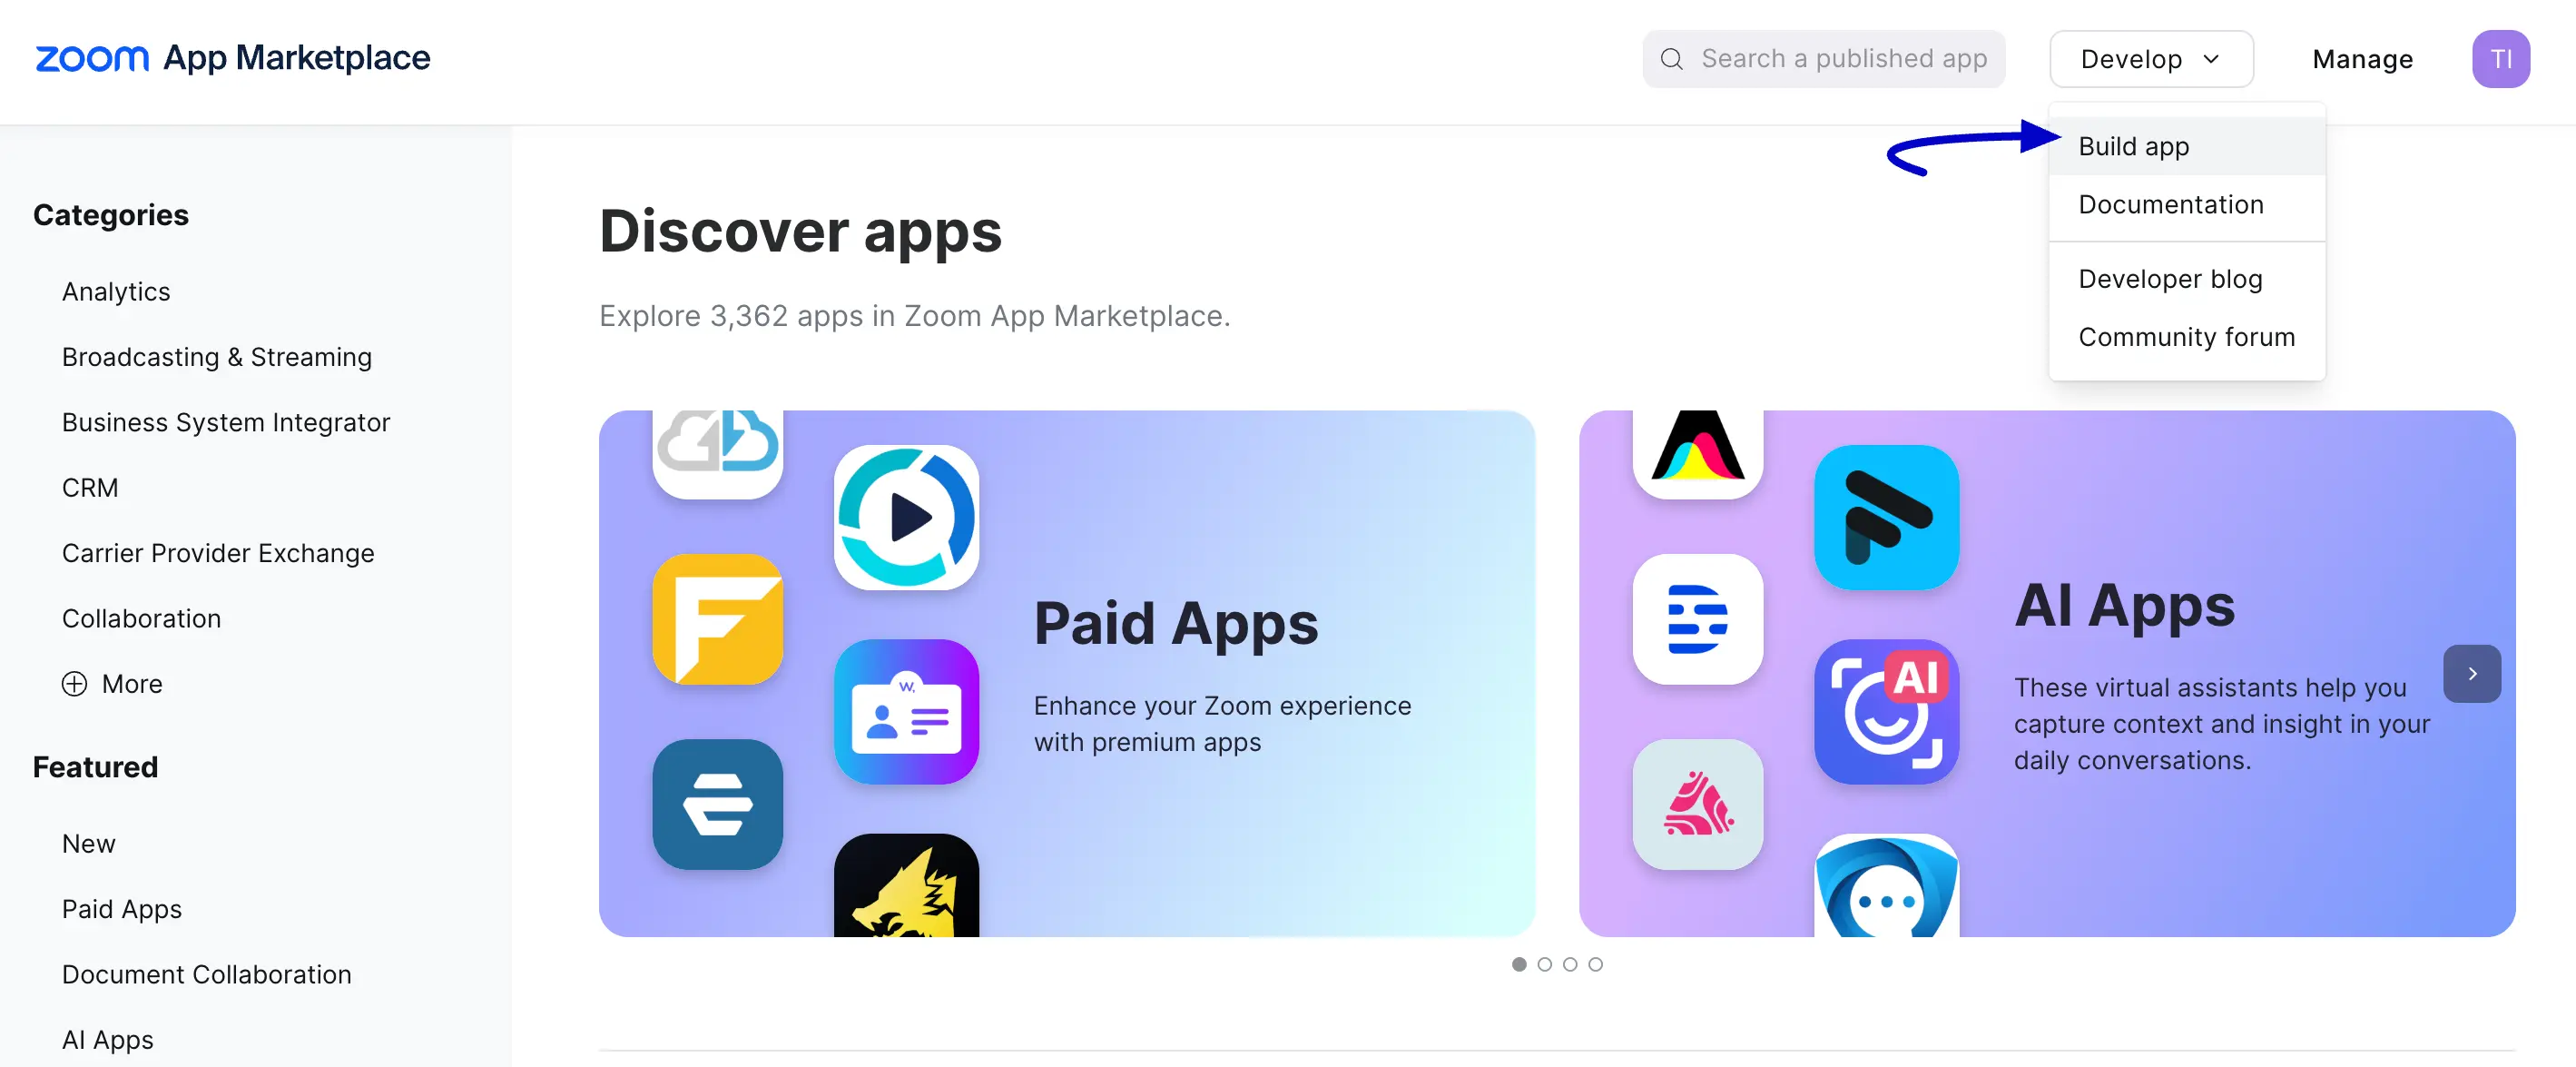
Create Zoom App
You have to create a Zoom App in order to get the credentials for the integration. On the top right side, you will find the Develop button hover over the button and you will find the Build App option click on it.
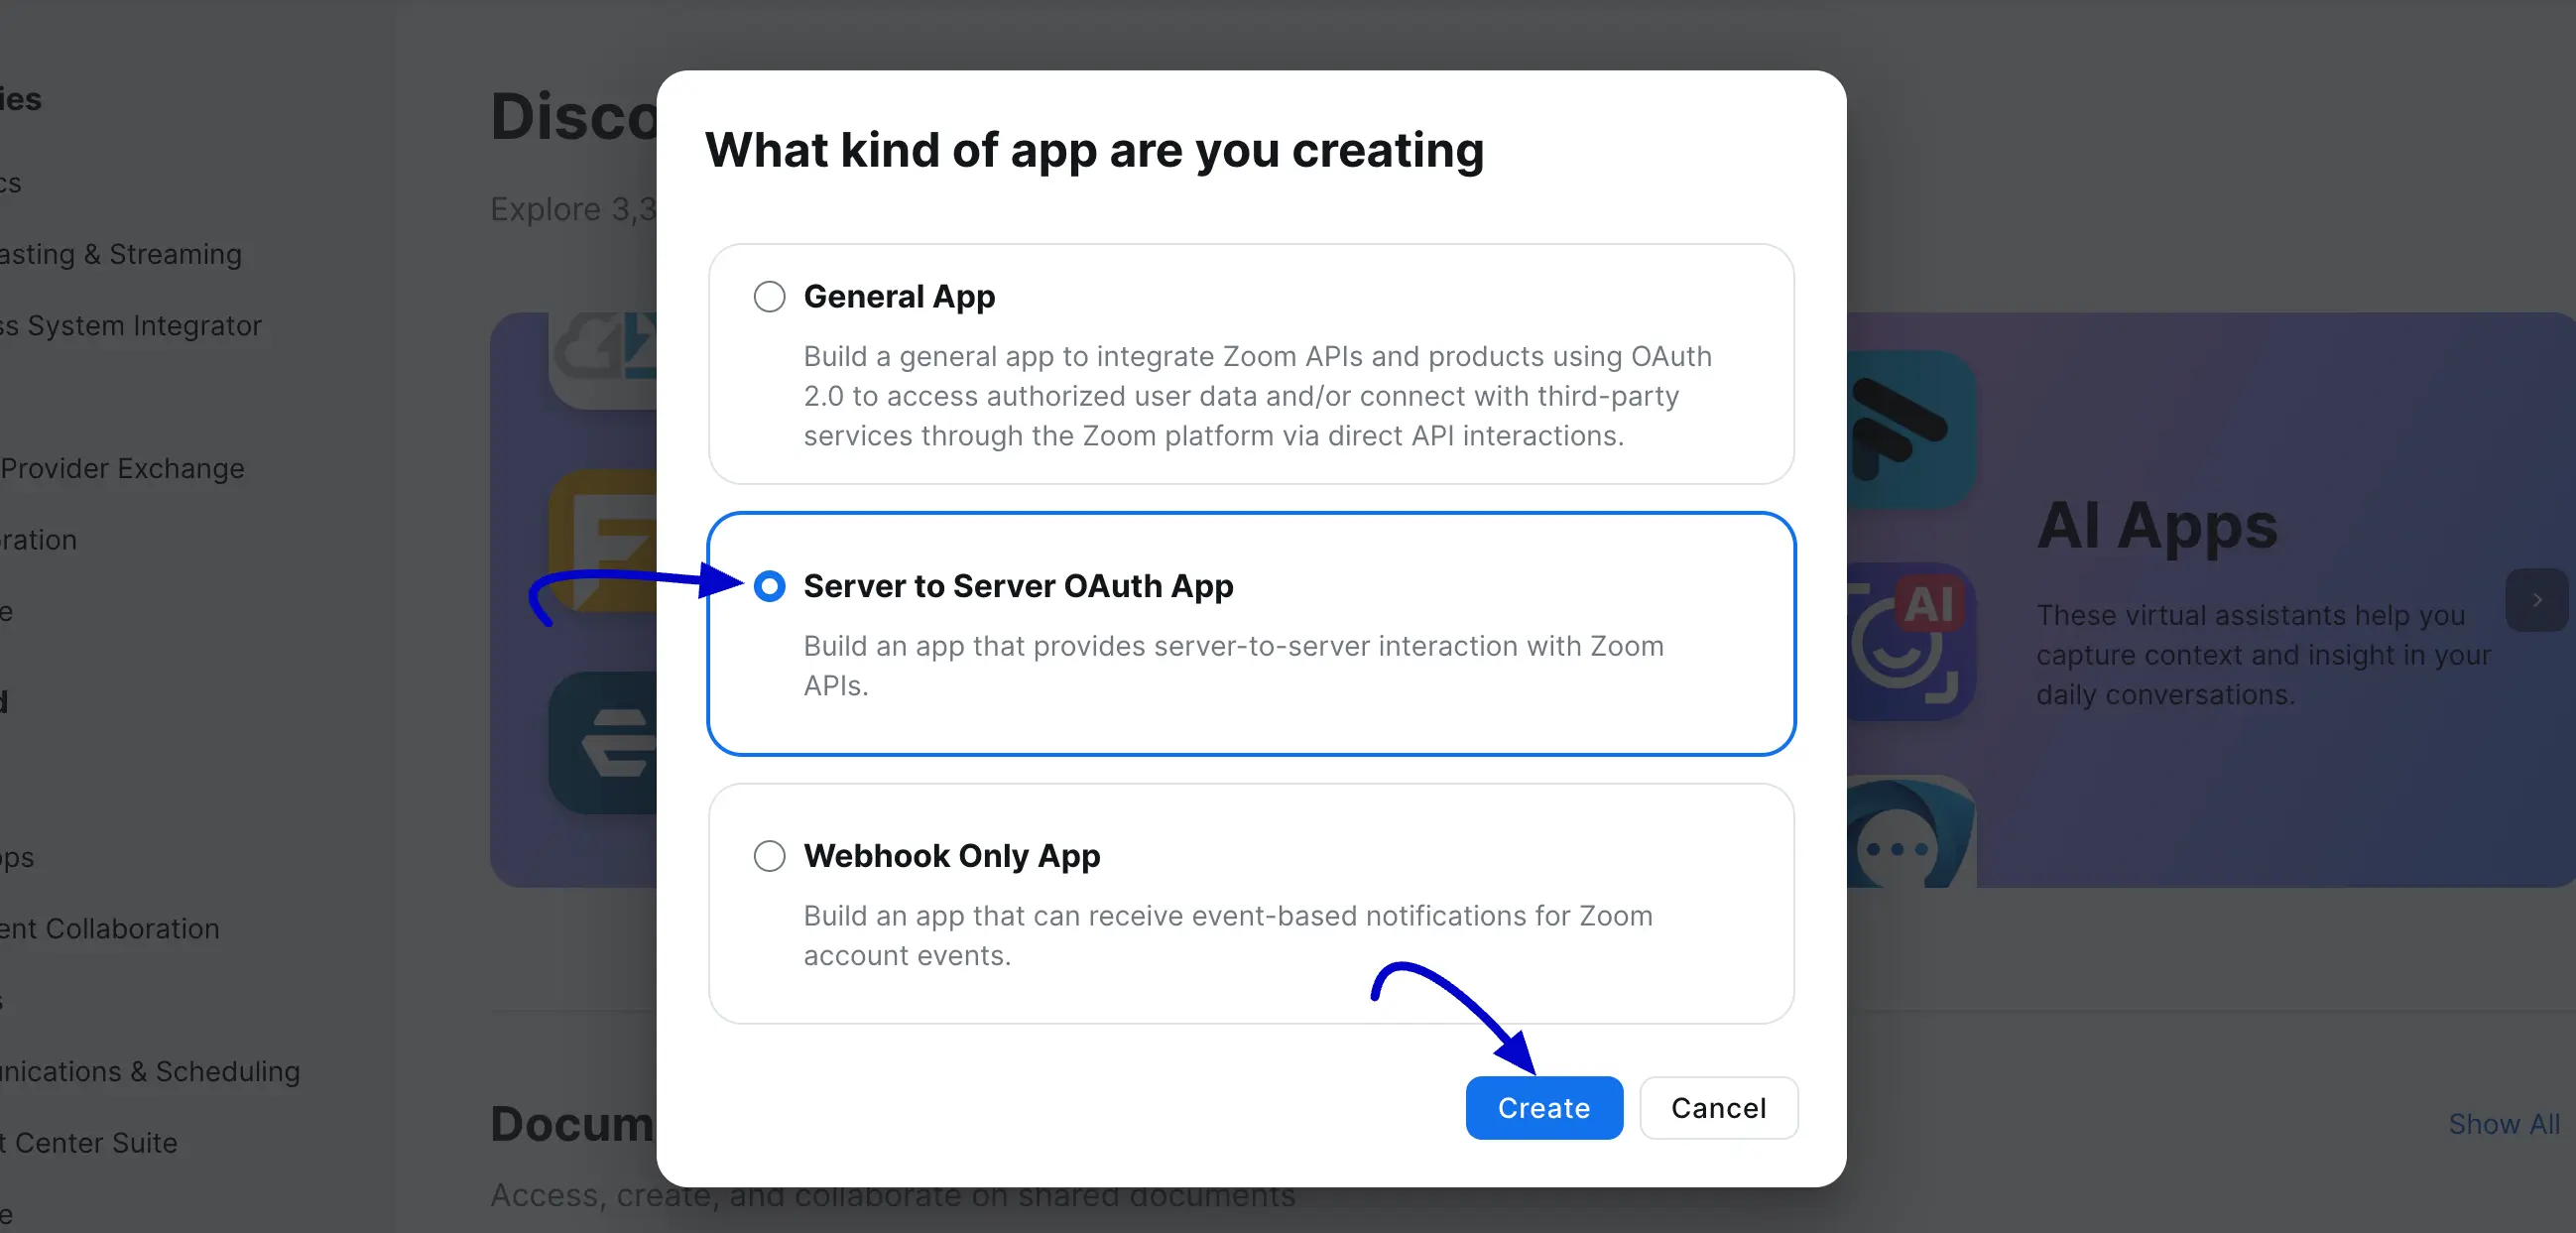
Here you need to select the app type Server-to-Sever OAuth App then click on the Create button.
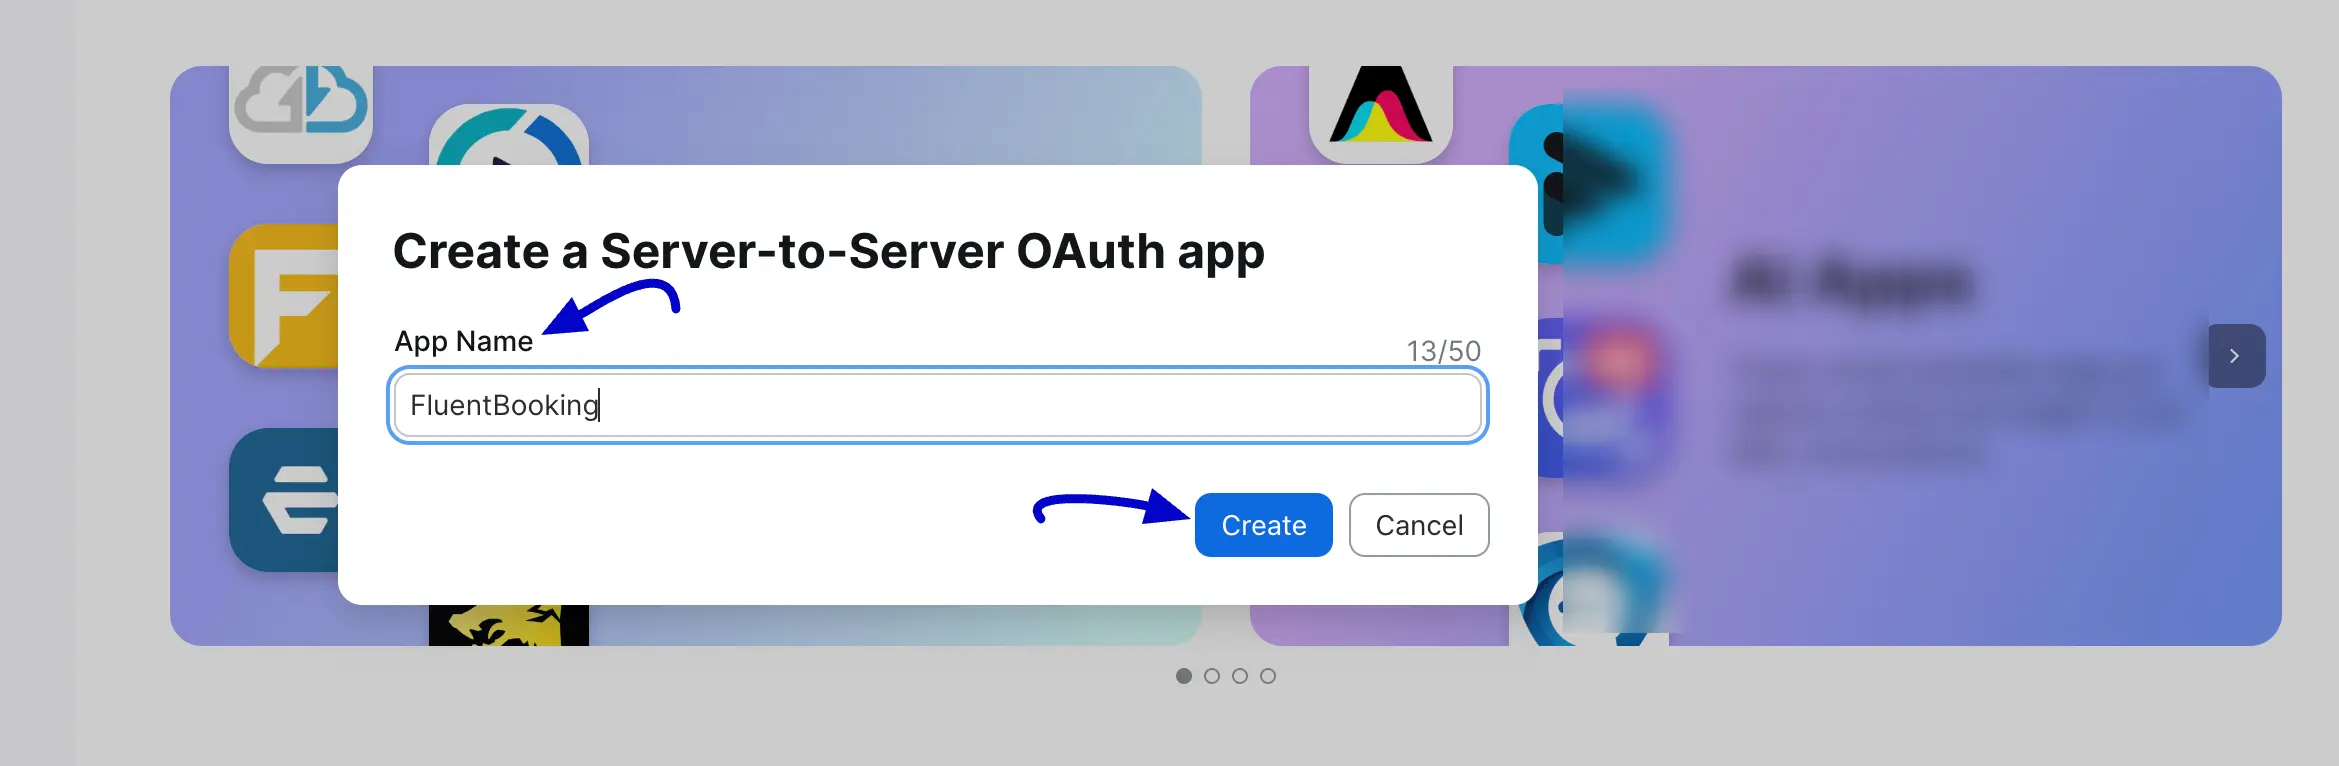
Now give a name to your App then click on the Create button.
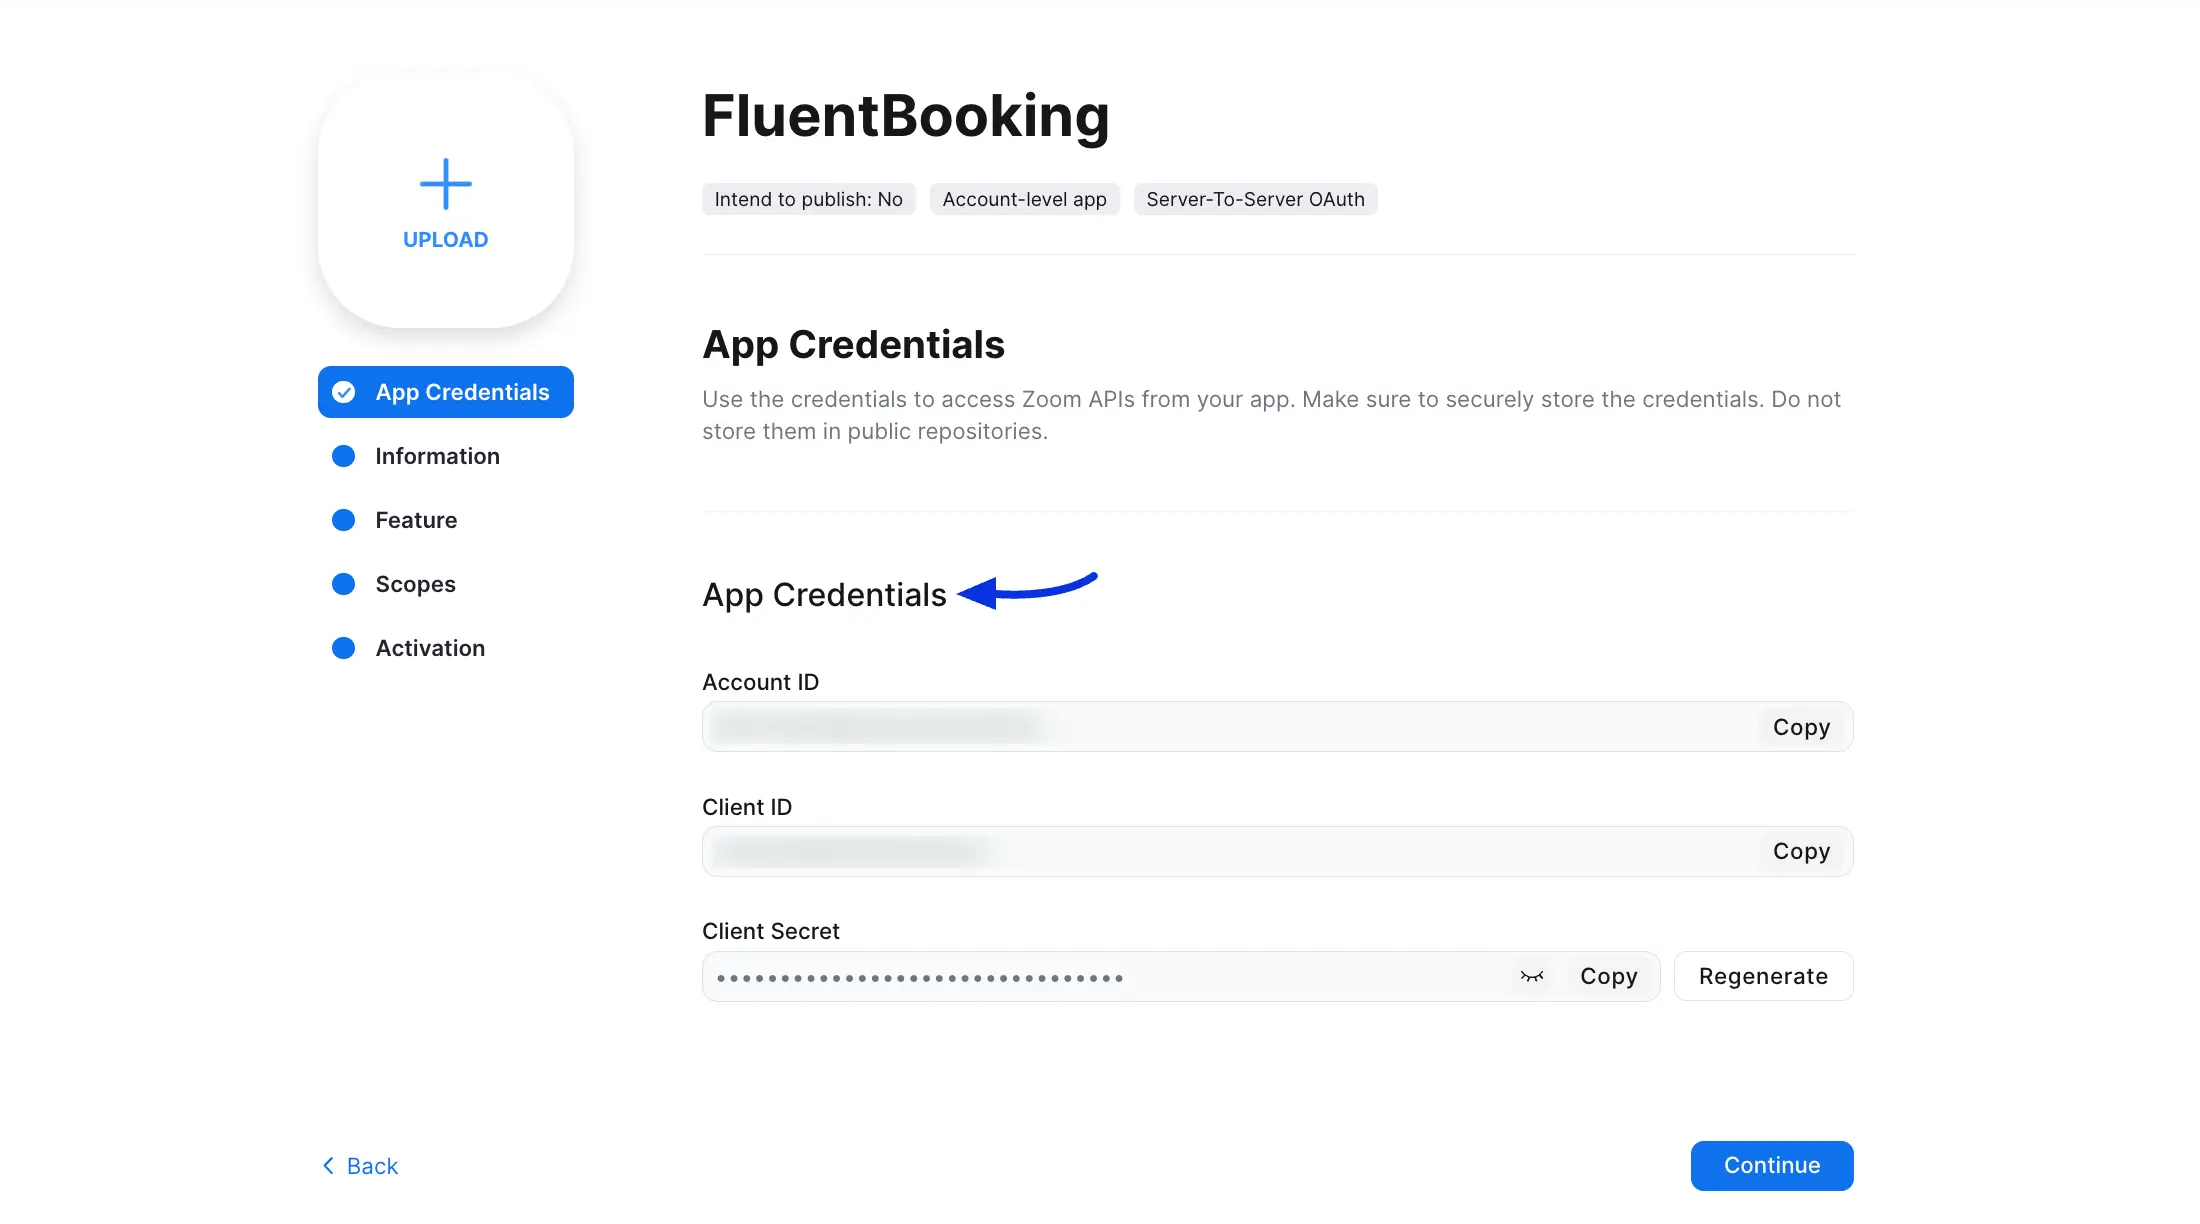
App Credentials
Now you will be taken to the App Credential page where you will get the App credentials. At this time you can copy the credentials to FluentBooking but that doesn’t complete the process, so keep the copied credential in the clipboard for later use.
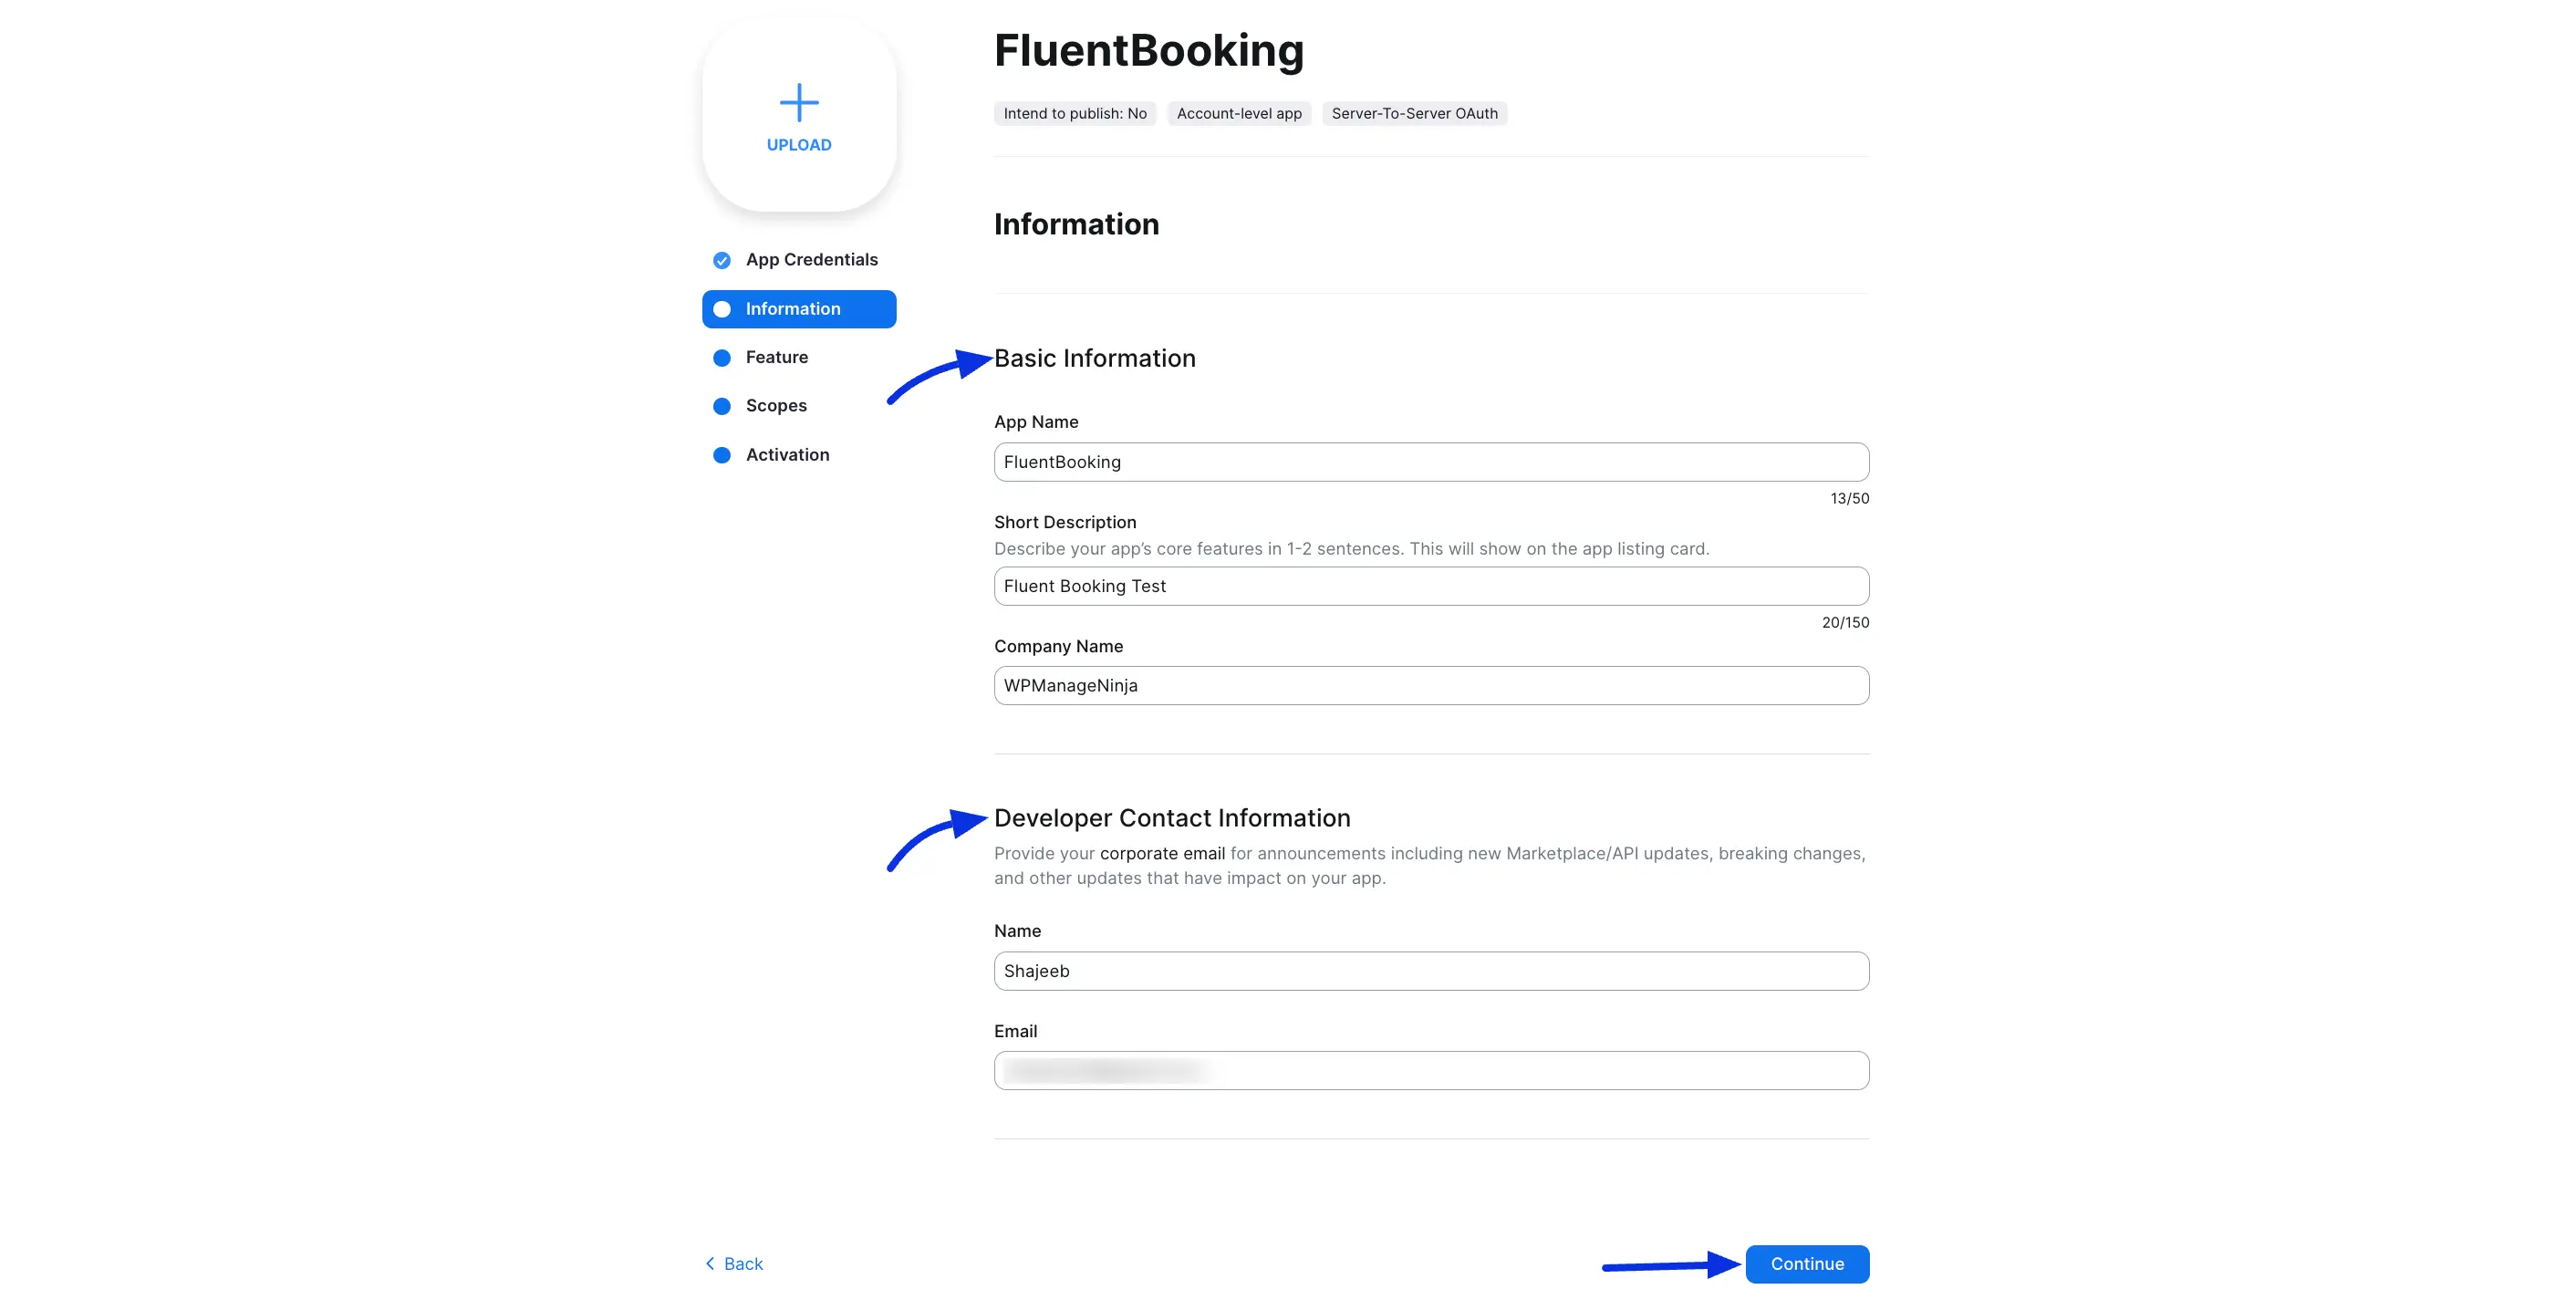
Information
On the Information page, there are some mandatory fields those are Basic Information Fields App Name, Short Description, Company Name, and Developer Contact Information (Name, Email). You have to give this information and then click on the continue button.
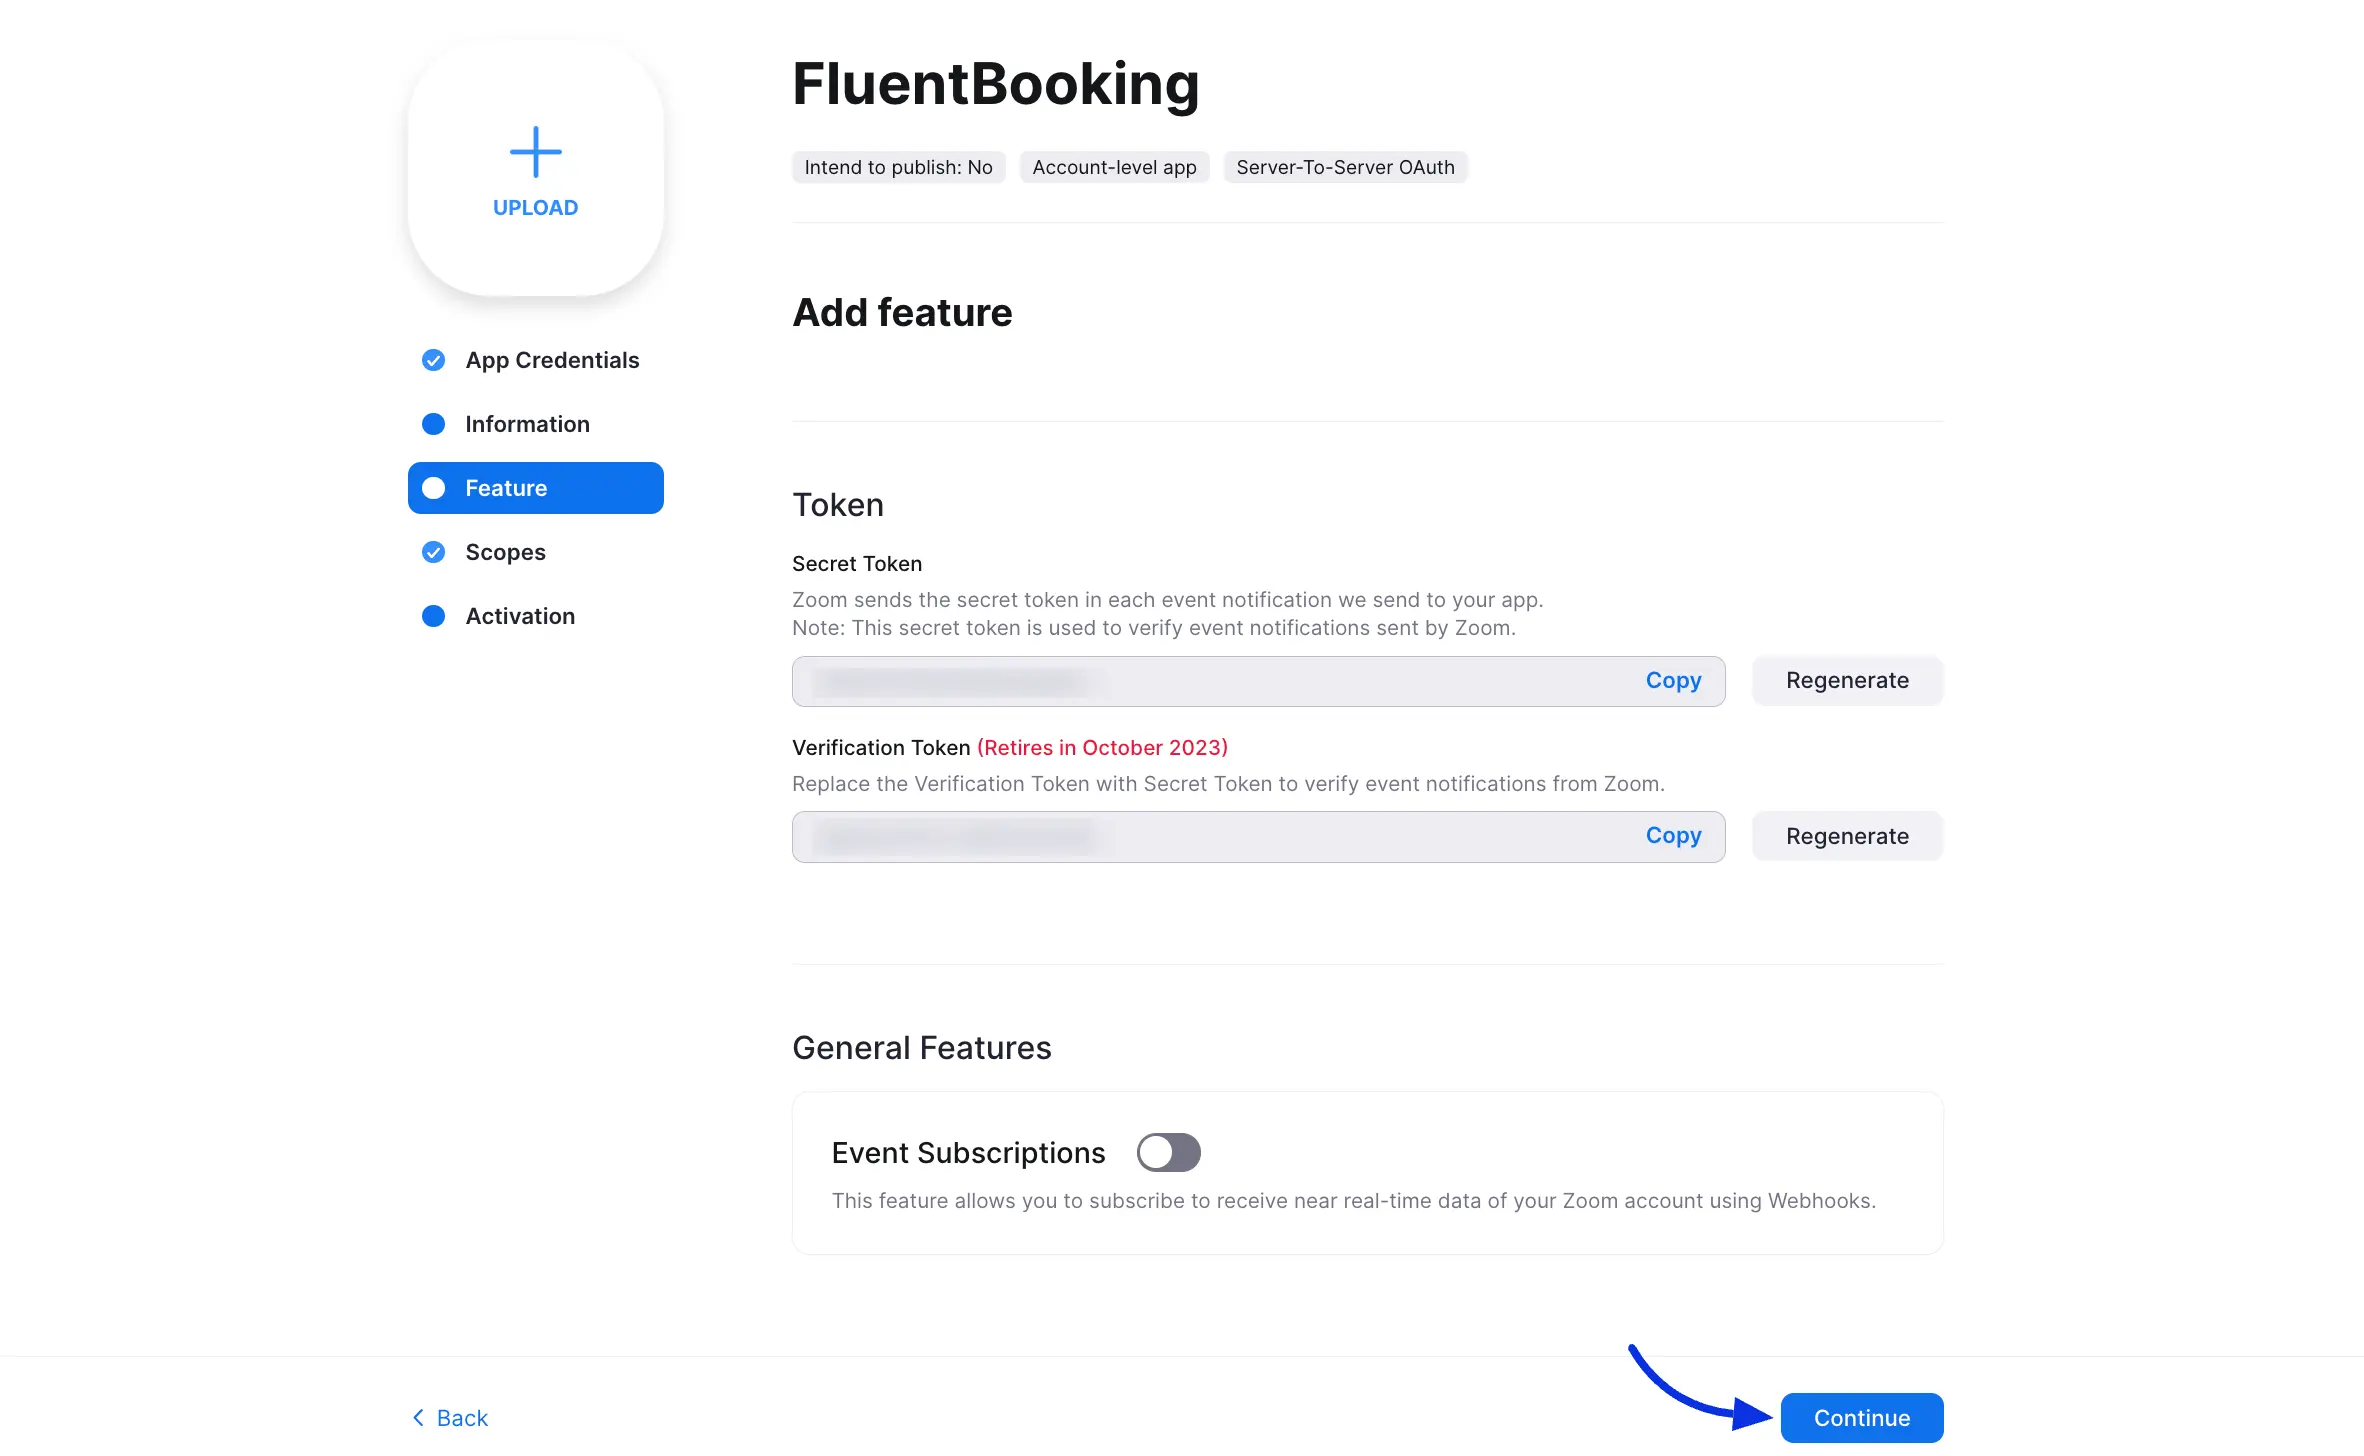
Feature
In the feature section, you don’t need to change anything so you can simply skip the feature section.
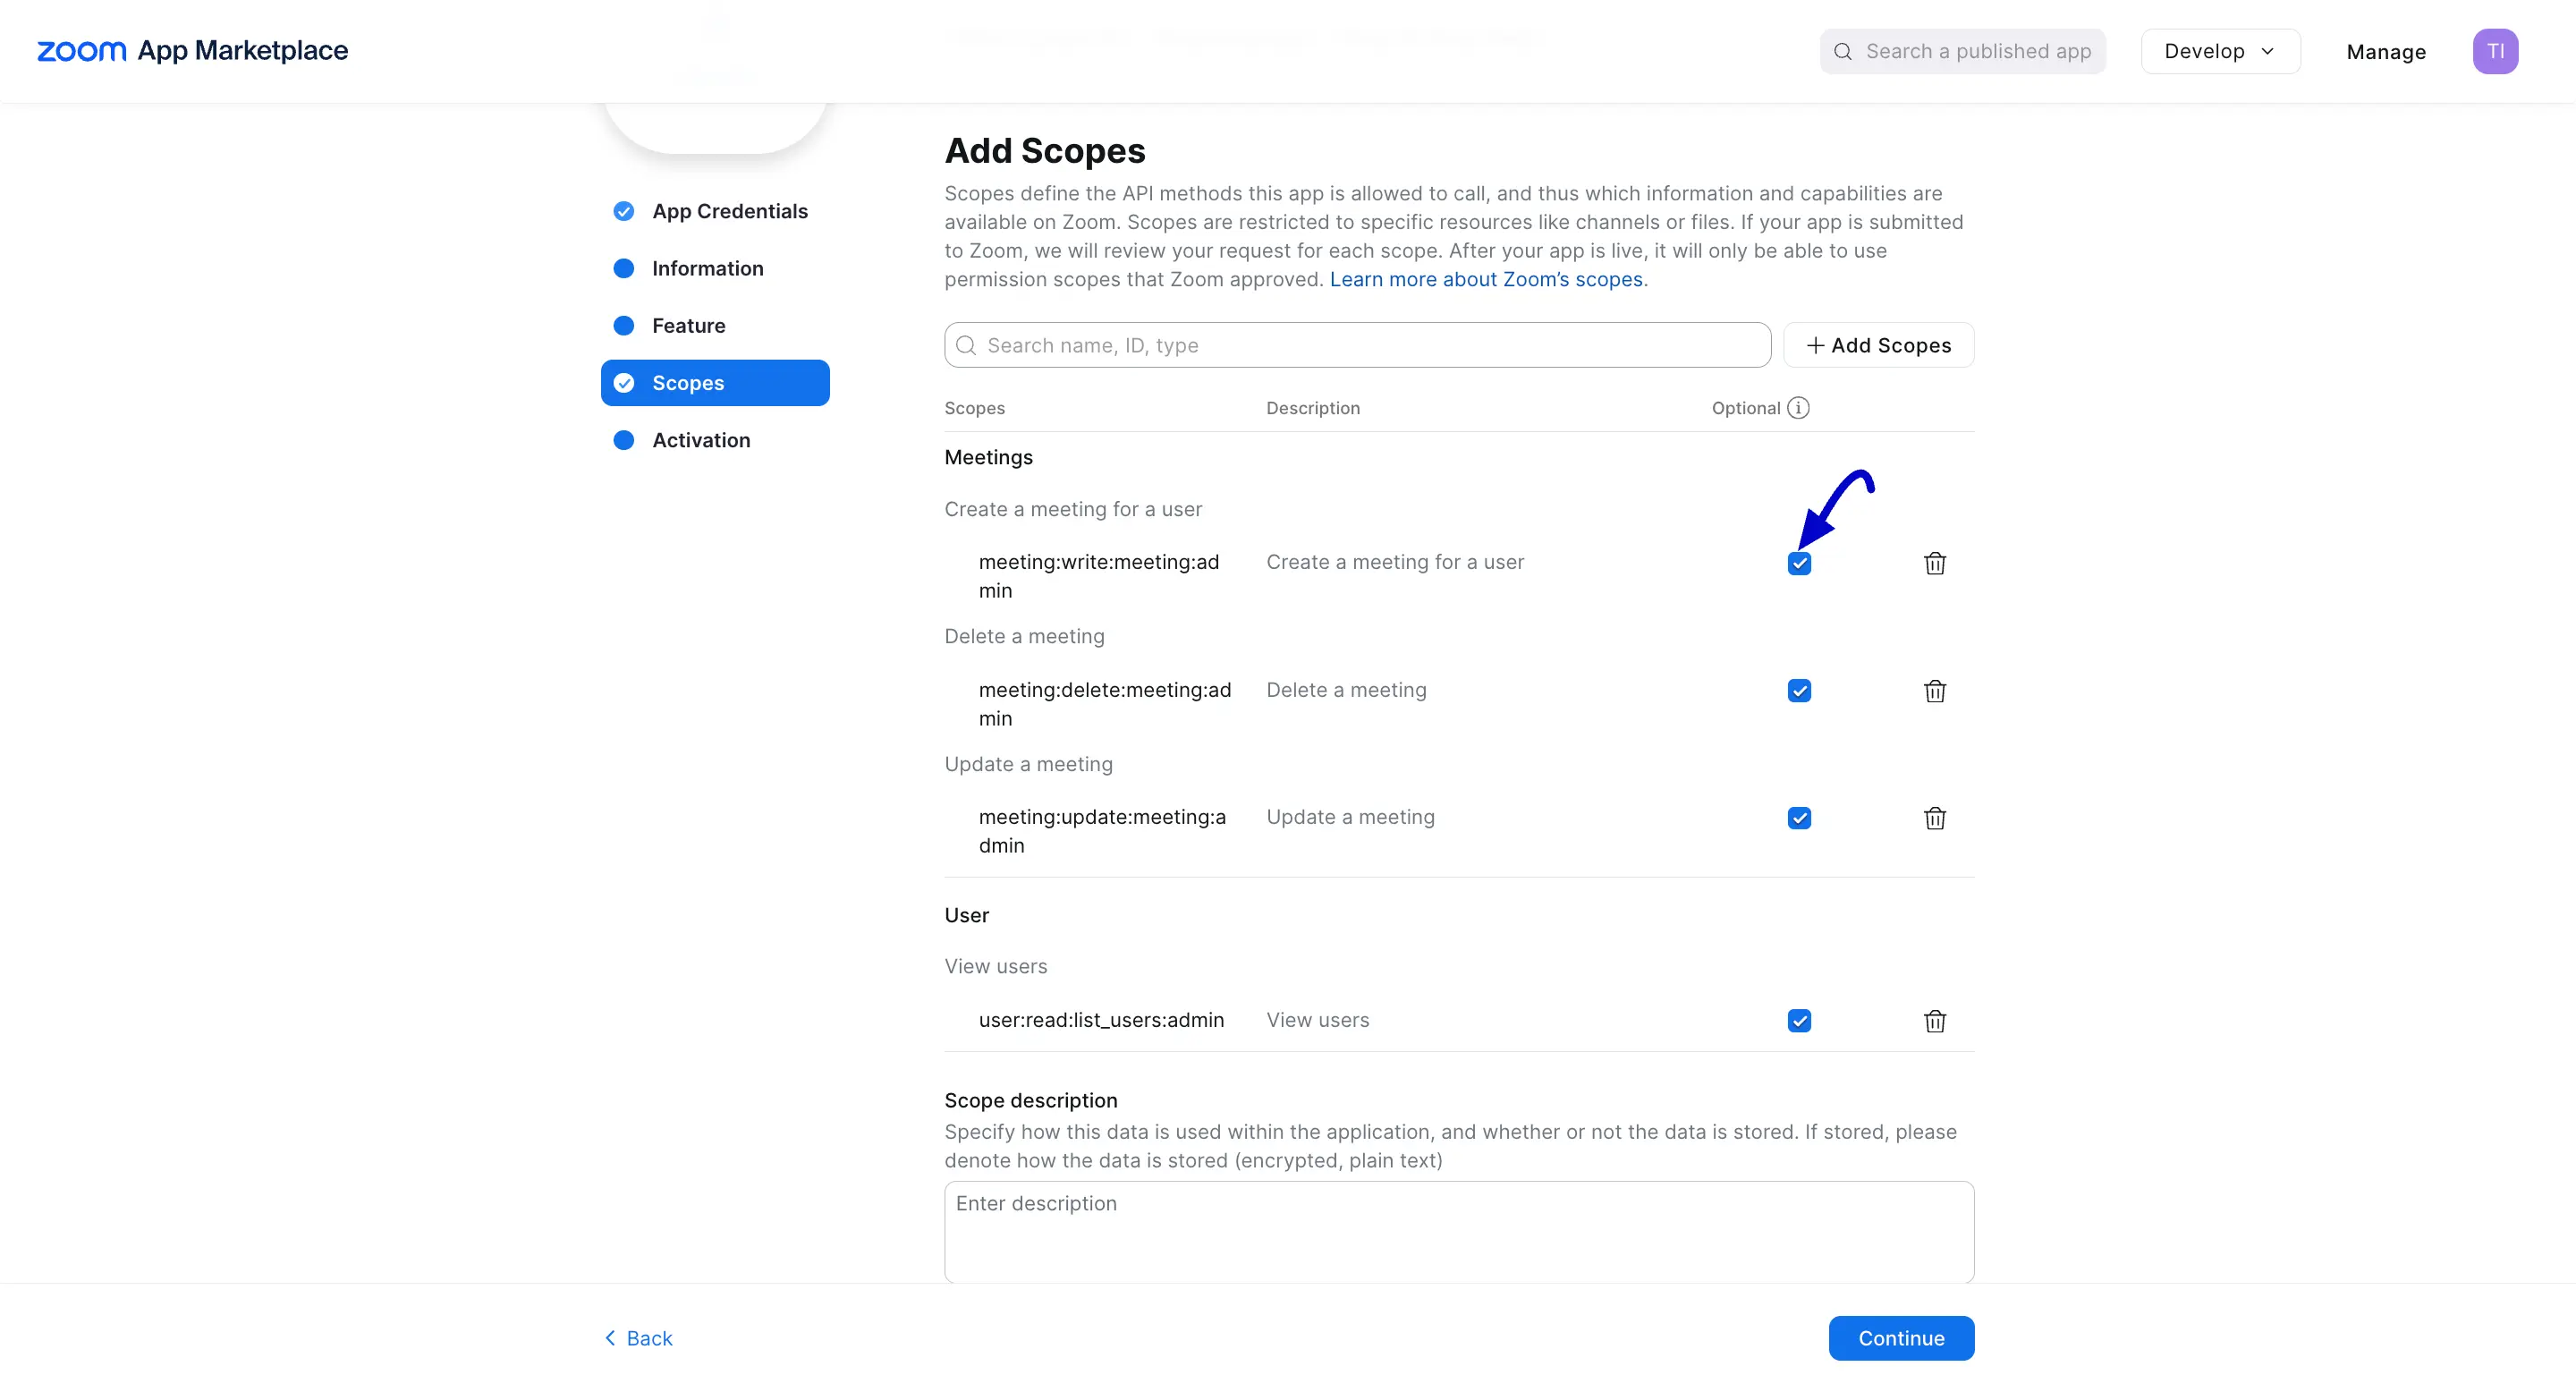
Scopes
Here you have to add four scopes. Click on the Add Scopes button and a pop-up will come up.

Select the following scopes from the Meeting and User Scopes then click on the Done button and continue:
From Meeting go to View and manage all user meetings and select these three scopes:
- Delete a Meeting (meeting:delete:meeting:admin)
- Update a Meeting (meeting:update:meeting:admin)
- Create a meeting for a user (meeting:write:meeting:admin)
From User go to View all User information then select-
- View a user (user:read:user:admin).
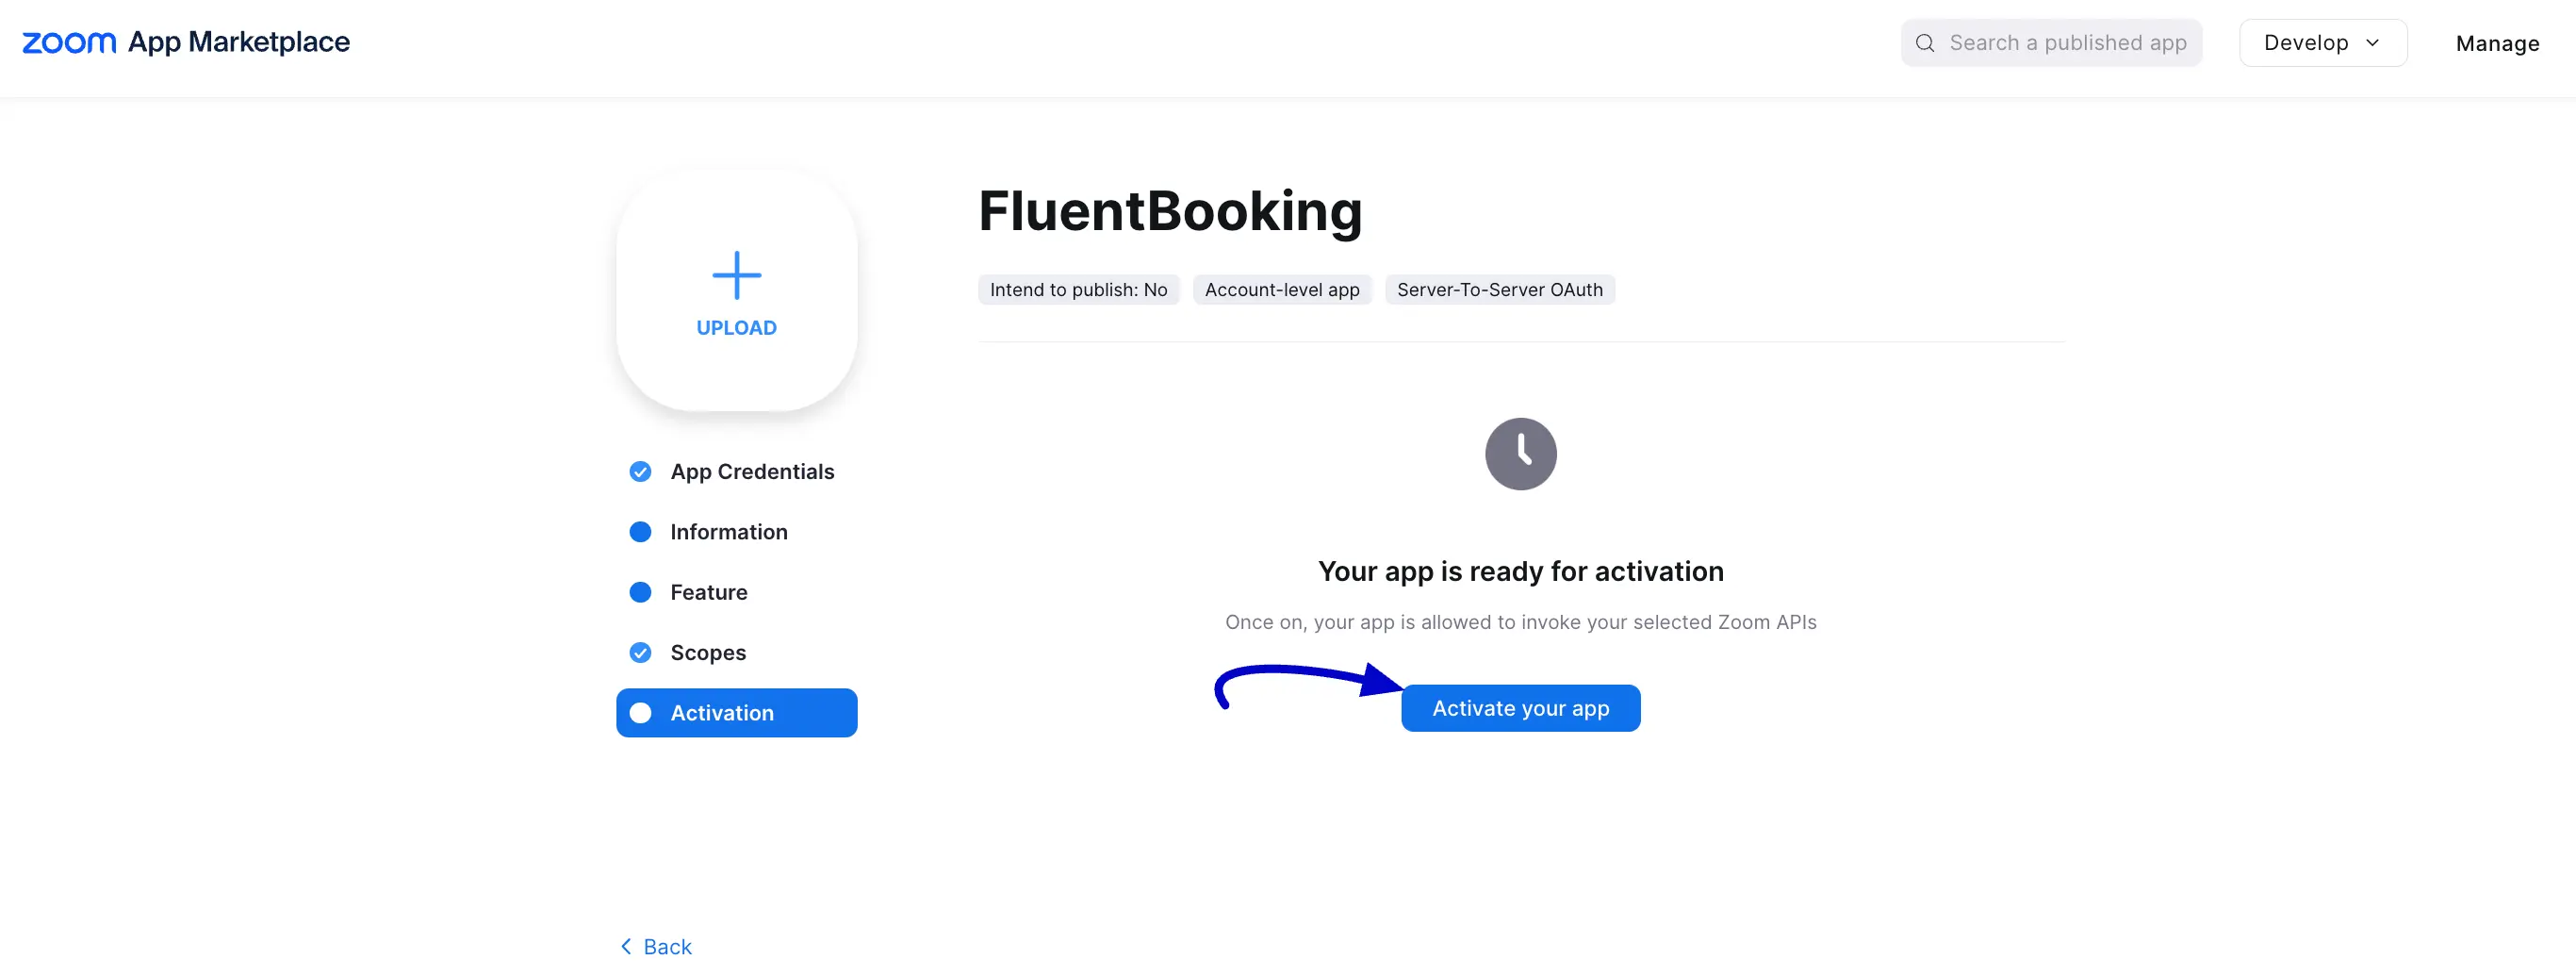
Activation
Once you have completed the above steps the Activation step will come. Simply click on the Activate your app button. This completes the process of creating a Zoom app.
Configuring Zoom With FluentBooking
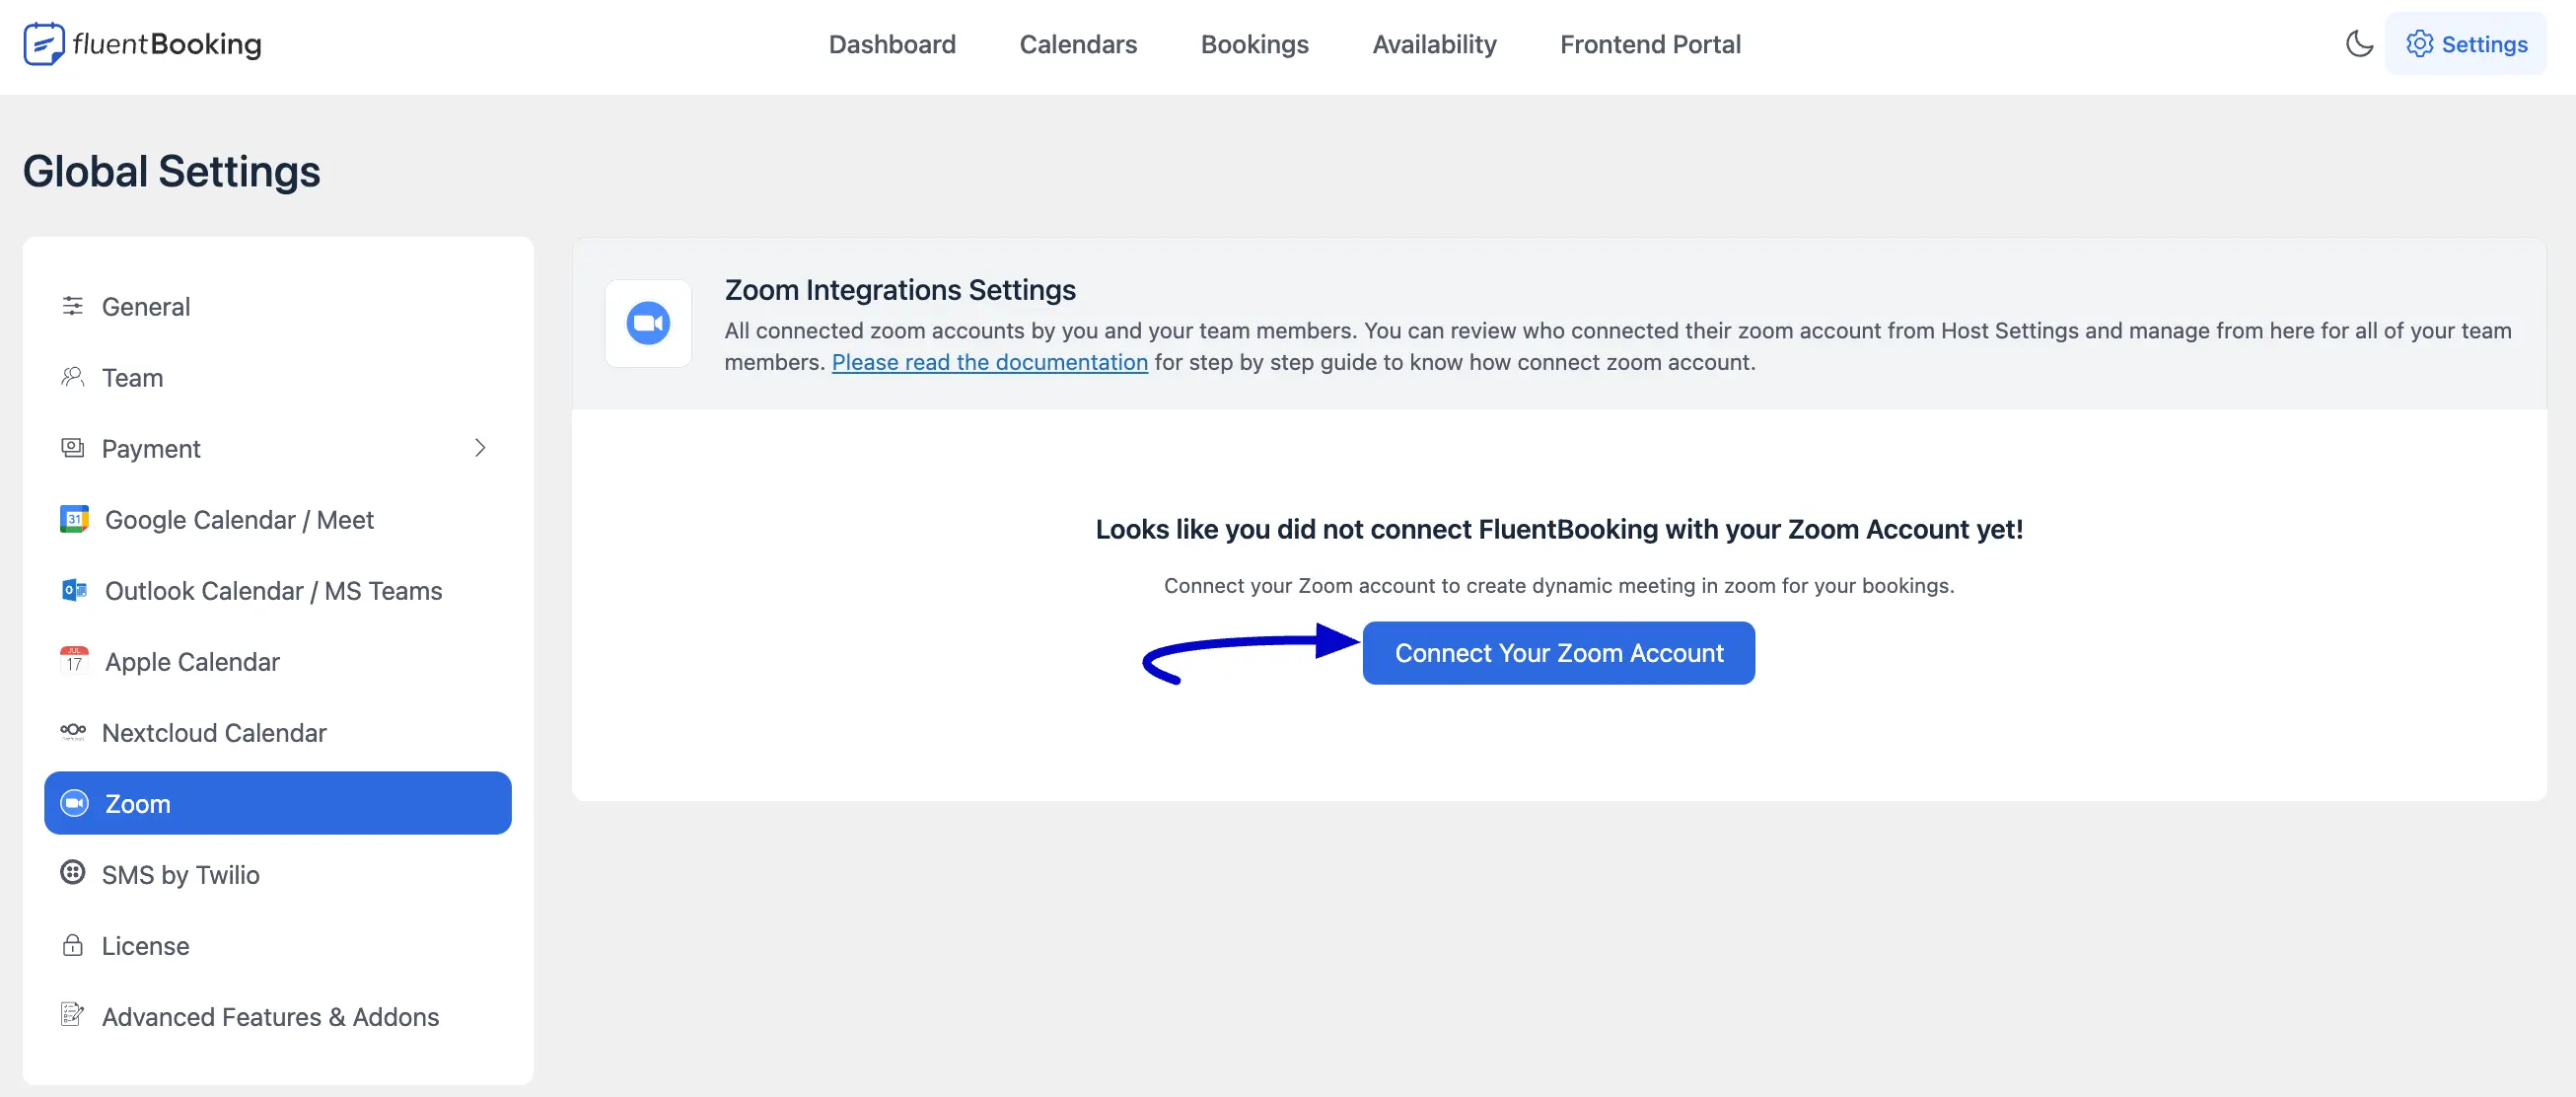
After creating the Zoom app properly now you can connect your Zoom with FluentBooking. Go to FluentBooking Dashboard and navigate to Settings > Zoom and you will see the button Connect Your Zoom Account click on the button.
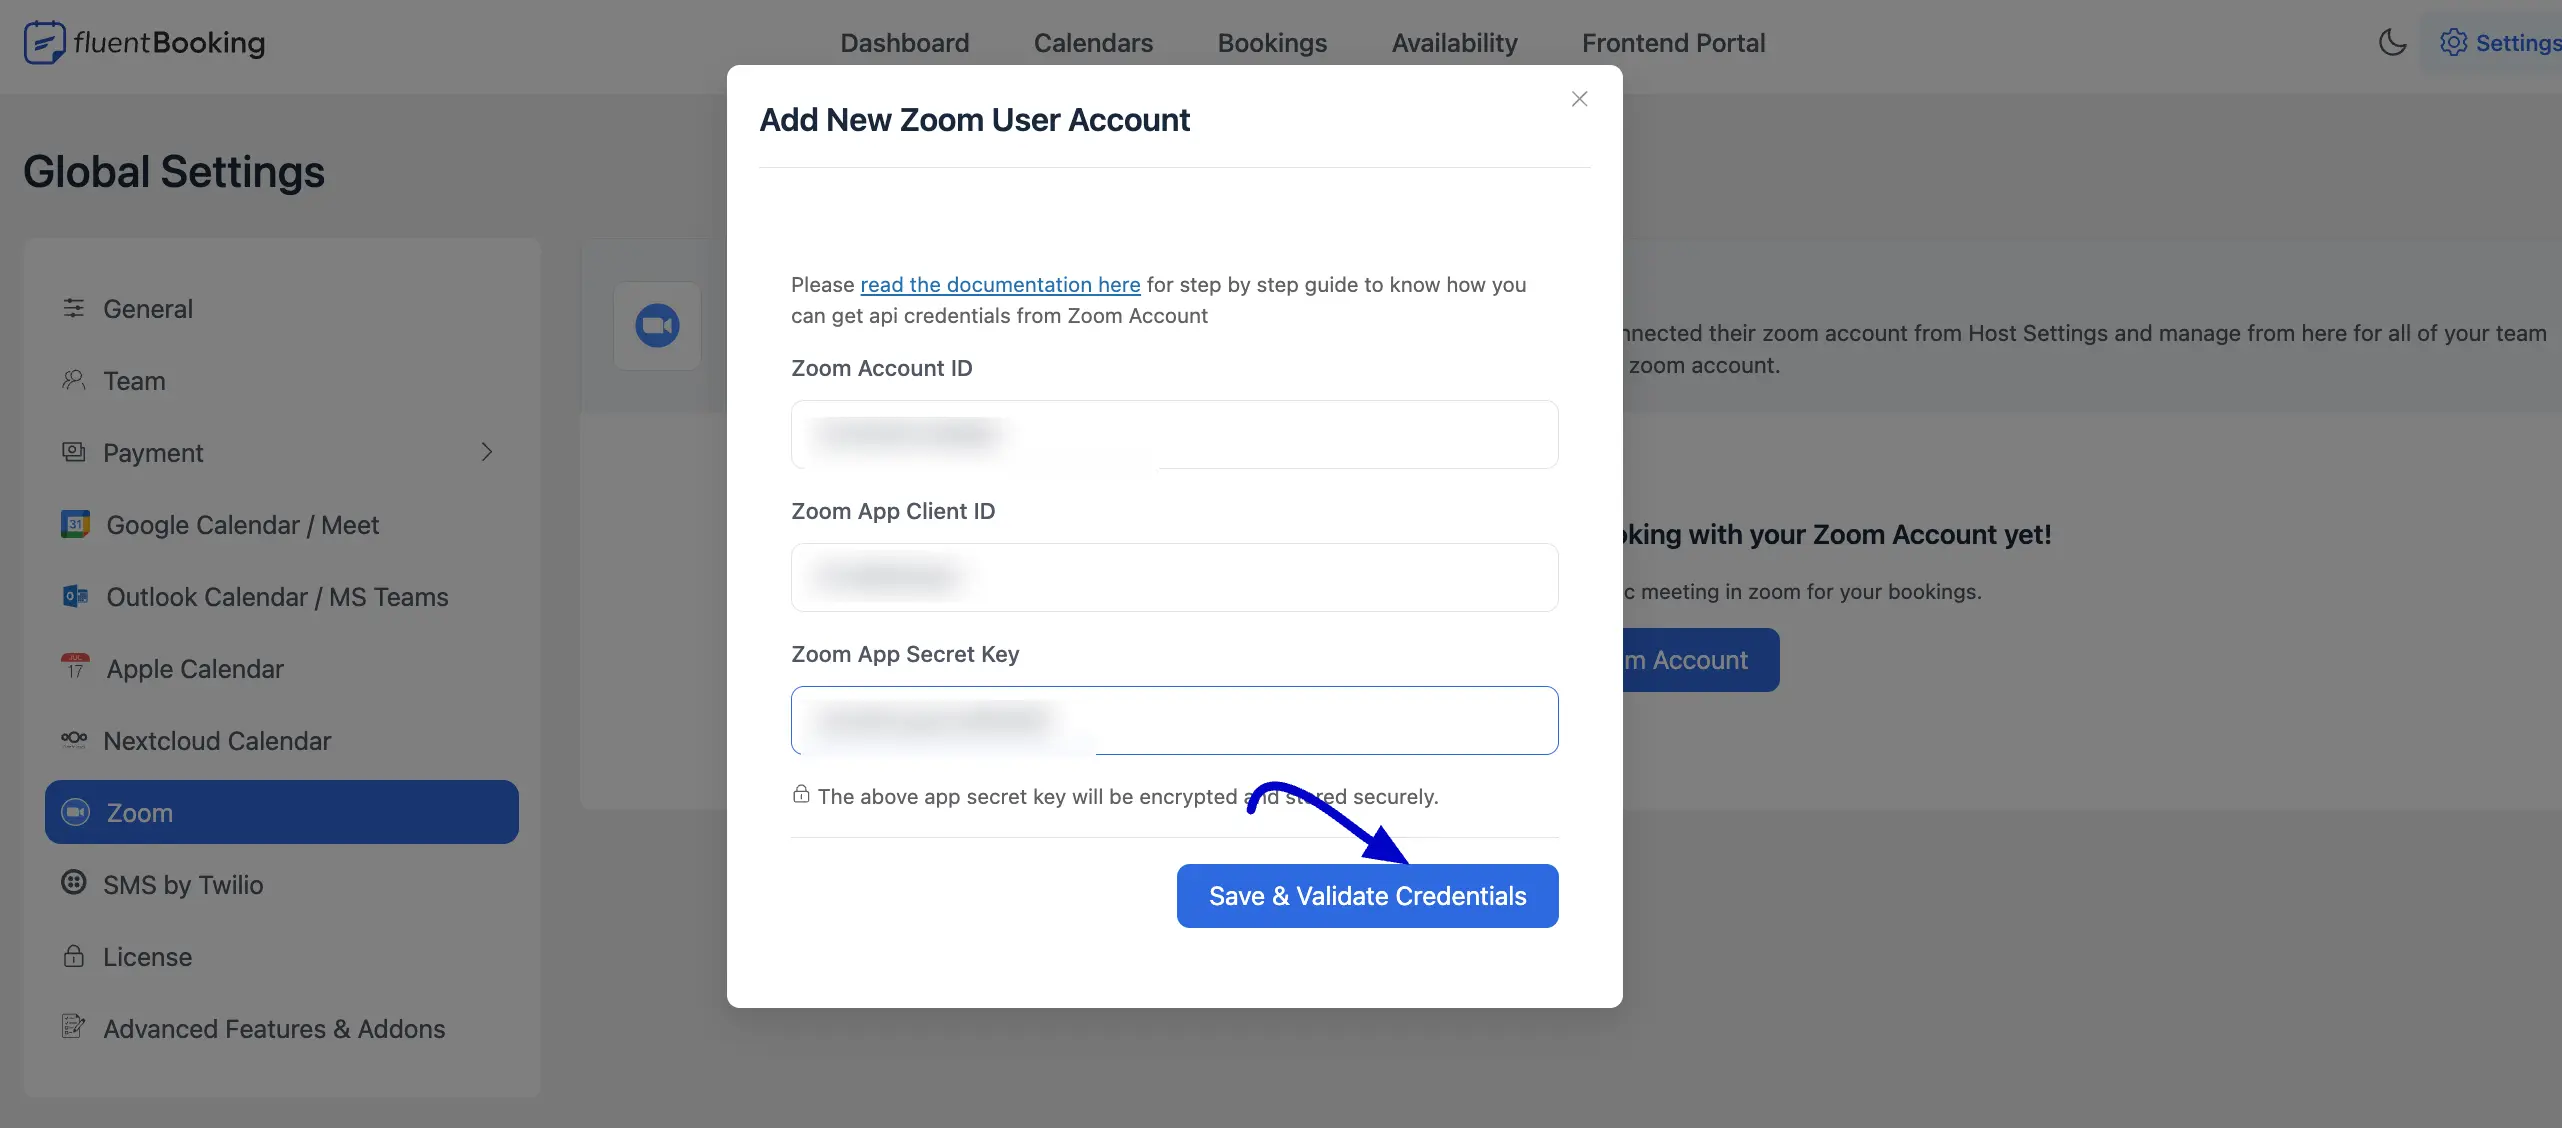
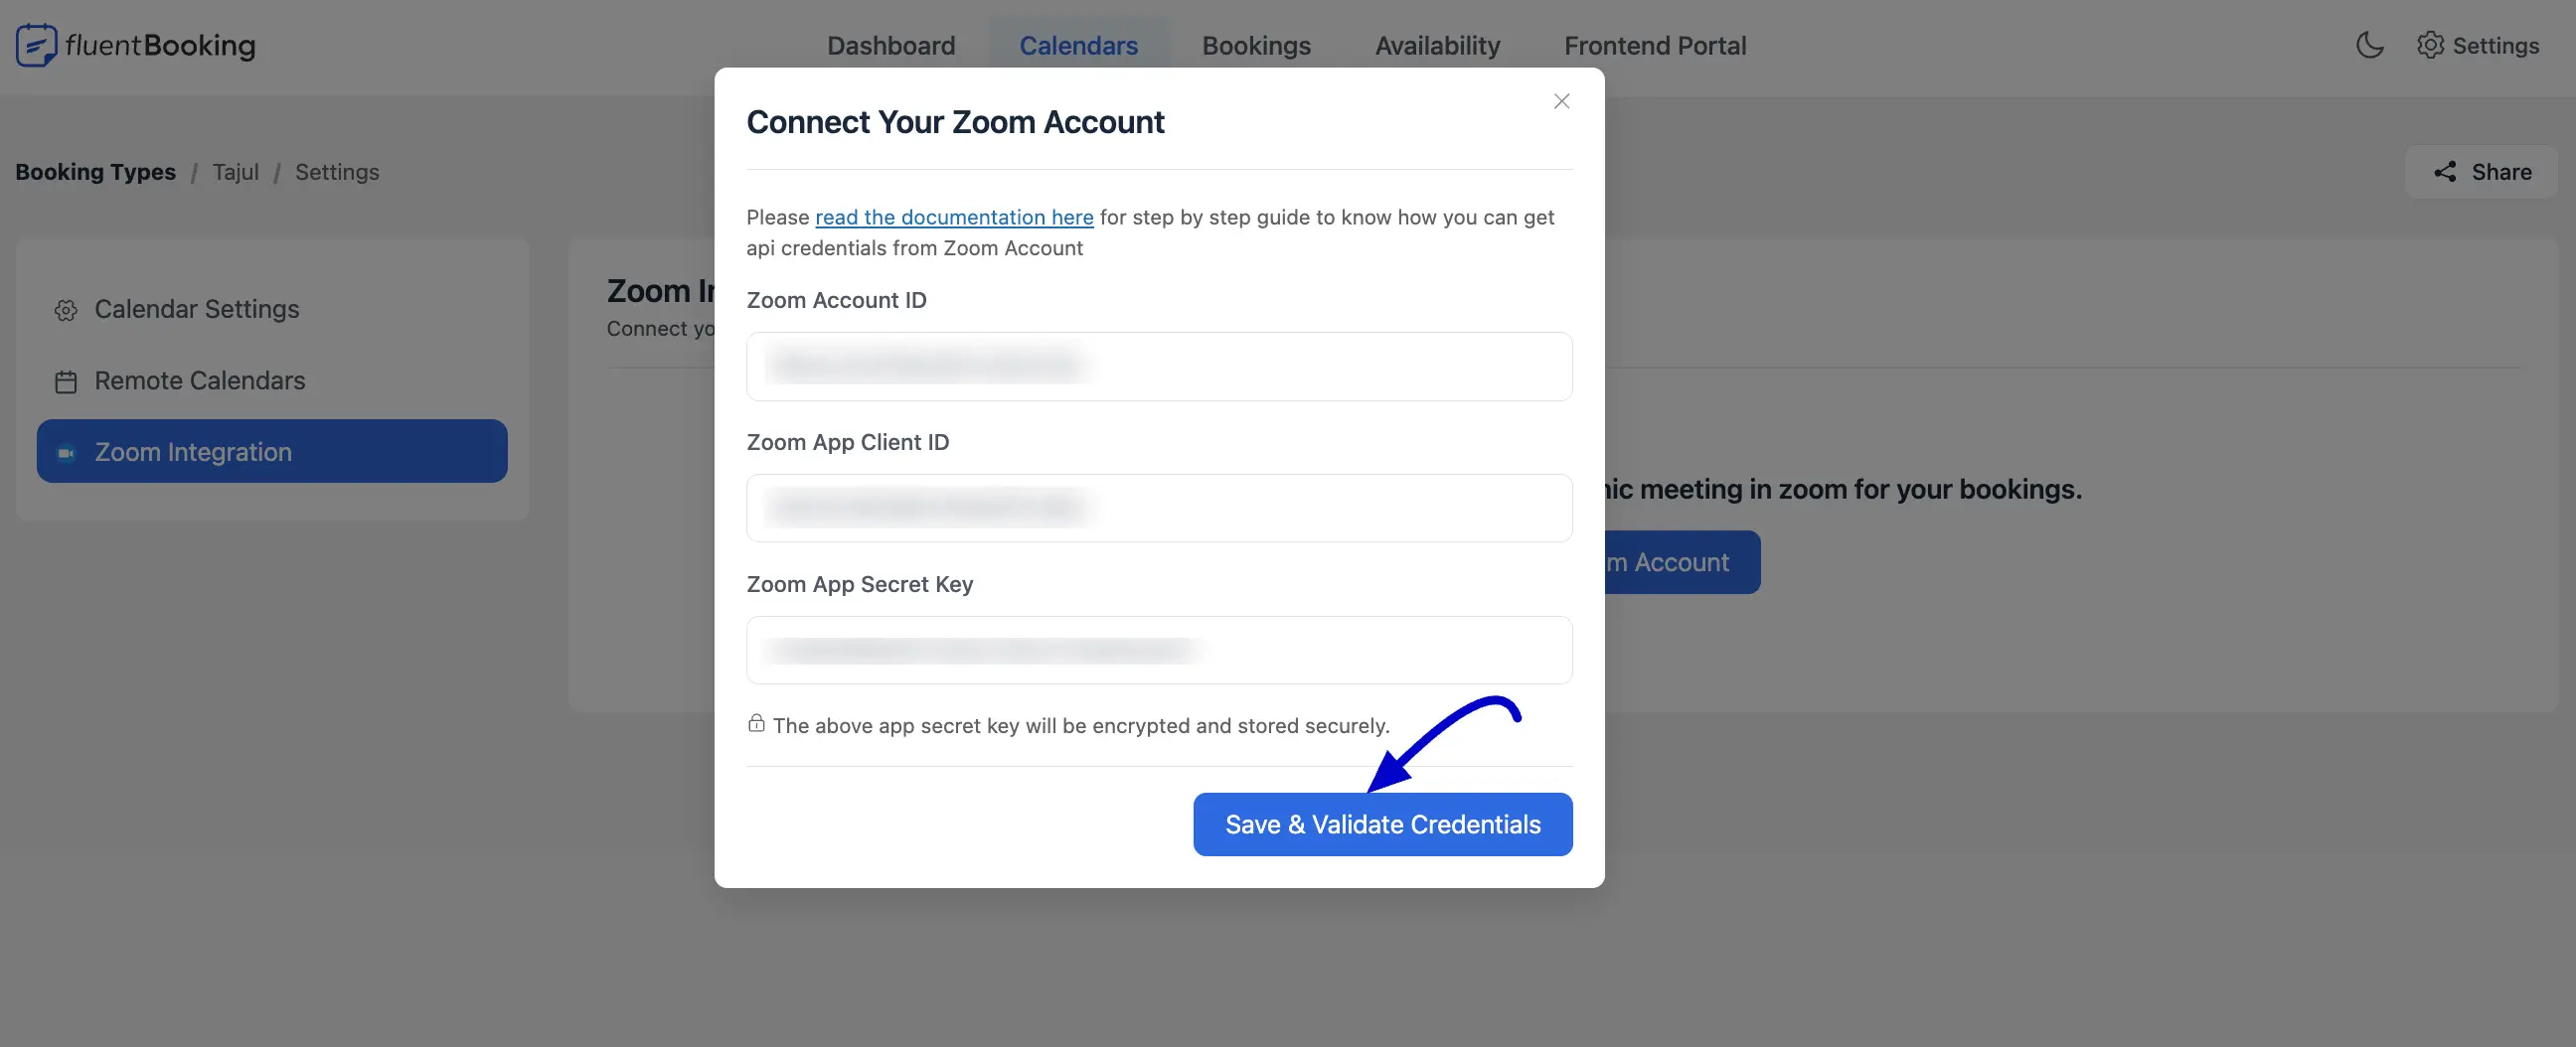
Now a popup will appear paste your copied Zoom App credentials here and click on Save & Validate Credentials.
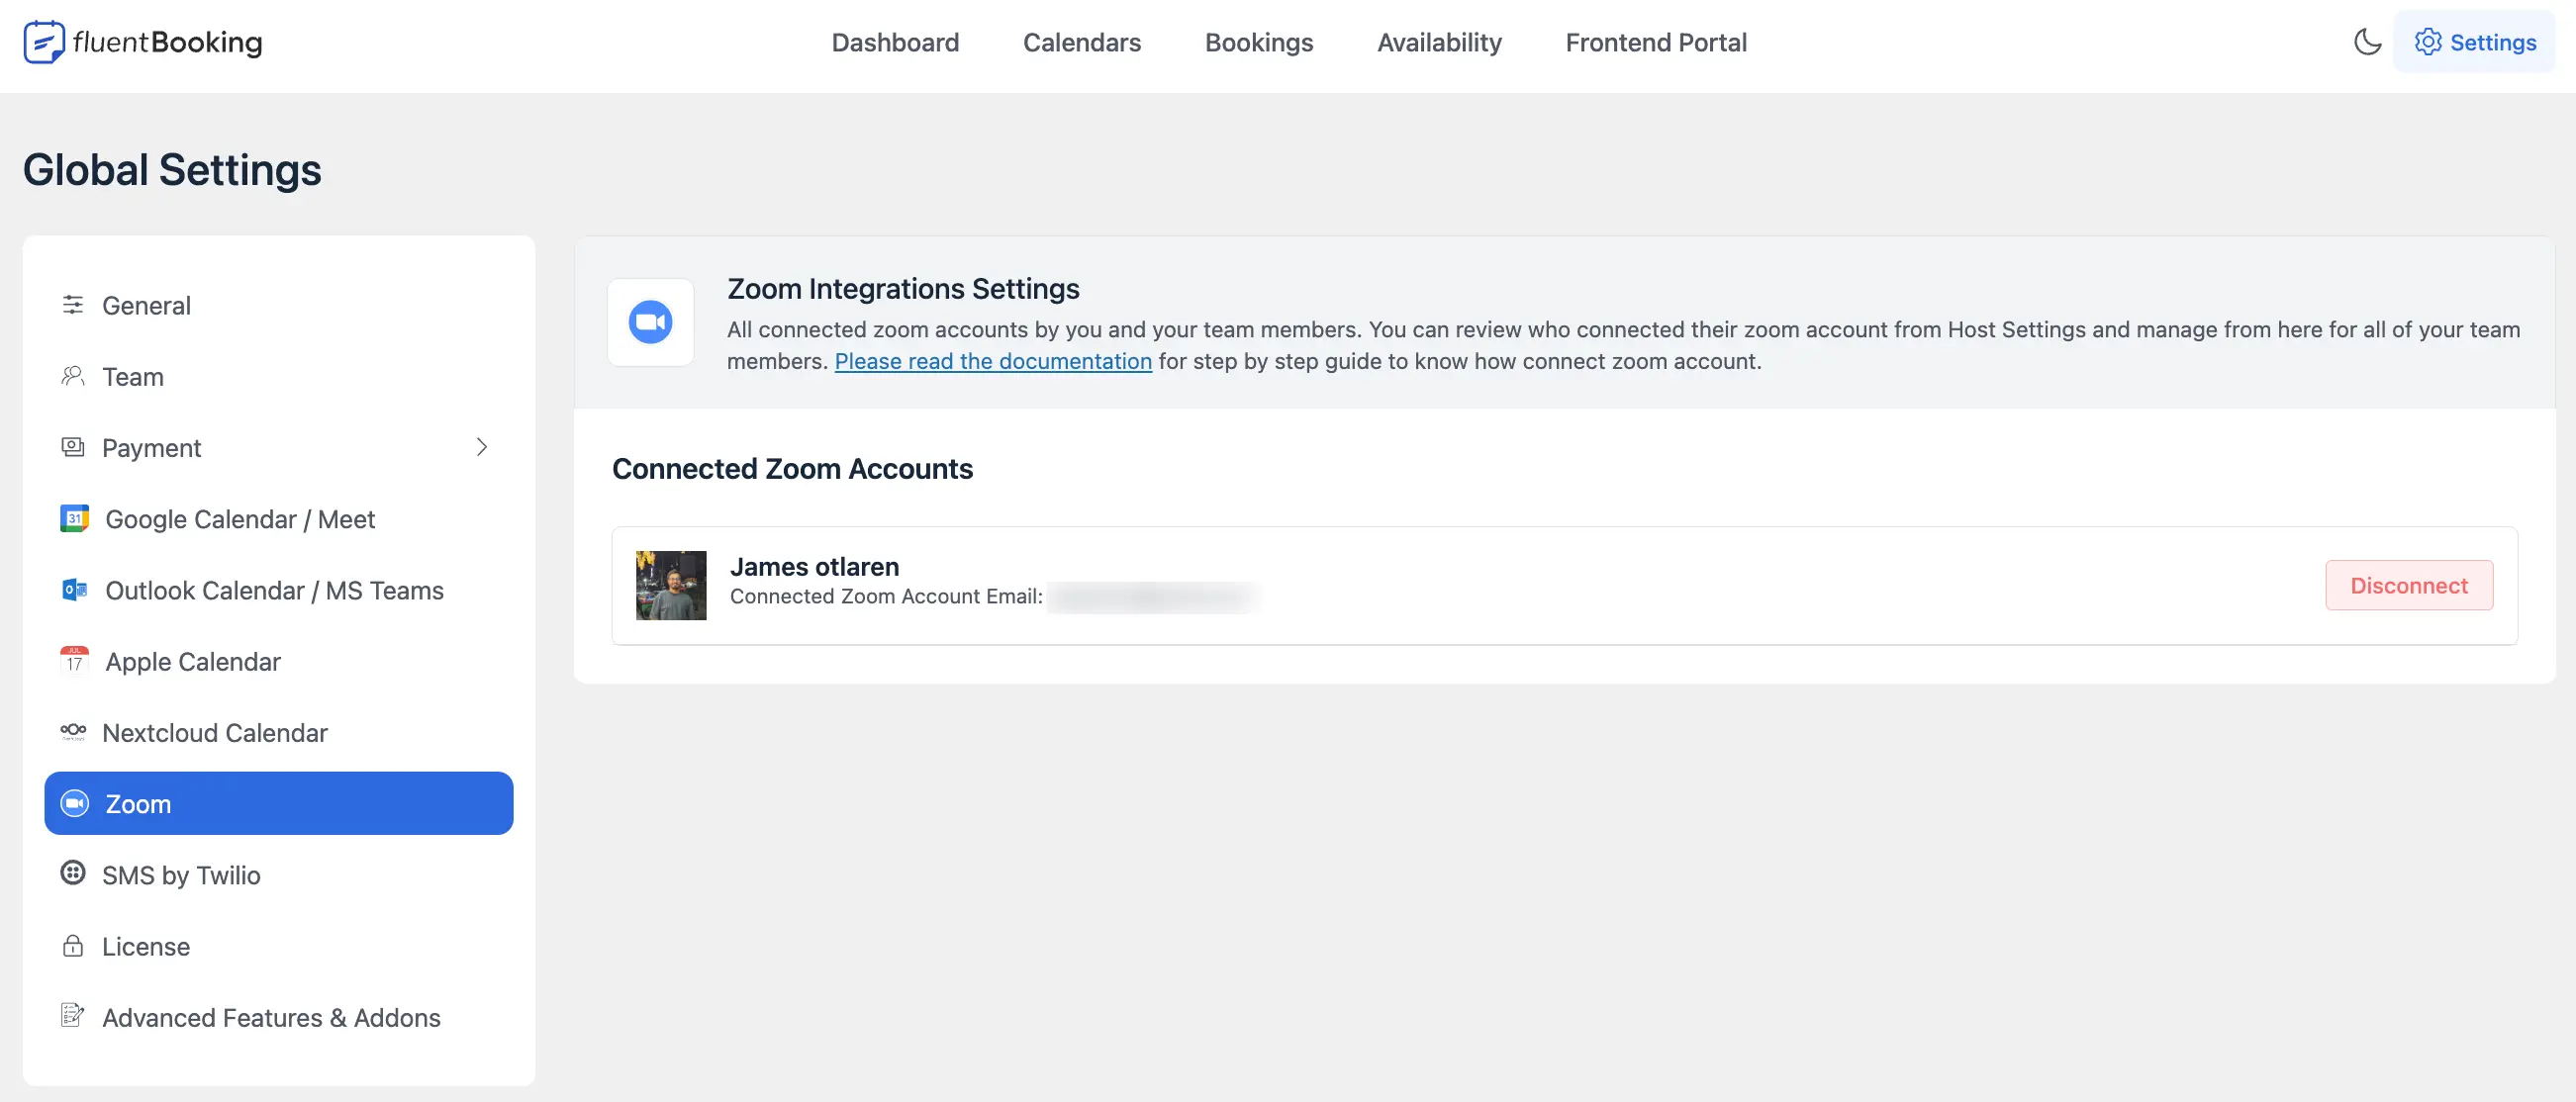
FluentBooking and Zoom are successfully connected, you can see the connected host here. If you want to connect another user account of FluentBooking with Zoom click the Add New User Account button.
To connect another user account of FluentBooking with Zoom you need to create another app from another Zoom account and then repeat the same process to connect with Zoom.
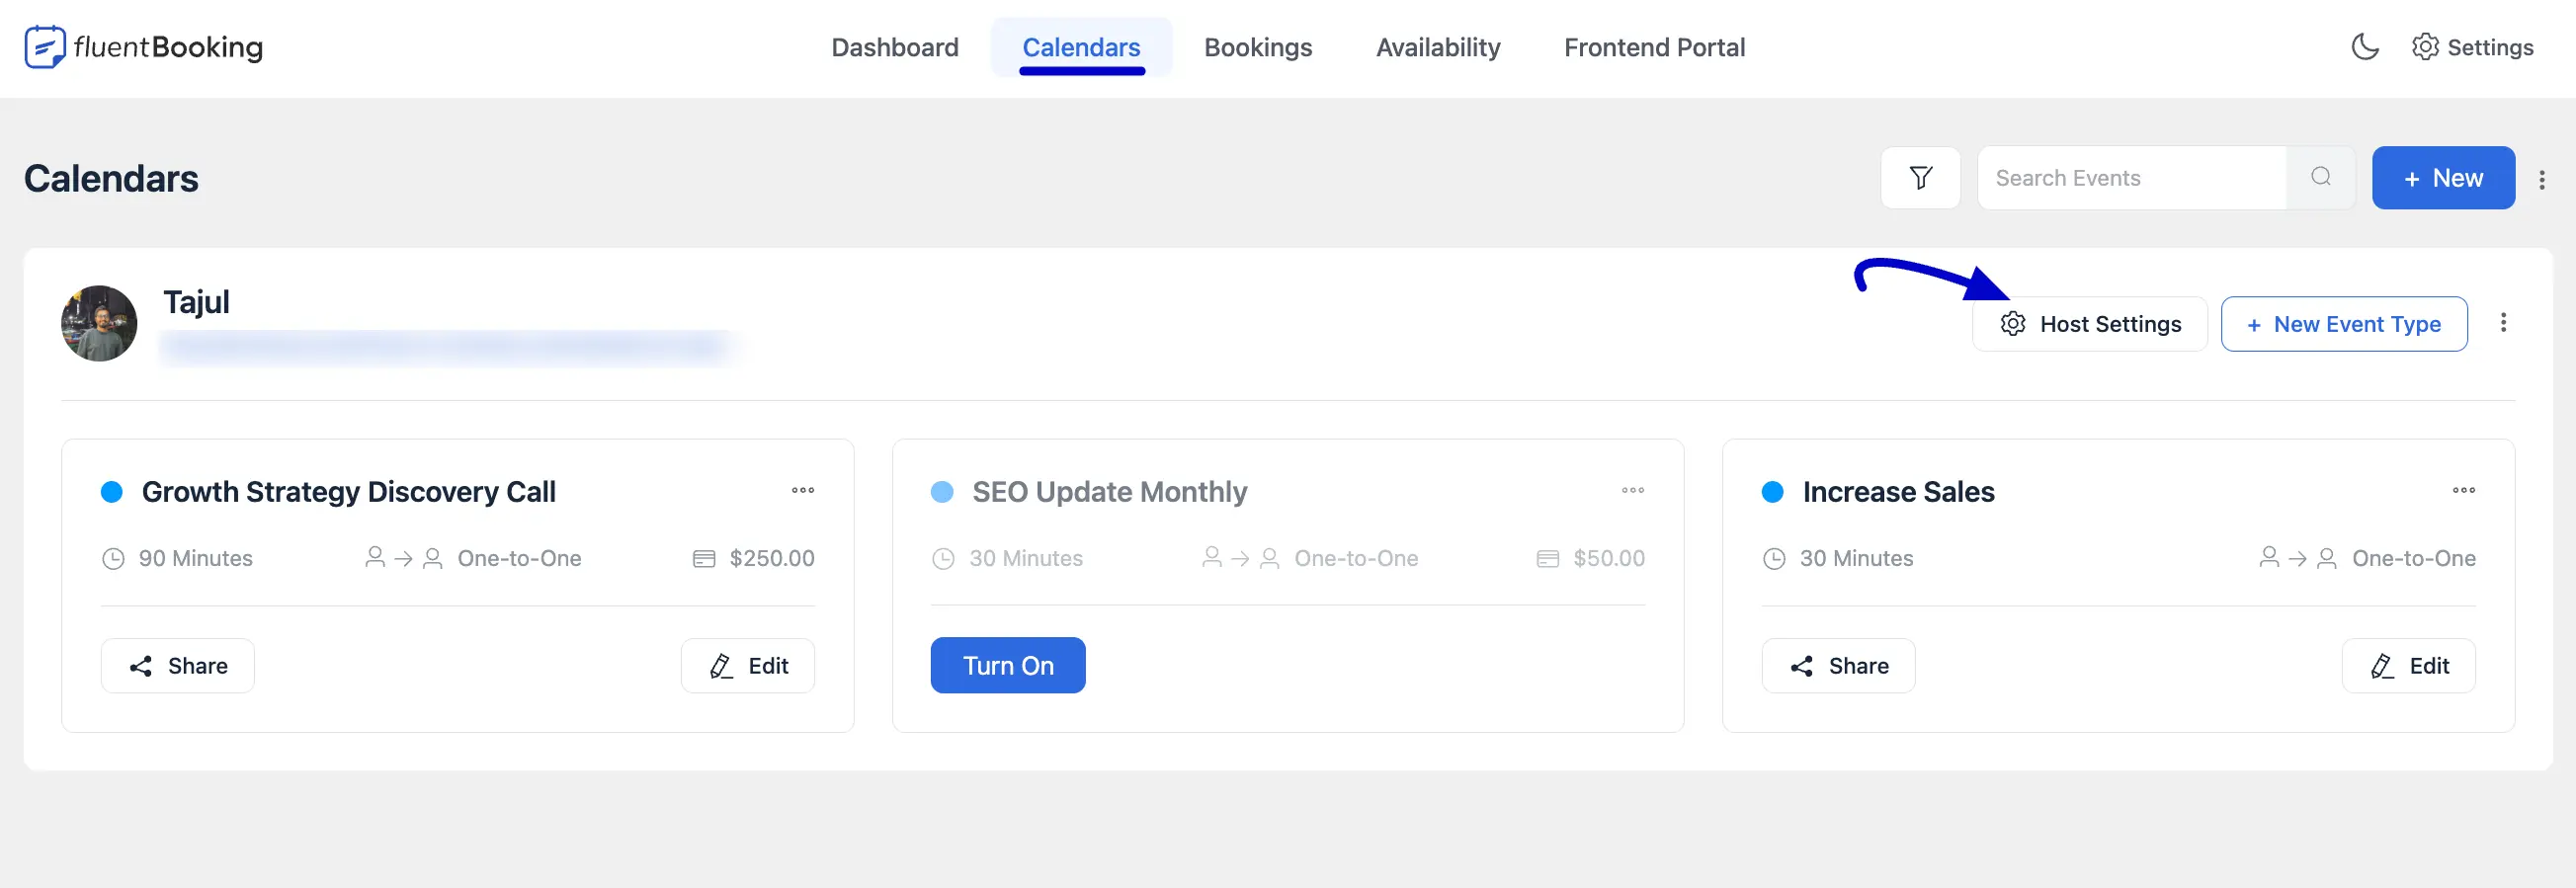
Zoom Integration From Host Setting
You can also set up Zoom from your host settings. Go to Booking Calendars of FluentBooking and click the Host Settings button on the host/calendar’s profile.
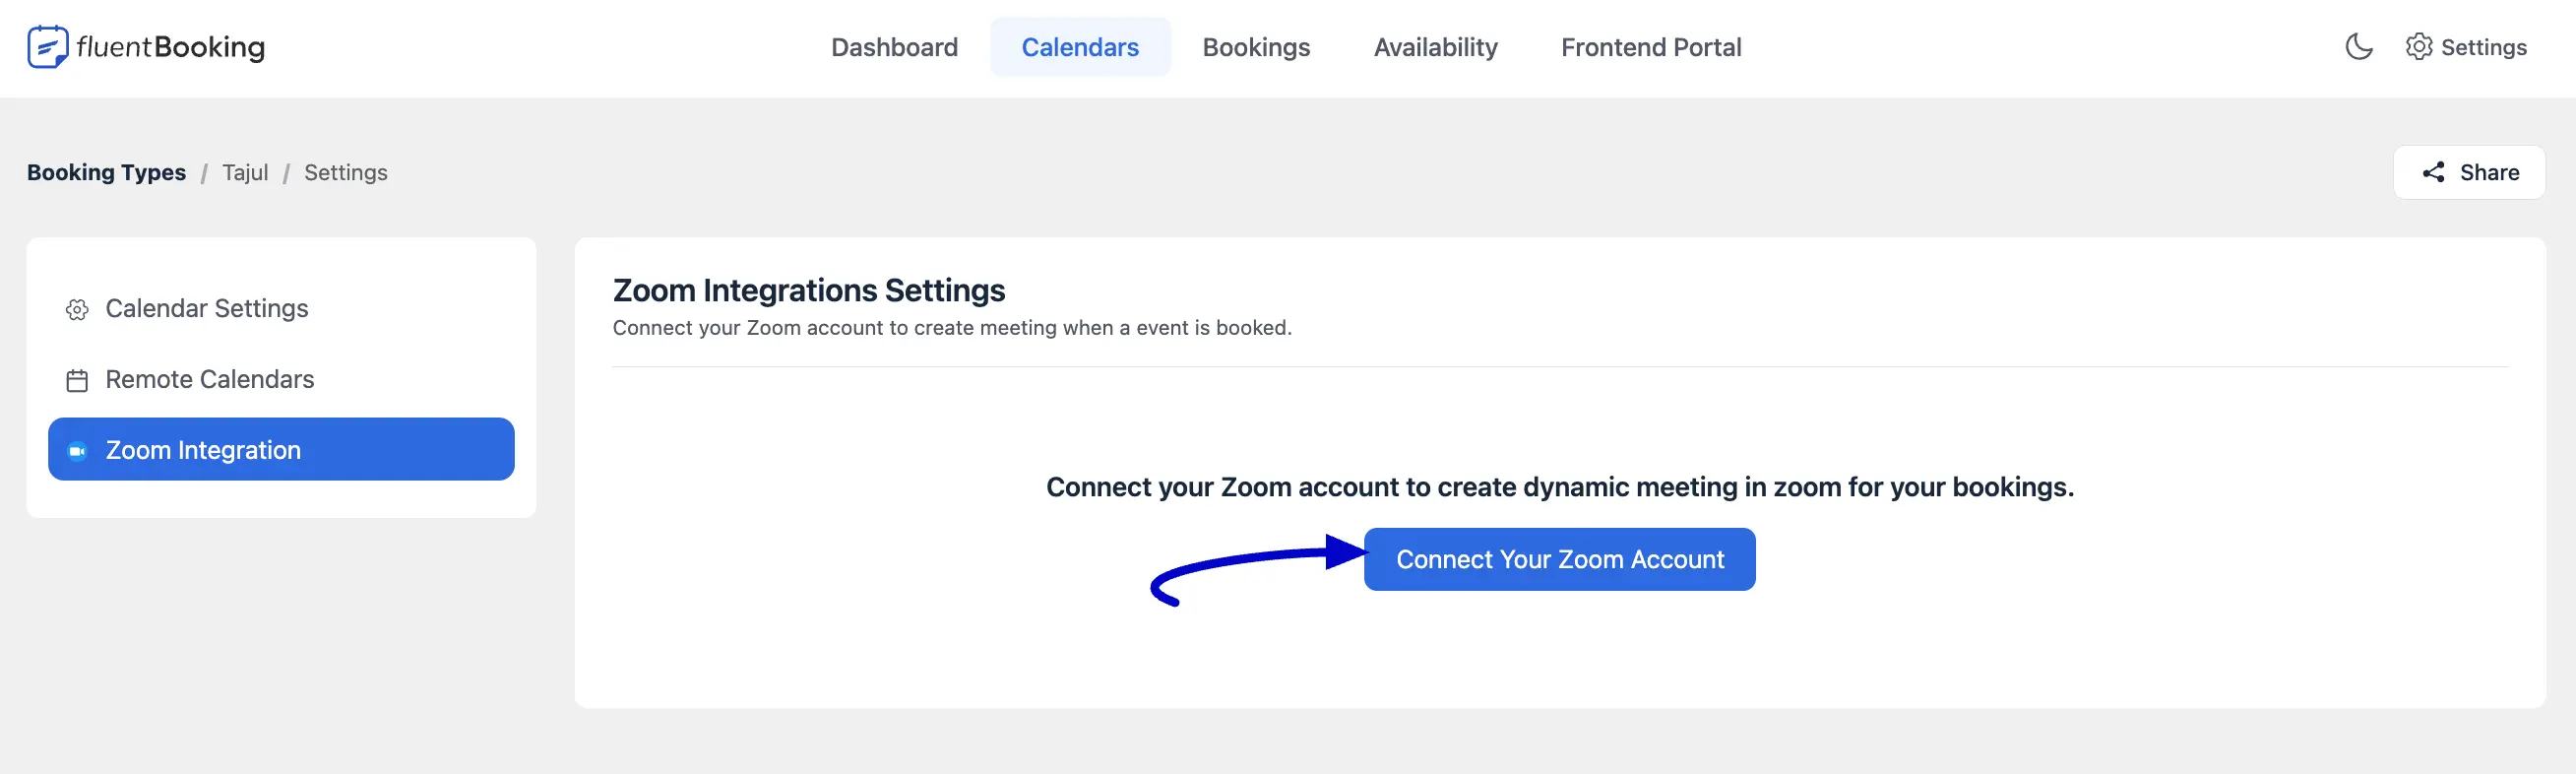
Now go to the Zoom Integration and press the Connect with Zoom Account button.
Now a popup will appear in the same way for your Zoom App credentials here paste your copied credentials here and click on Save & Validate Credentials.
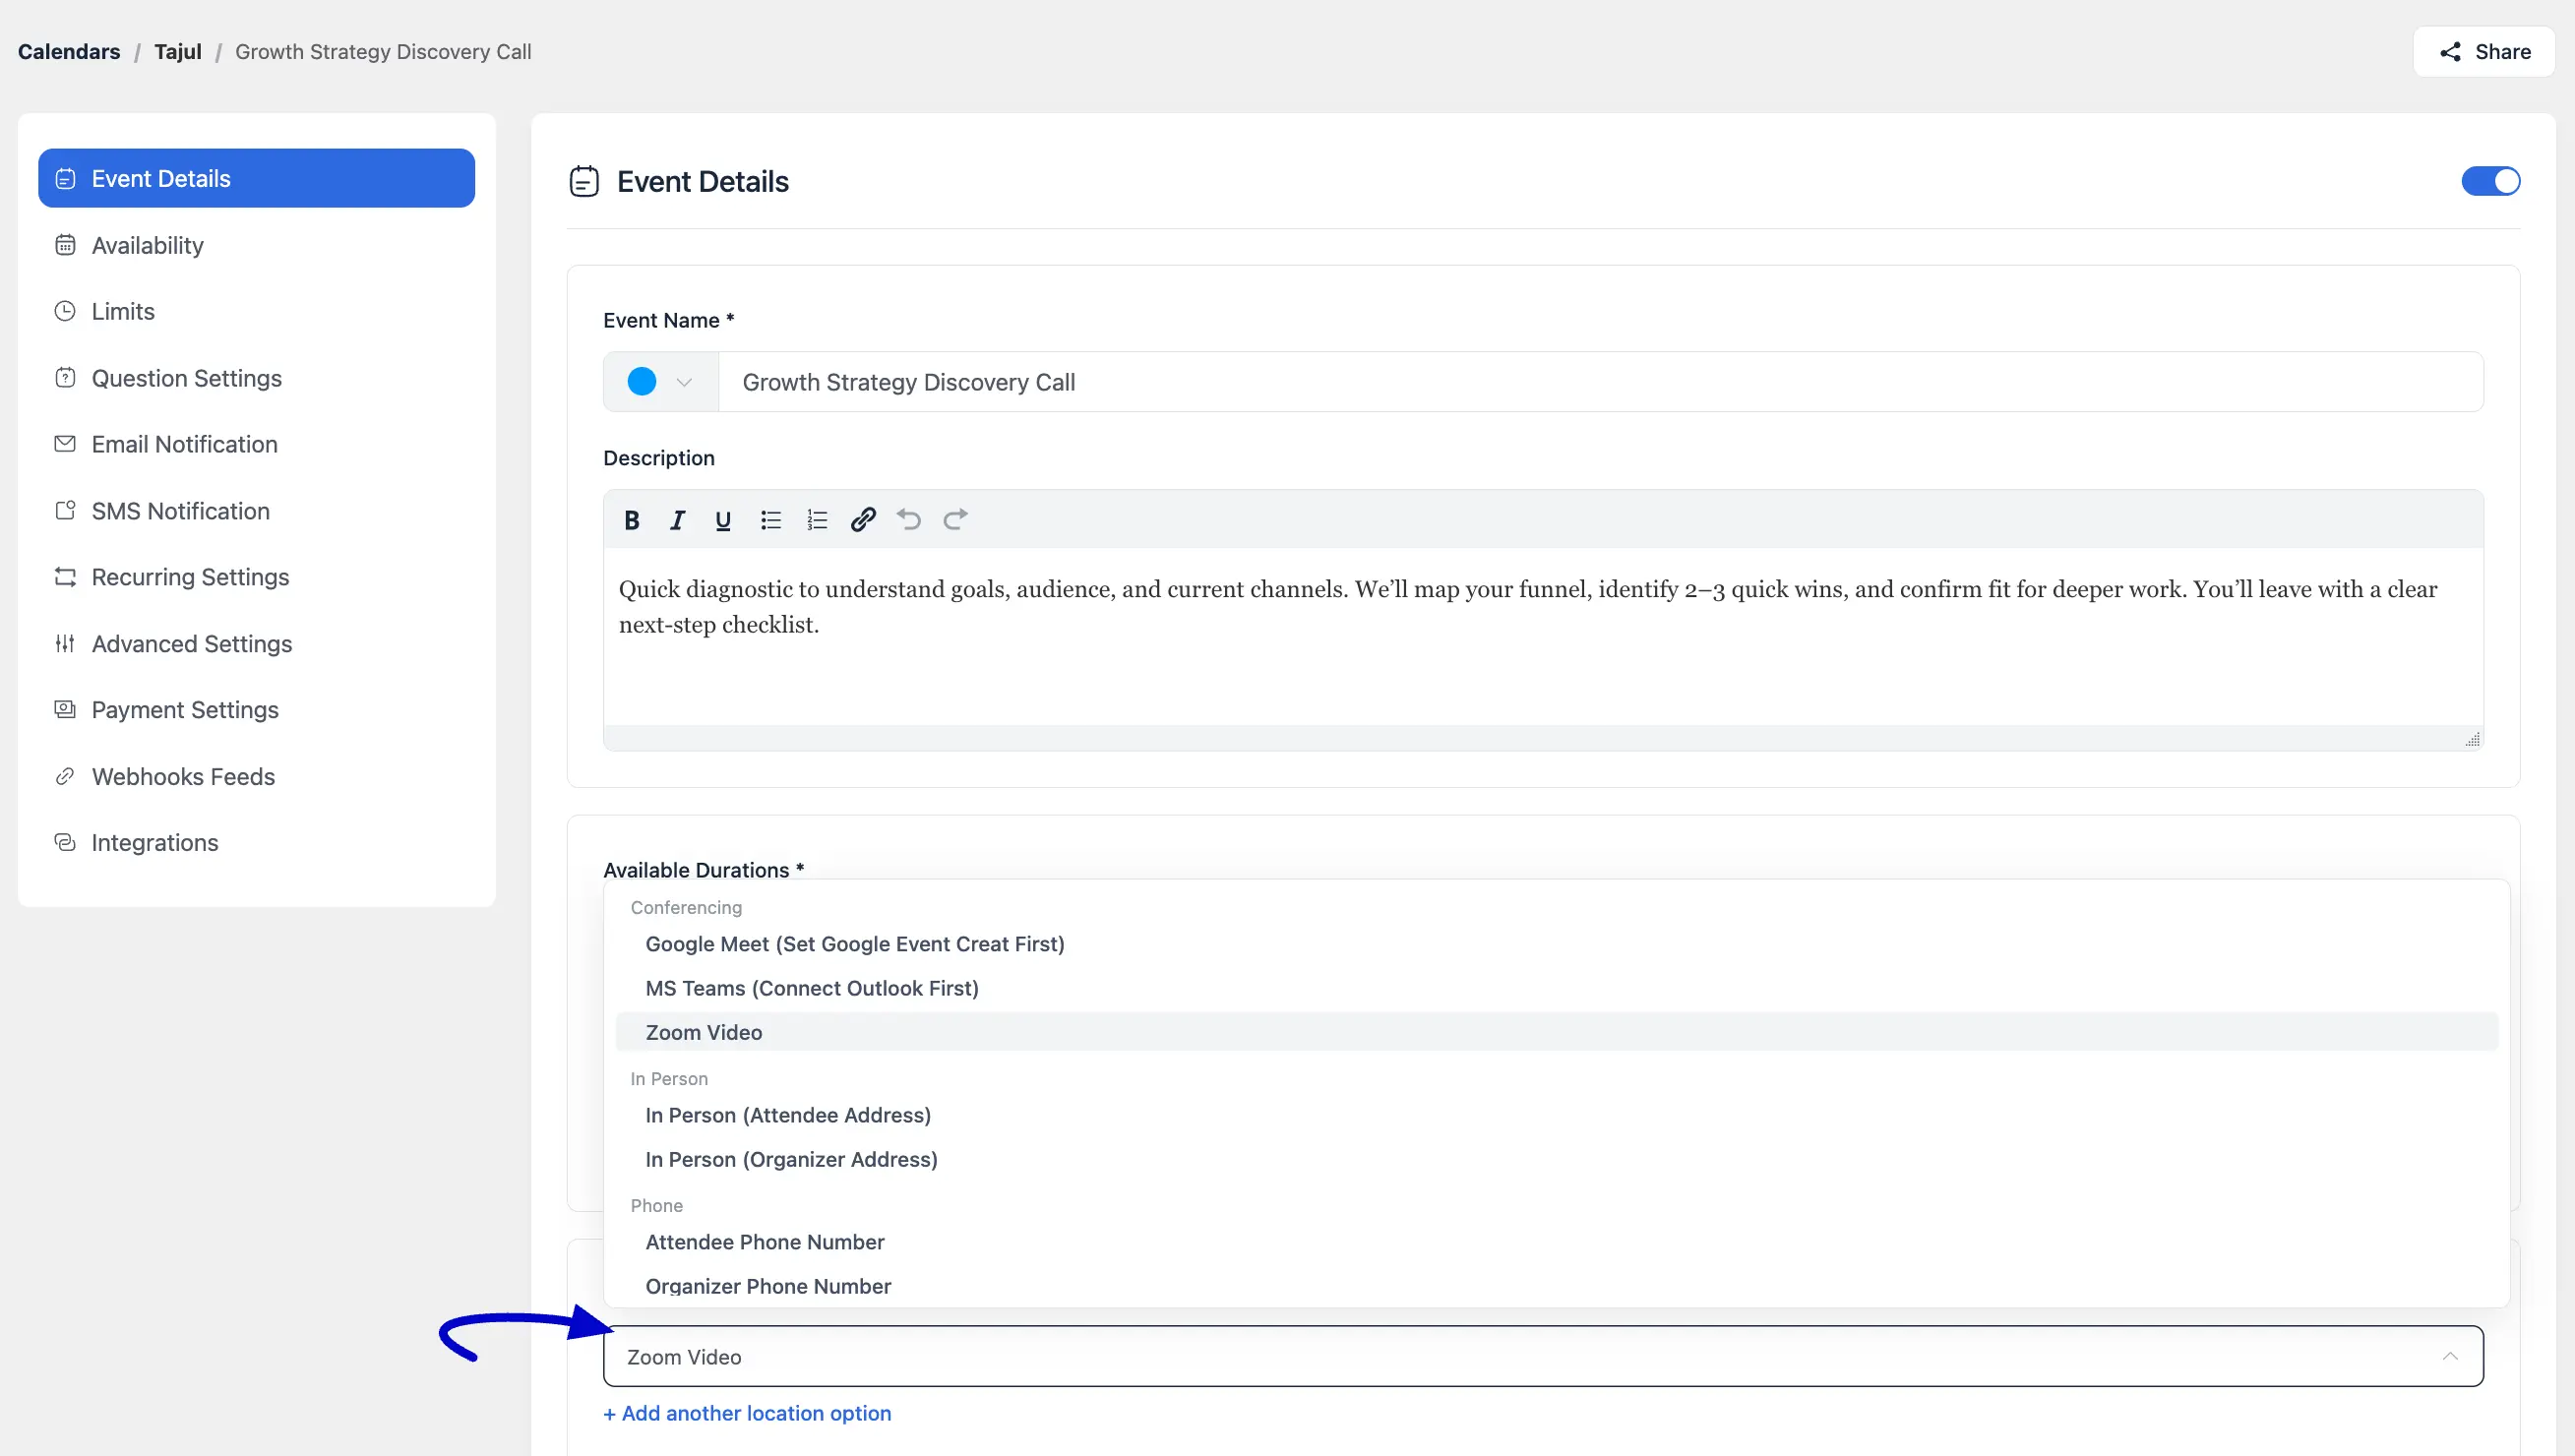
Add Zoom to the Event
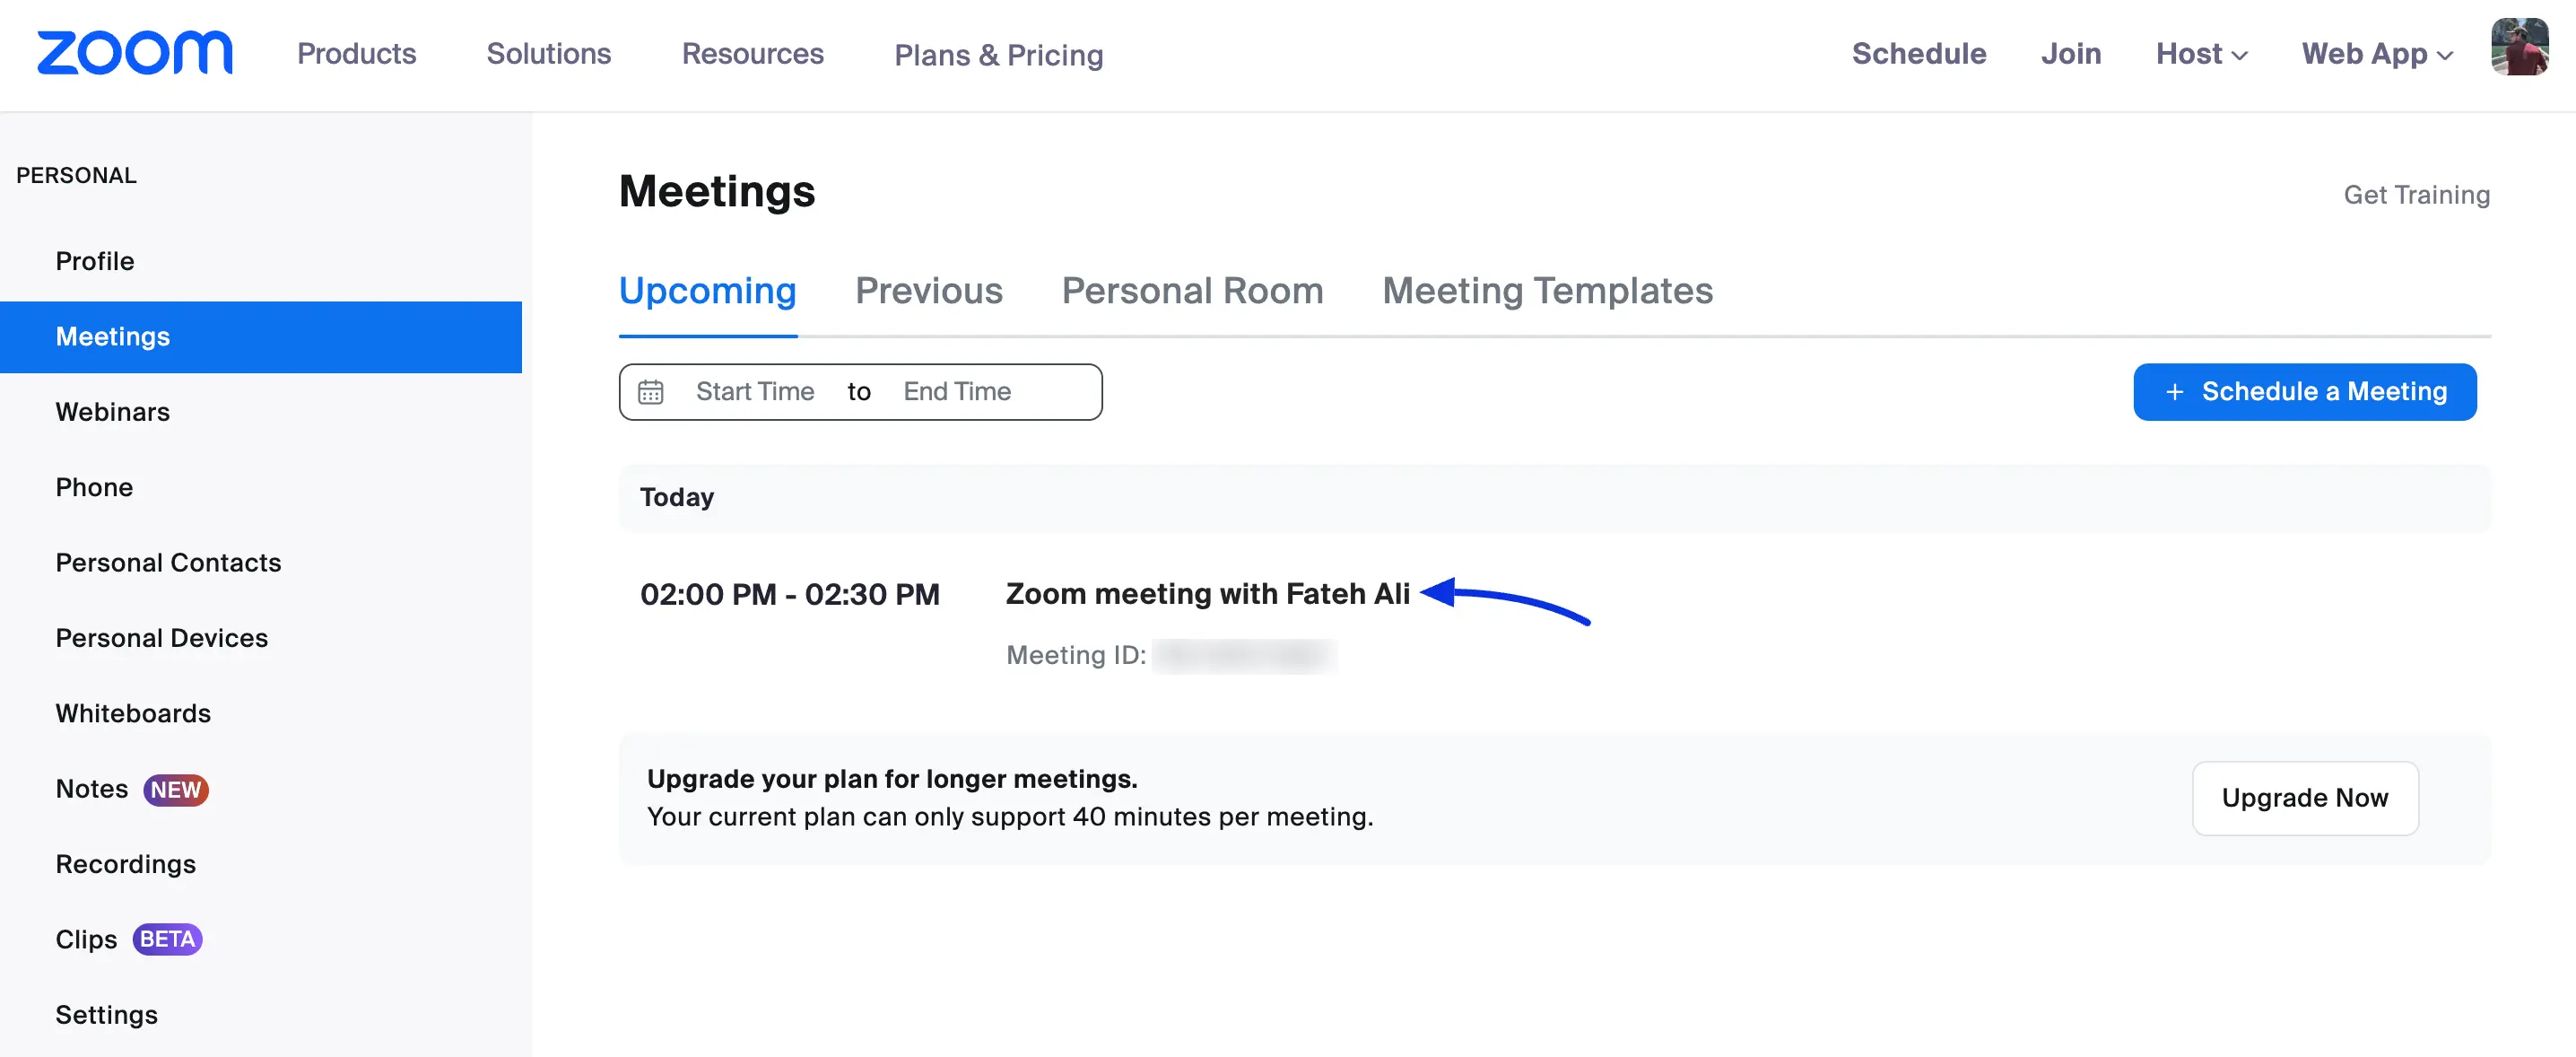
Now at the Event Location, you will find the Zoom video for your meeting.
The host of the Fluentbooking and the attendees will receive the Zoom video link with the notification mail. Also, you will see your meetings in your Zoom account just like the screenshot below: