Appearance
Set Recurring Events
Recurring Events are useful for professionals offering coaching packages, multi-week courses, or therapy sessions. Clients can book the full series—such as monthly sessions or a 6-week program—in one booking instead of scheduling each session separately. This saves time and secures future bookings in advance.
This guide will explain every setting in detail so you can configure it perfectly for your needs.
Step 1: Open Your Event Settings
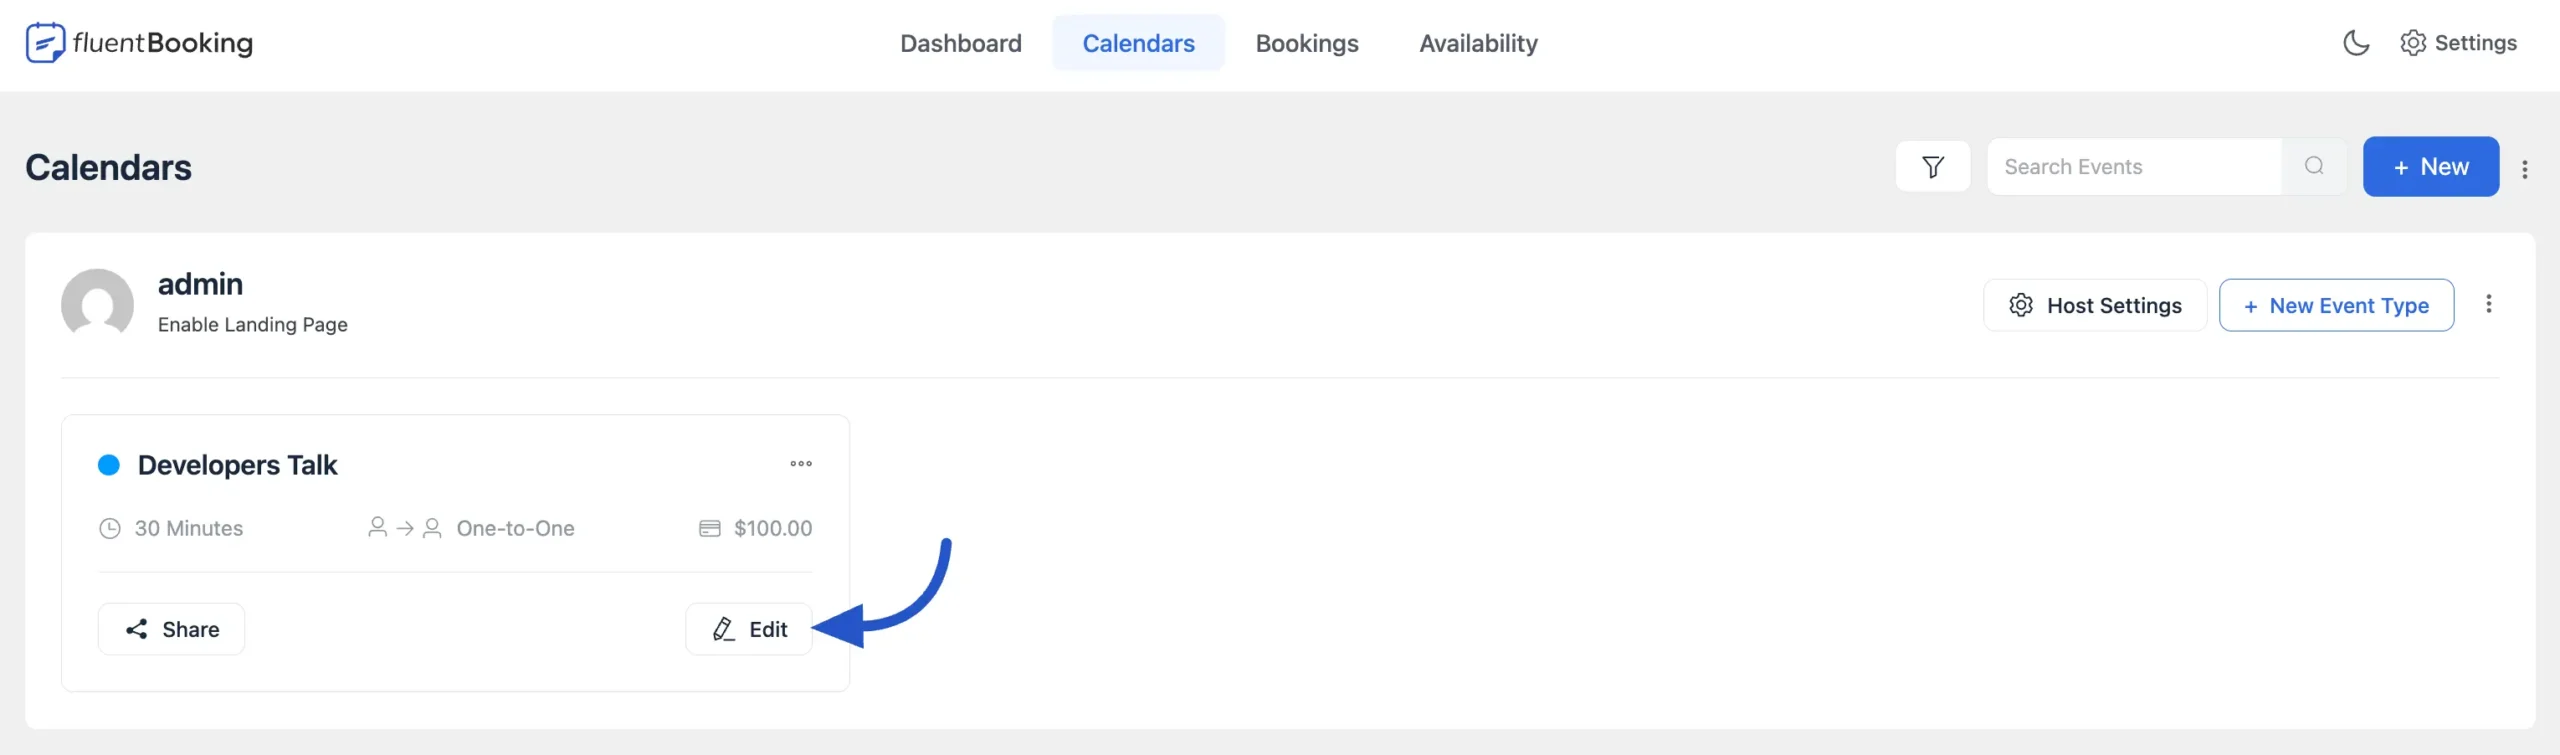
First, you need to select which event you want to turn into a recurring series.
Go to the Calendars section in your FluentBooking dashboard. Locate your specific event card and click the Edit button to open the editor.
Step 2: Enable Recurring Mode
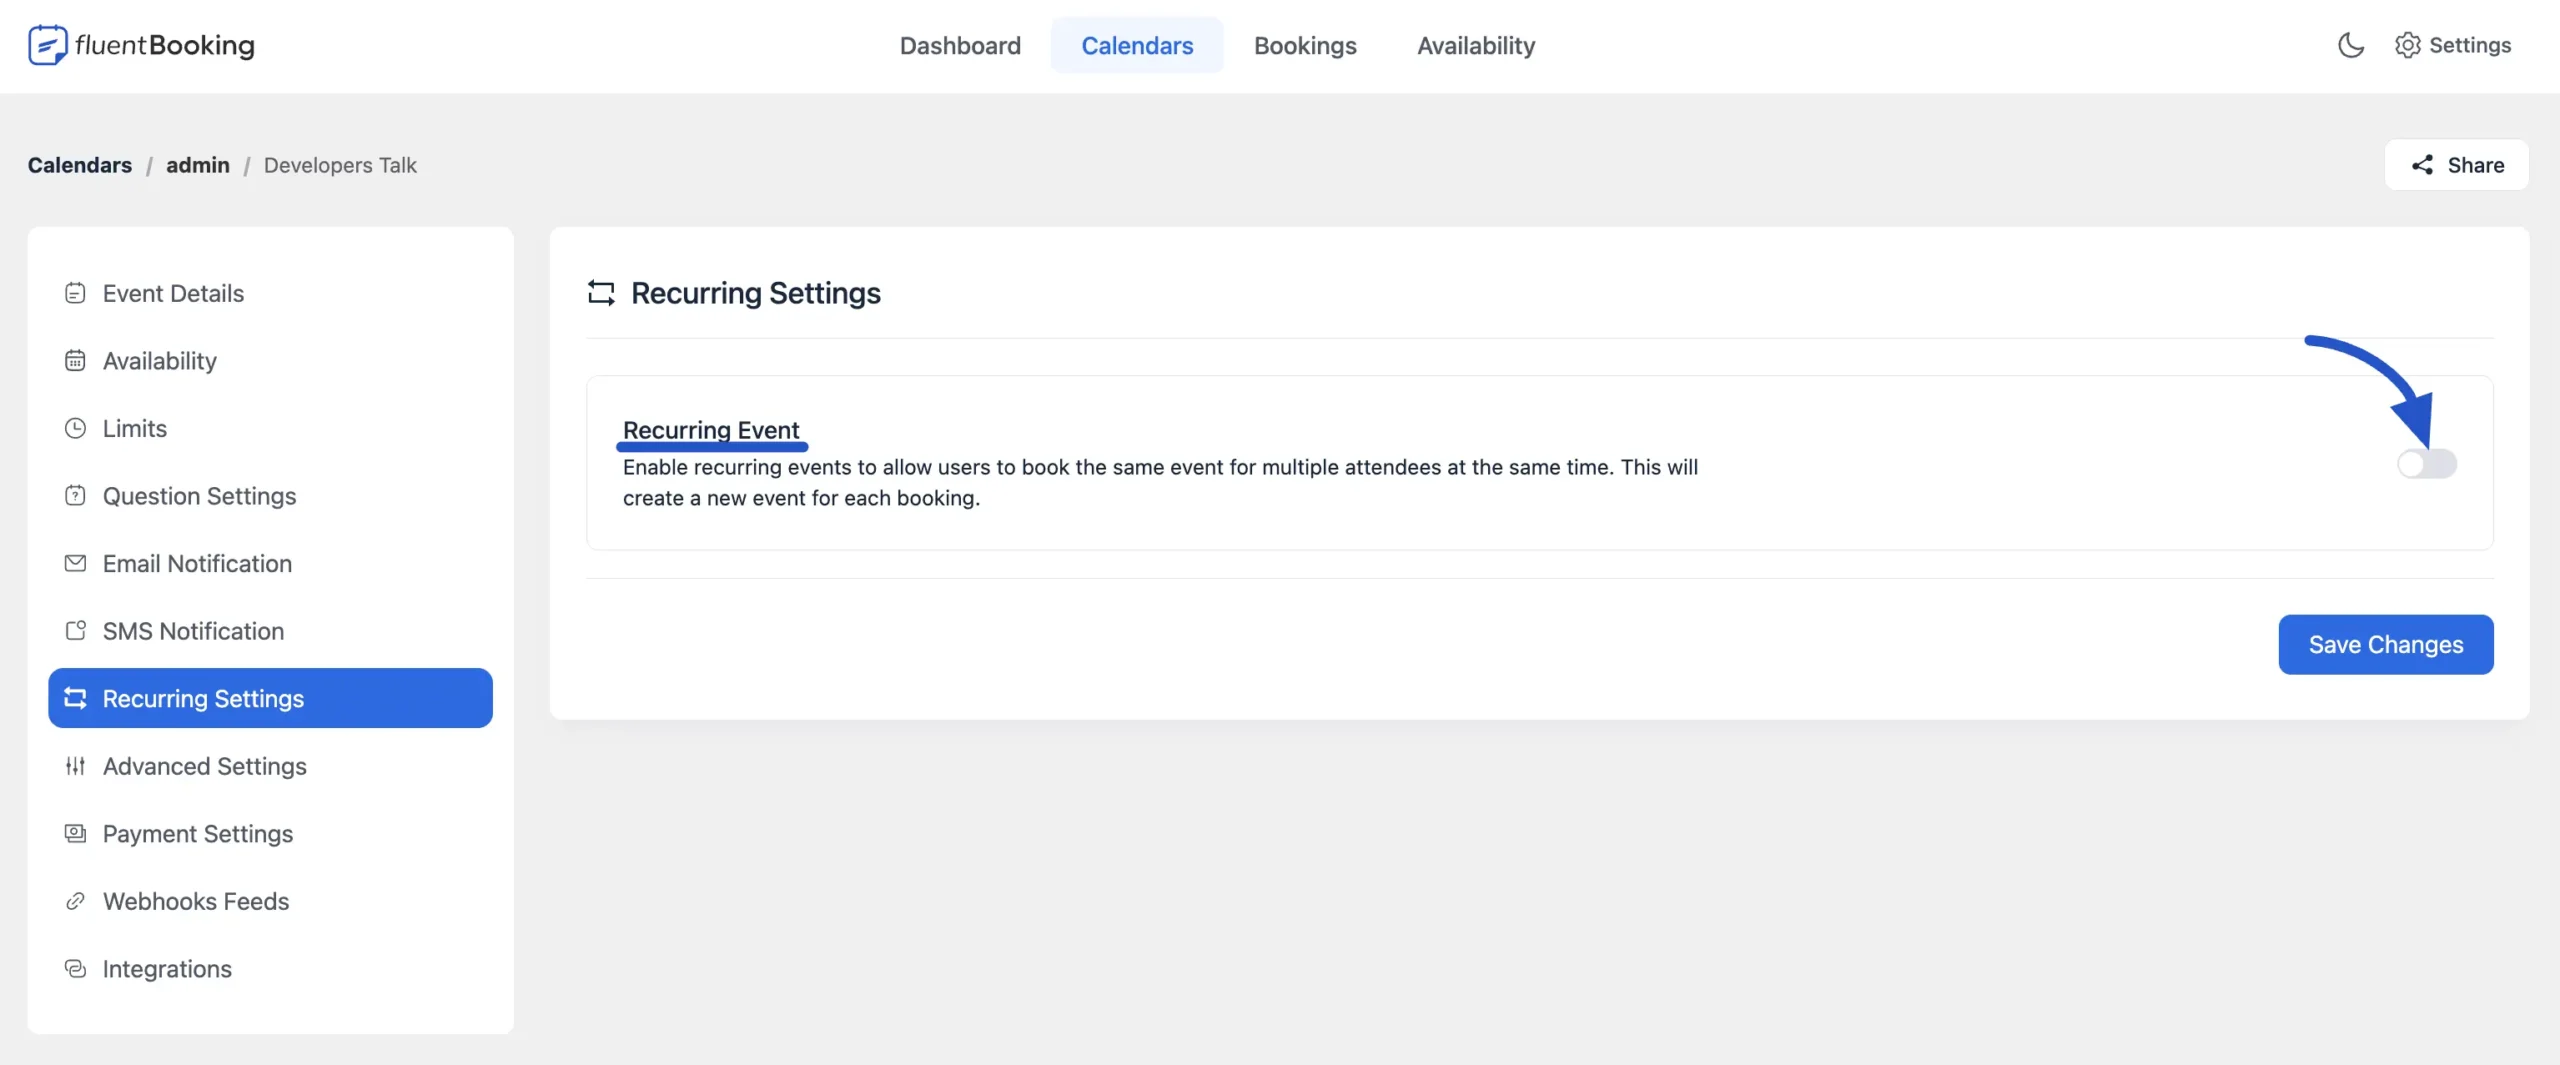
By default, all events are set to "single booking."
In the left-hand menu of the event editor, click on Recurring Settings. Find the toggle switch labeled Recurring Event. Turn it ON (it will turn blue).
Step 3: Configure Your Schedule (Important)
This is where you define the rules for your series. Let's break down what each option means for your business.
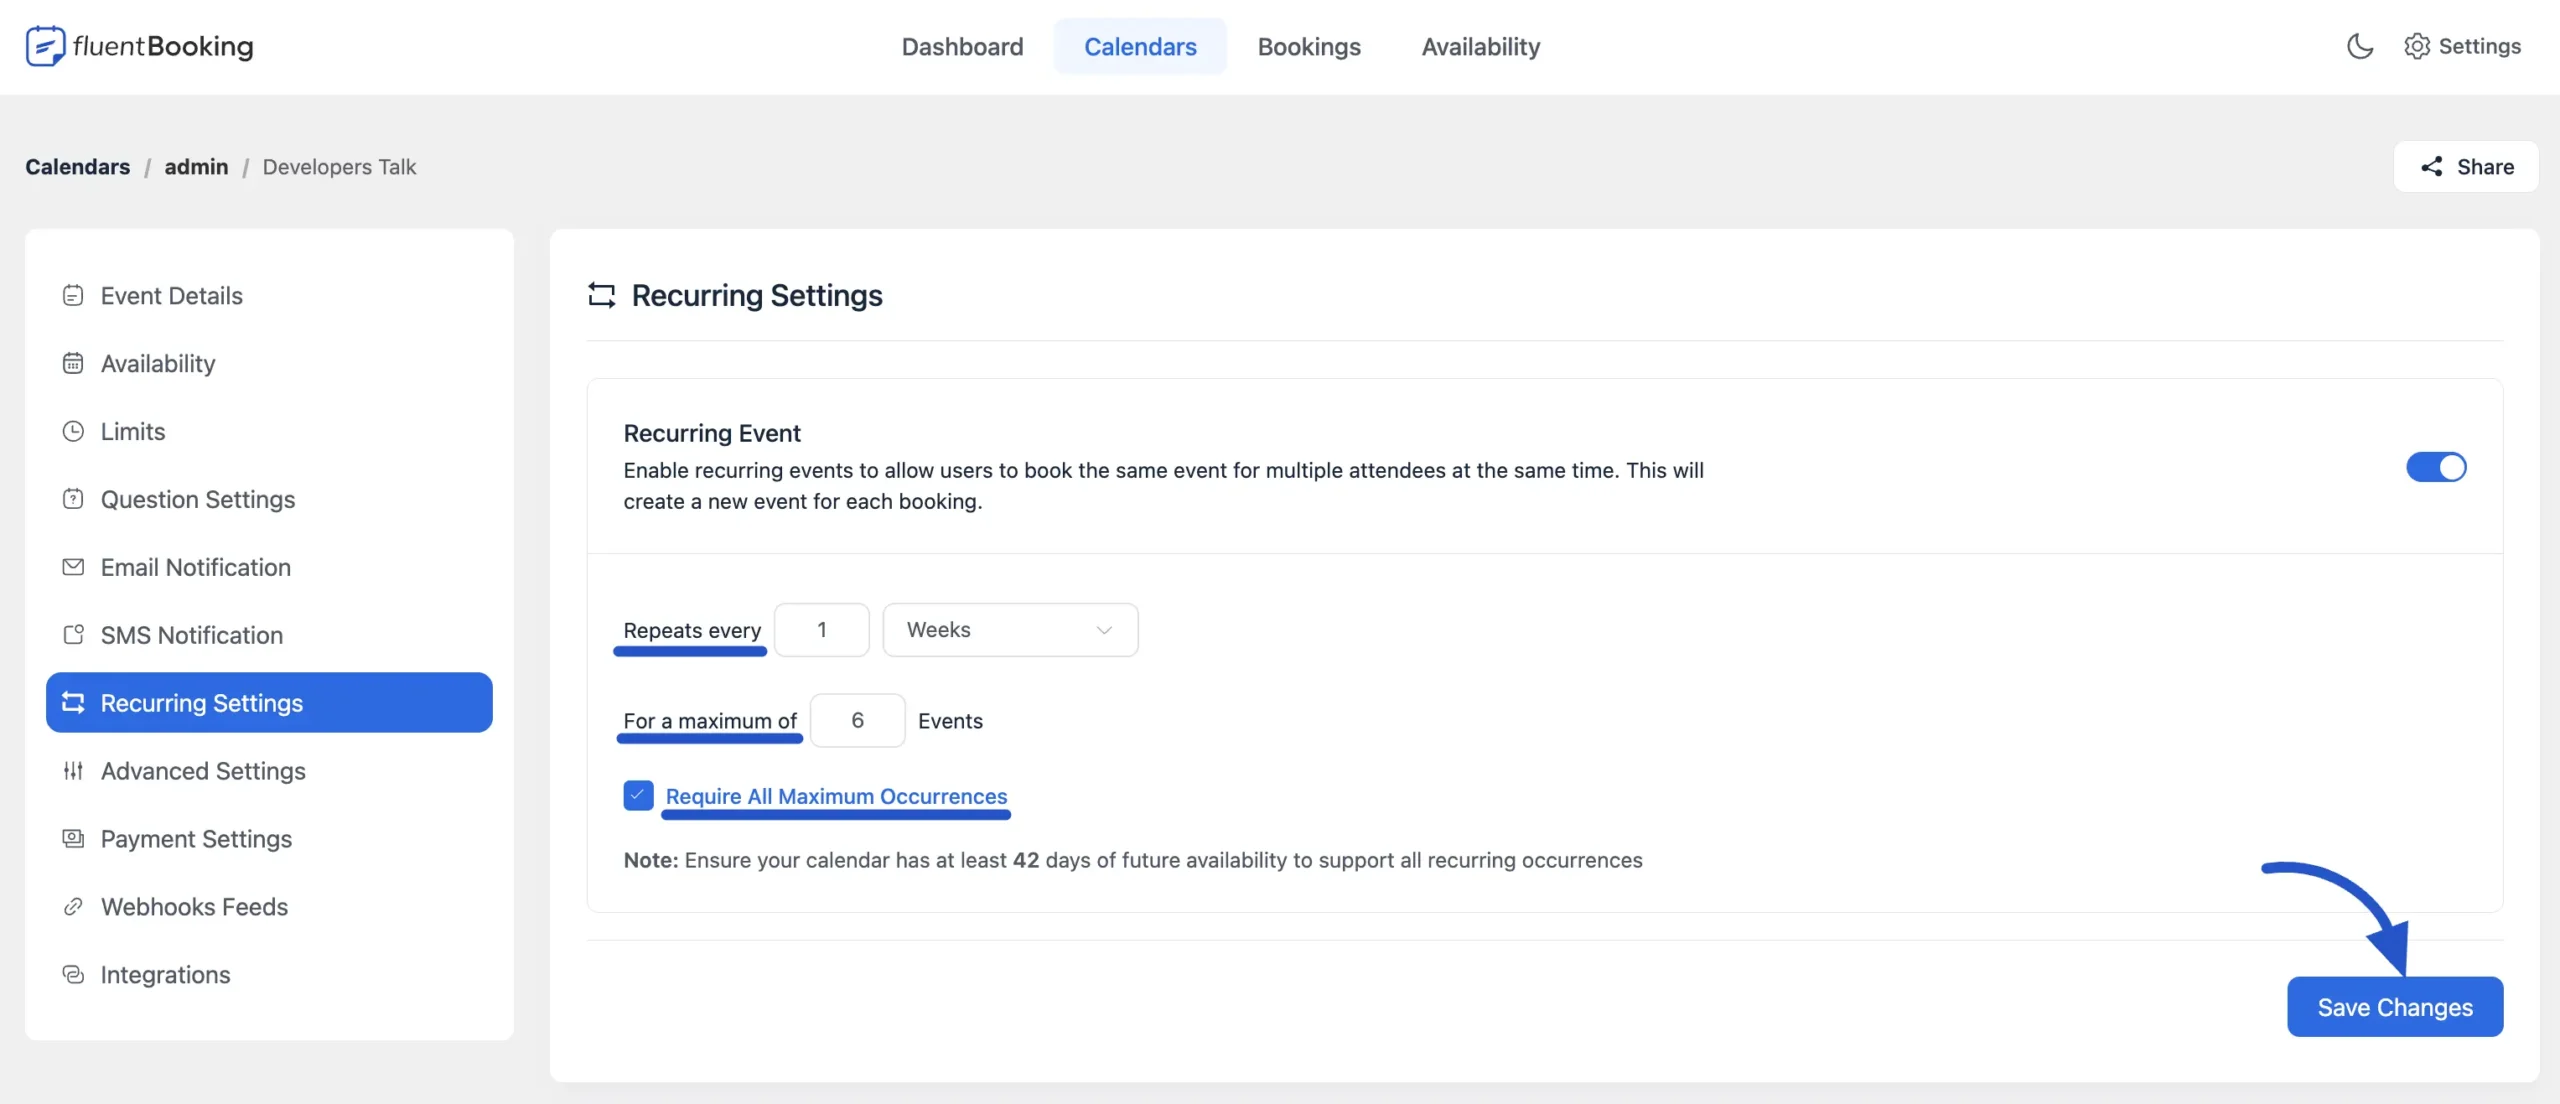
1. Frequency (Repeats every...)
This determines the gap between sessions.
- Example: If you select 1 Weeks, the system will look for the same time slot exactly 7 days later.
- Use case: Perfect for "Every Tuesday at 10 AM" meetings.
2. Count (For a maximum of...)
This is the total number of sessions in the series.
- Example: If you enter 6 Events, the customer will be booking 6 appointments total.
3. Strict vs. Flexible (Require All Maximum Occurrences)
This checkbox changes how the booking works significantly:
Checked (Strict): The customer must book all sessions in the series. They cannot remove individual dates.
- Best for: Fixed courses, paid packages, or structured programs where attendance at every session is required.
Unchecked (Flexible): The customer can choose to book fewer sessions than the maximum. They might book only 4 out of the 6 available slots if they are busy on certain weeks.
Important Availability Note: The system needs enough "future availability" to book the whole series.
Example: If you create a 6-week series, your calendar's "Availability" settings must allow bookings at least 42 days (6 weeks) into the future. If your calendar only allows bookings for the "Next 30 days," the system cannot book the final sessions of the series.
- Once you have configured these rules, click Save Changes.
Step 4: What Your Customer Sees
It is helpful to understand the experience from your client's perspective.
On the Booking Page
When they select a start date, they will see a summary of the commitment (e.g., "Every week for 6 occurrences").
- Pricing: If you charge $100 per session, the system automatically calculates the total. A 6-session package will show as $600.00 at checkout.

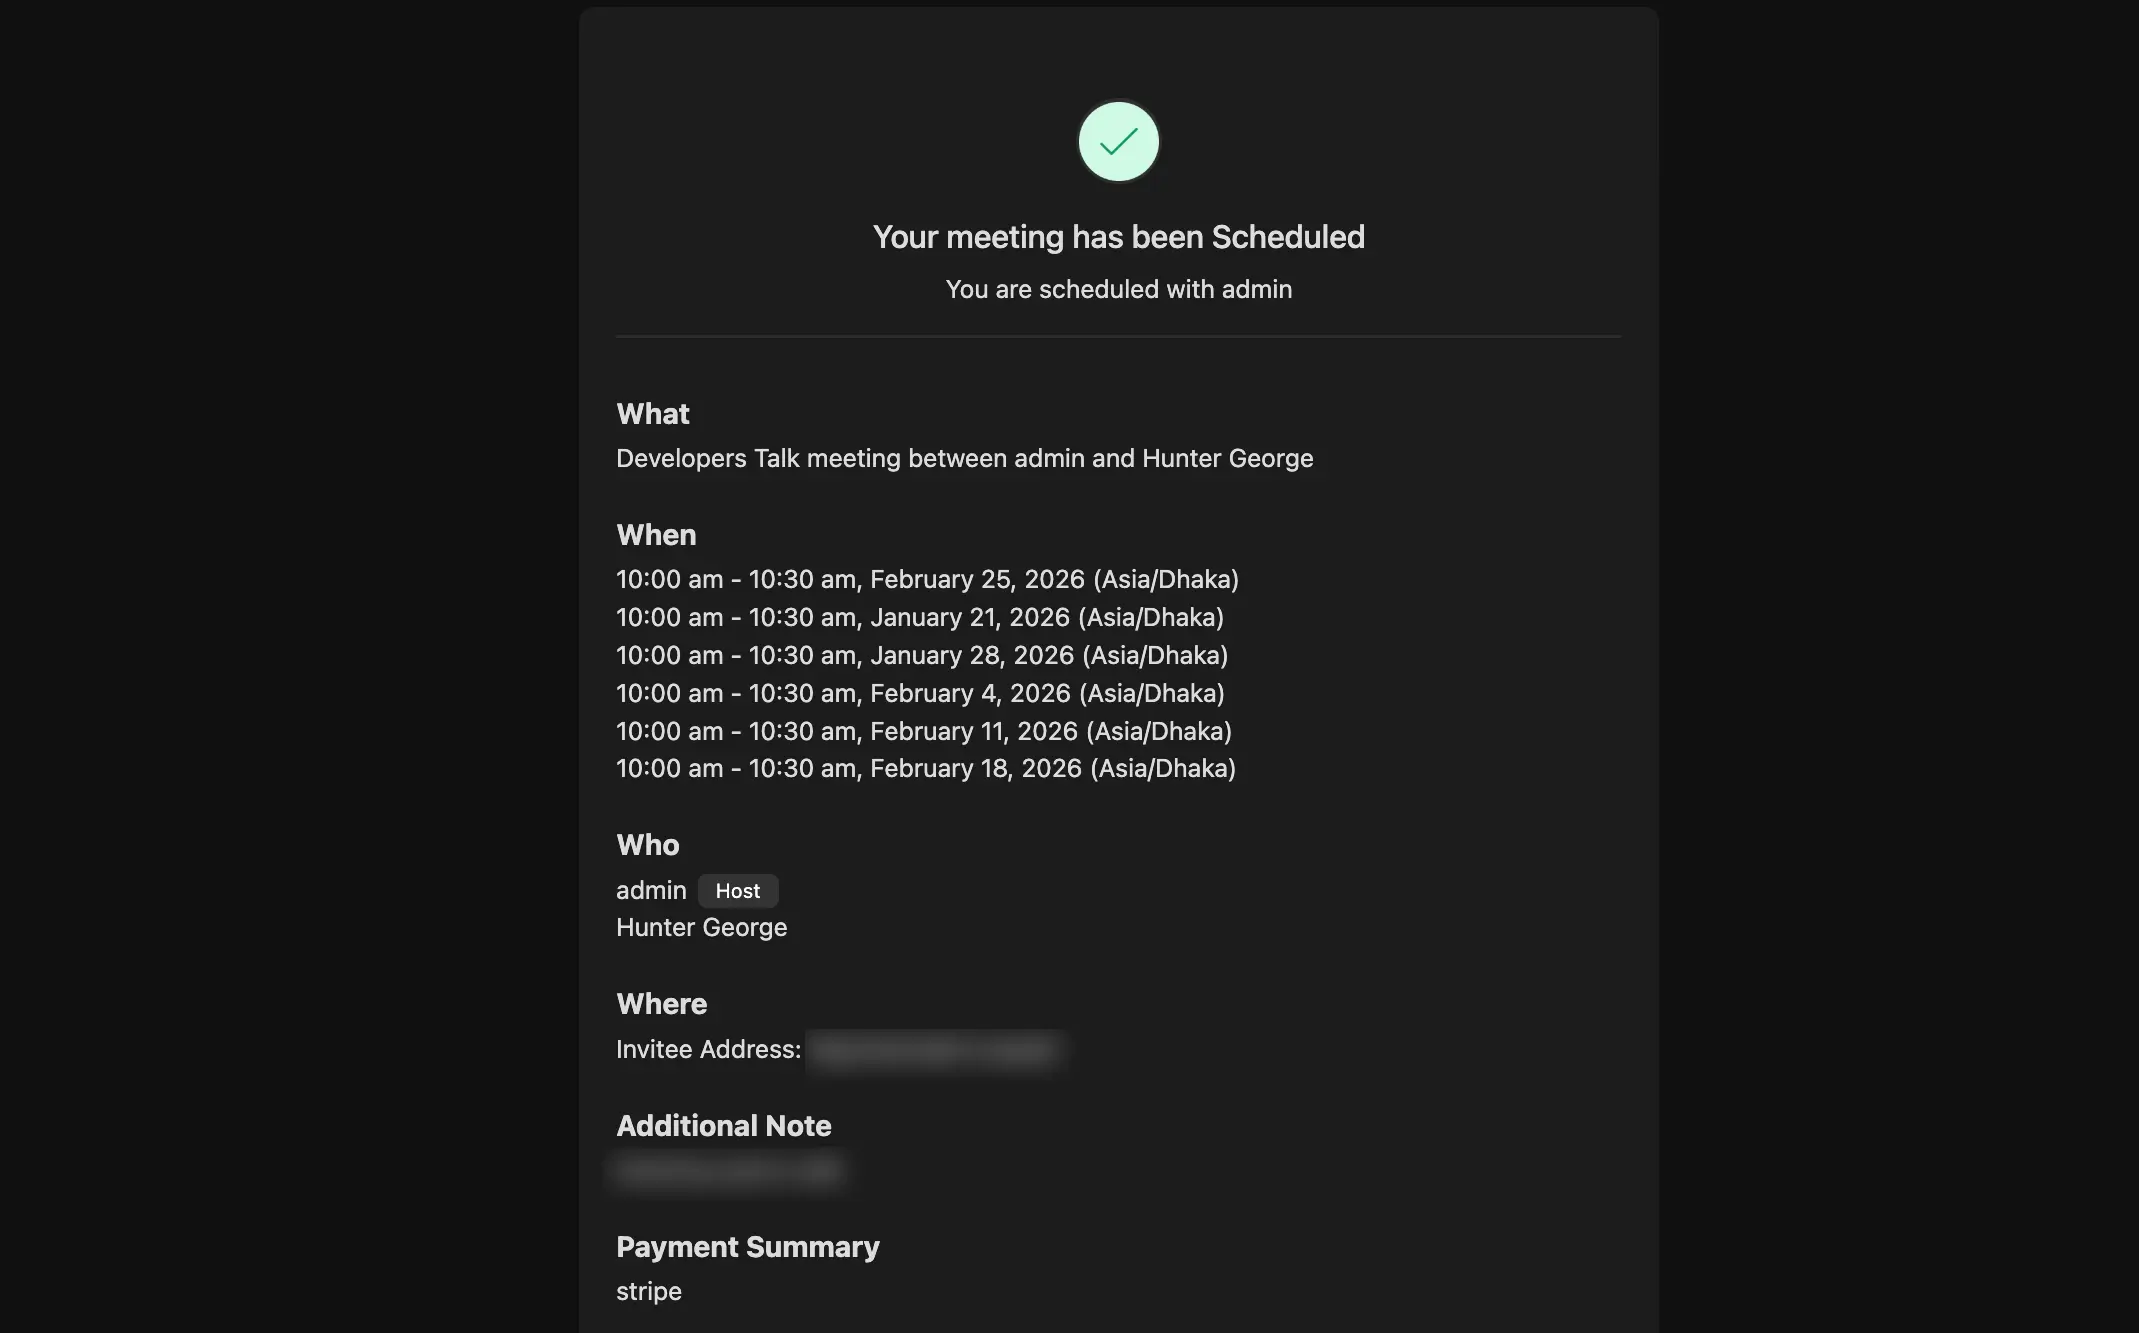
On the Confirmation Page
After they pay or confirm, they won't just see one date. They will see a list of every single appointment date and time scheduled in the series, so they can add them to their personal calendar.