Appearance
Set Up Payments
FluentBooking provides a complete solution to accept payments for your services. You can connect popular gateways like Stripe and PayPal, use WooCommerce, or even accept offline payments. This guide will walk you through the entire process, from initial setup to configuring your first paid event.
NOTE
Payment features are only available in FluentBooking Pro. You’ll need the FluentBooking Pro plugin to use them.
Enable the Global Payment Module
Before you can charge for any event, you must first activate the main payment module.
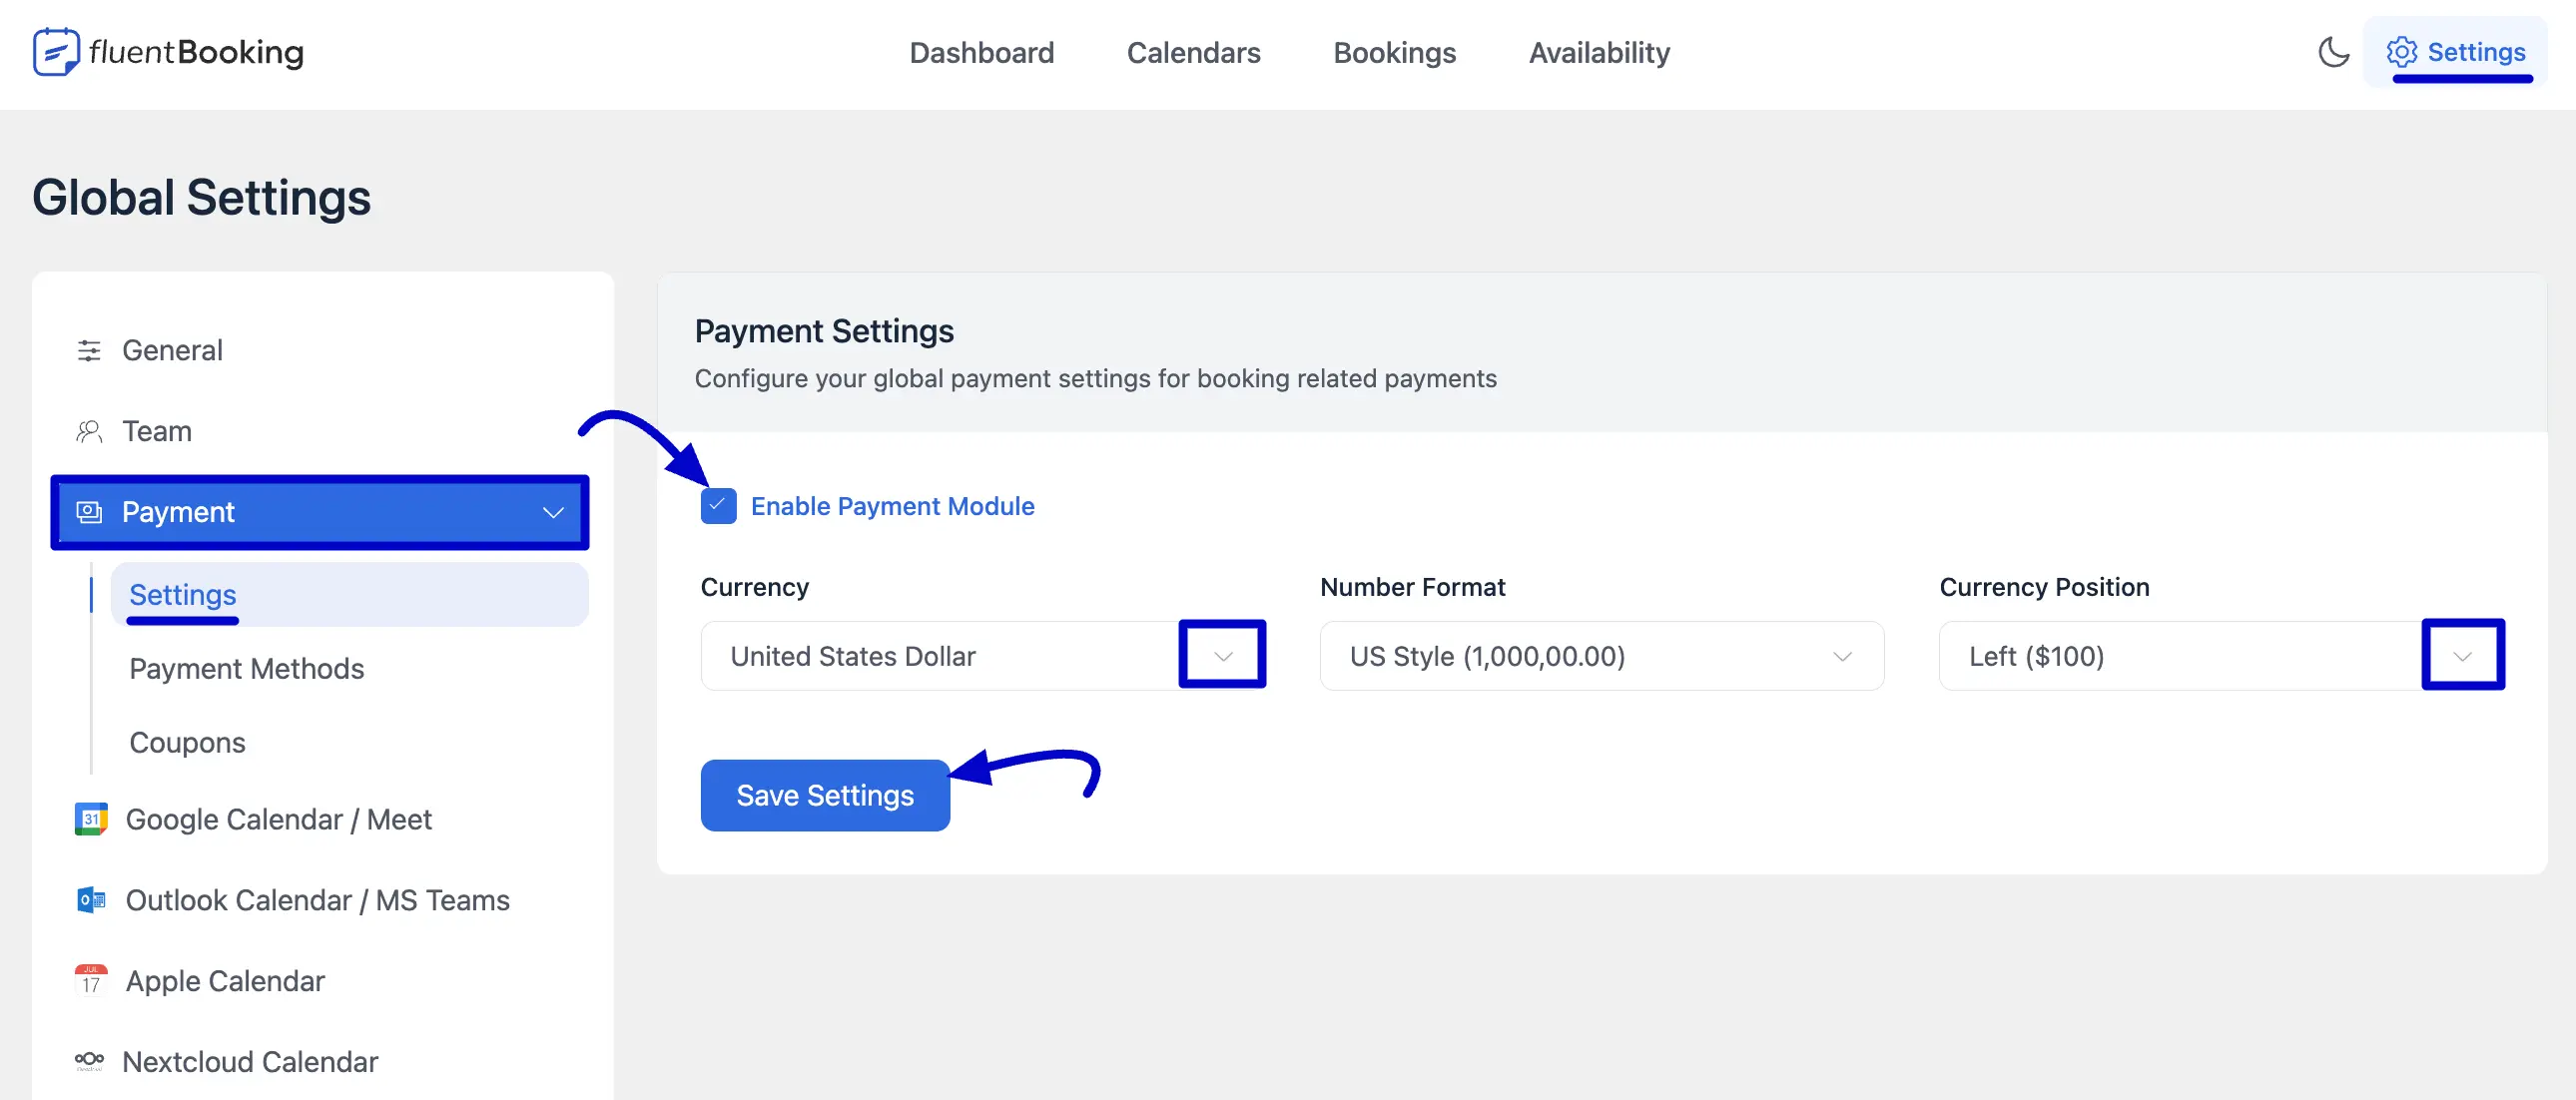
Start by going to the Settings menu at the top of your dashboard. Under General>Payment sections, select Settings, and you will see Payment Settings. Now, switch on the Enable Payment Module option.
After that, configure the global currency settings:
- Currency: Select your business currency.
- Number Format: Choose the style for displaying prices.
- Currency Position: Select where the currency symbol appears (Left, Right, Left Space, and Right Space).
Once that’s done, click the Save Settings button.
Set Up a Payment Gateway
After enabling the module, you must connect at least one payment method to process transactions.
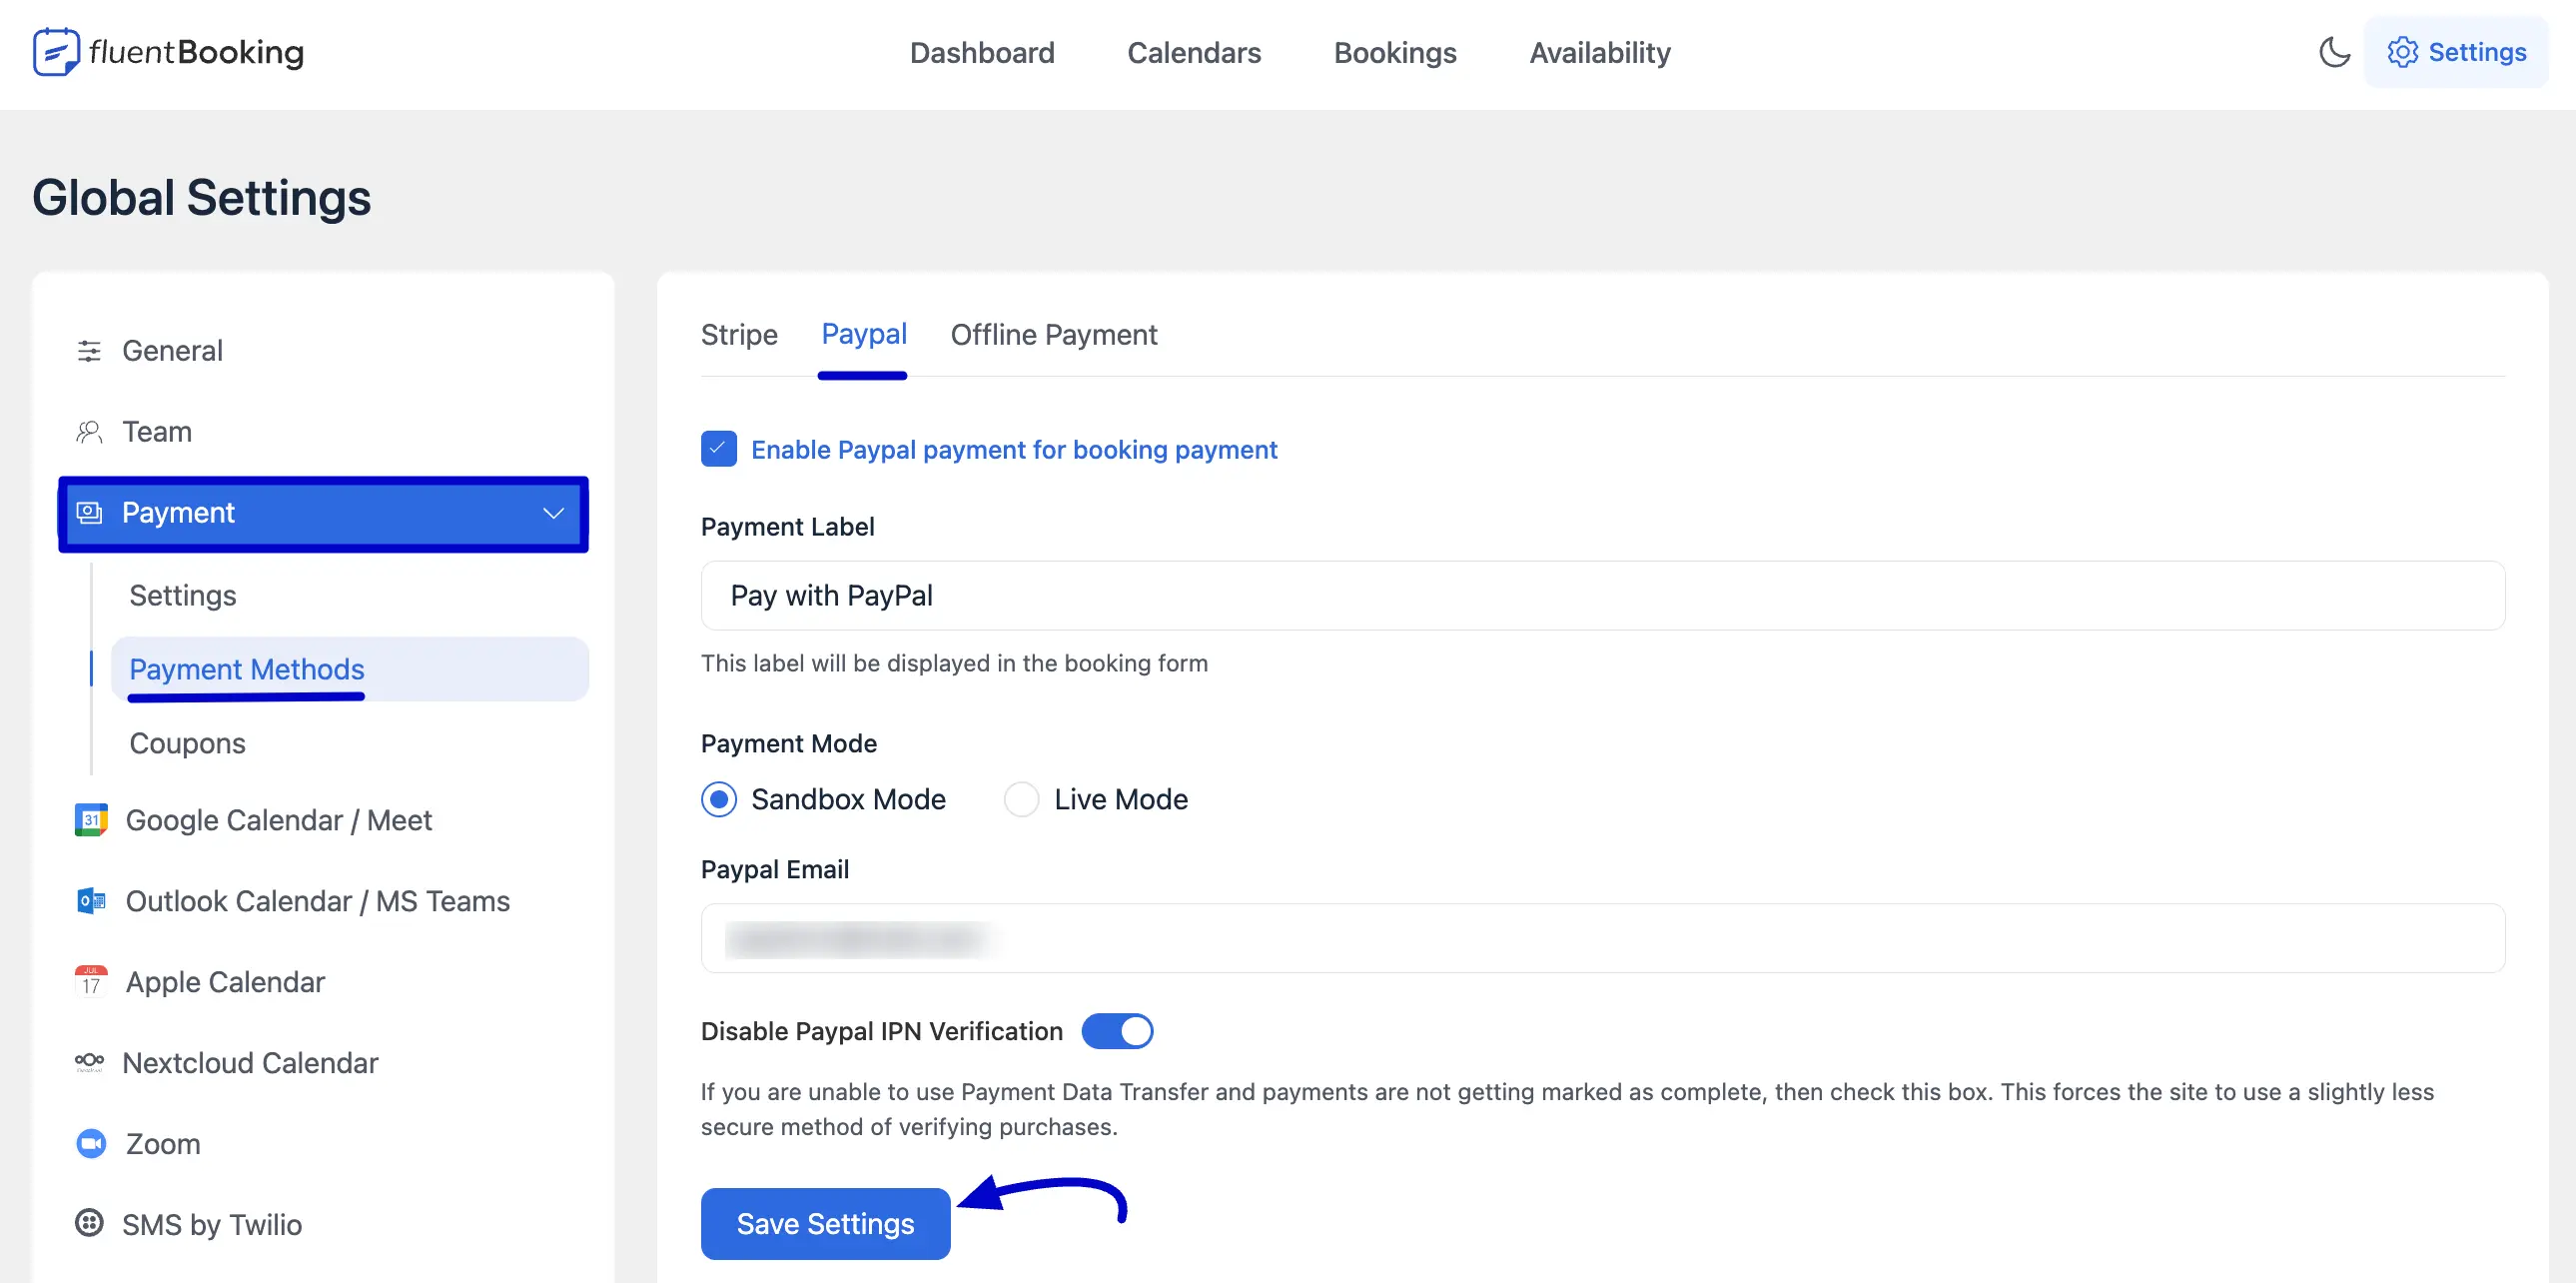
While in the Payment settings, click on the Payment Methods sub-menu. Select the tab for the payment gateway you want to configure: Stripe,PayPal, or Offline Payment.
Fill in the required details for your chosen gateway. For example, to use PayPal, you will need to enable it, set the payment mode, and enter your PayPal email address. Click the Save Settings button.
For detailed instructions on each gateway, please see our guides:
- How to set up Stripe Payment with FluentBooking
- How to set up PayPal Payment with FluentBooking
- How to set up Offline Payment with FluentBooking
- How to use Multiple Payment Methods in one Booking
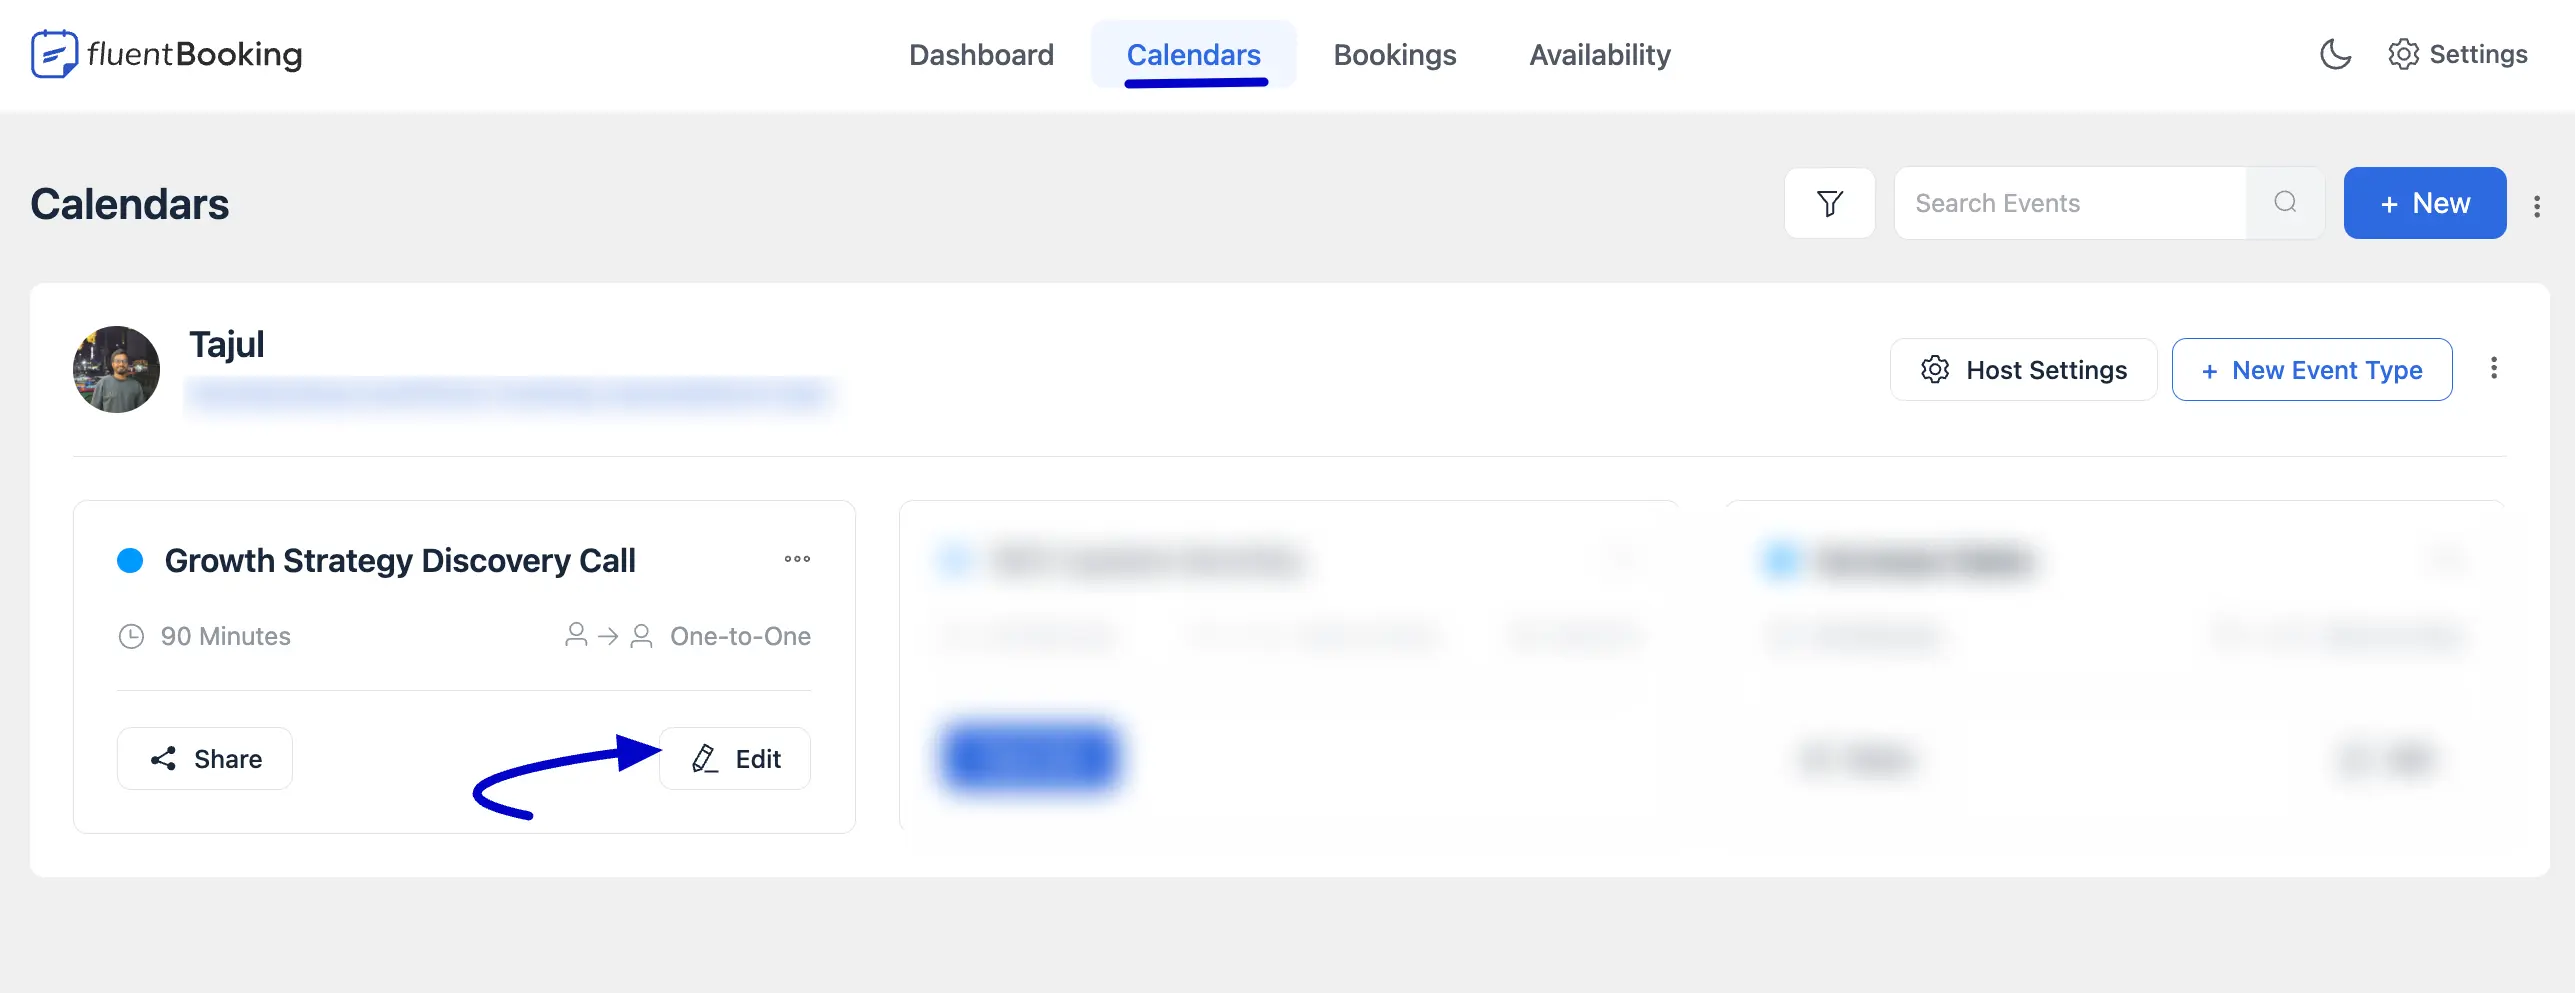
Configure Payments for an Event
To set up payments for a specific booking, click the Calendars section in your FluentBooking dashboard. Find the booking you want to update, then click the Edit button.
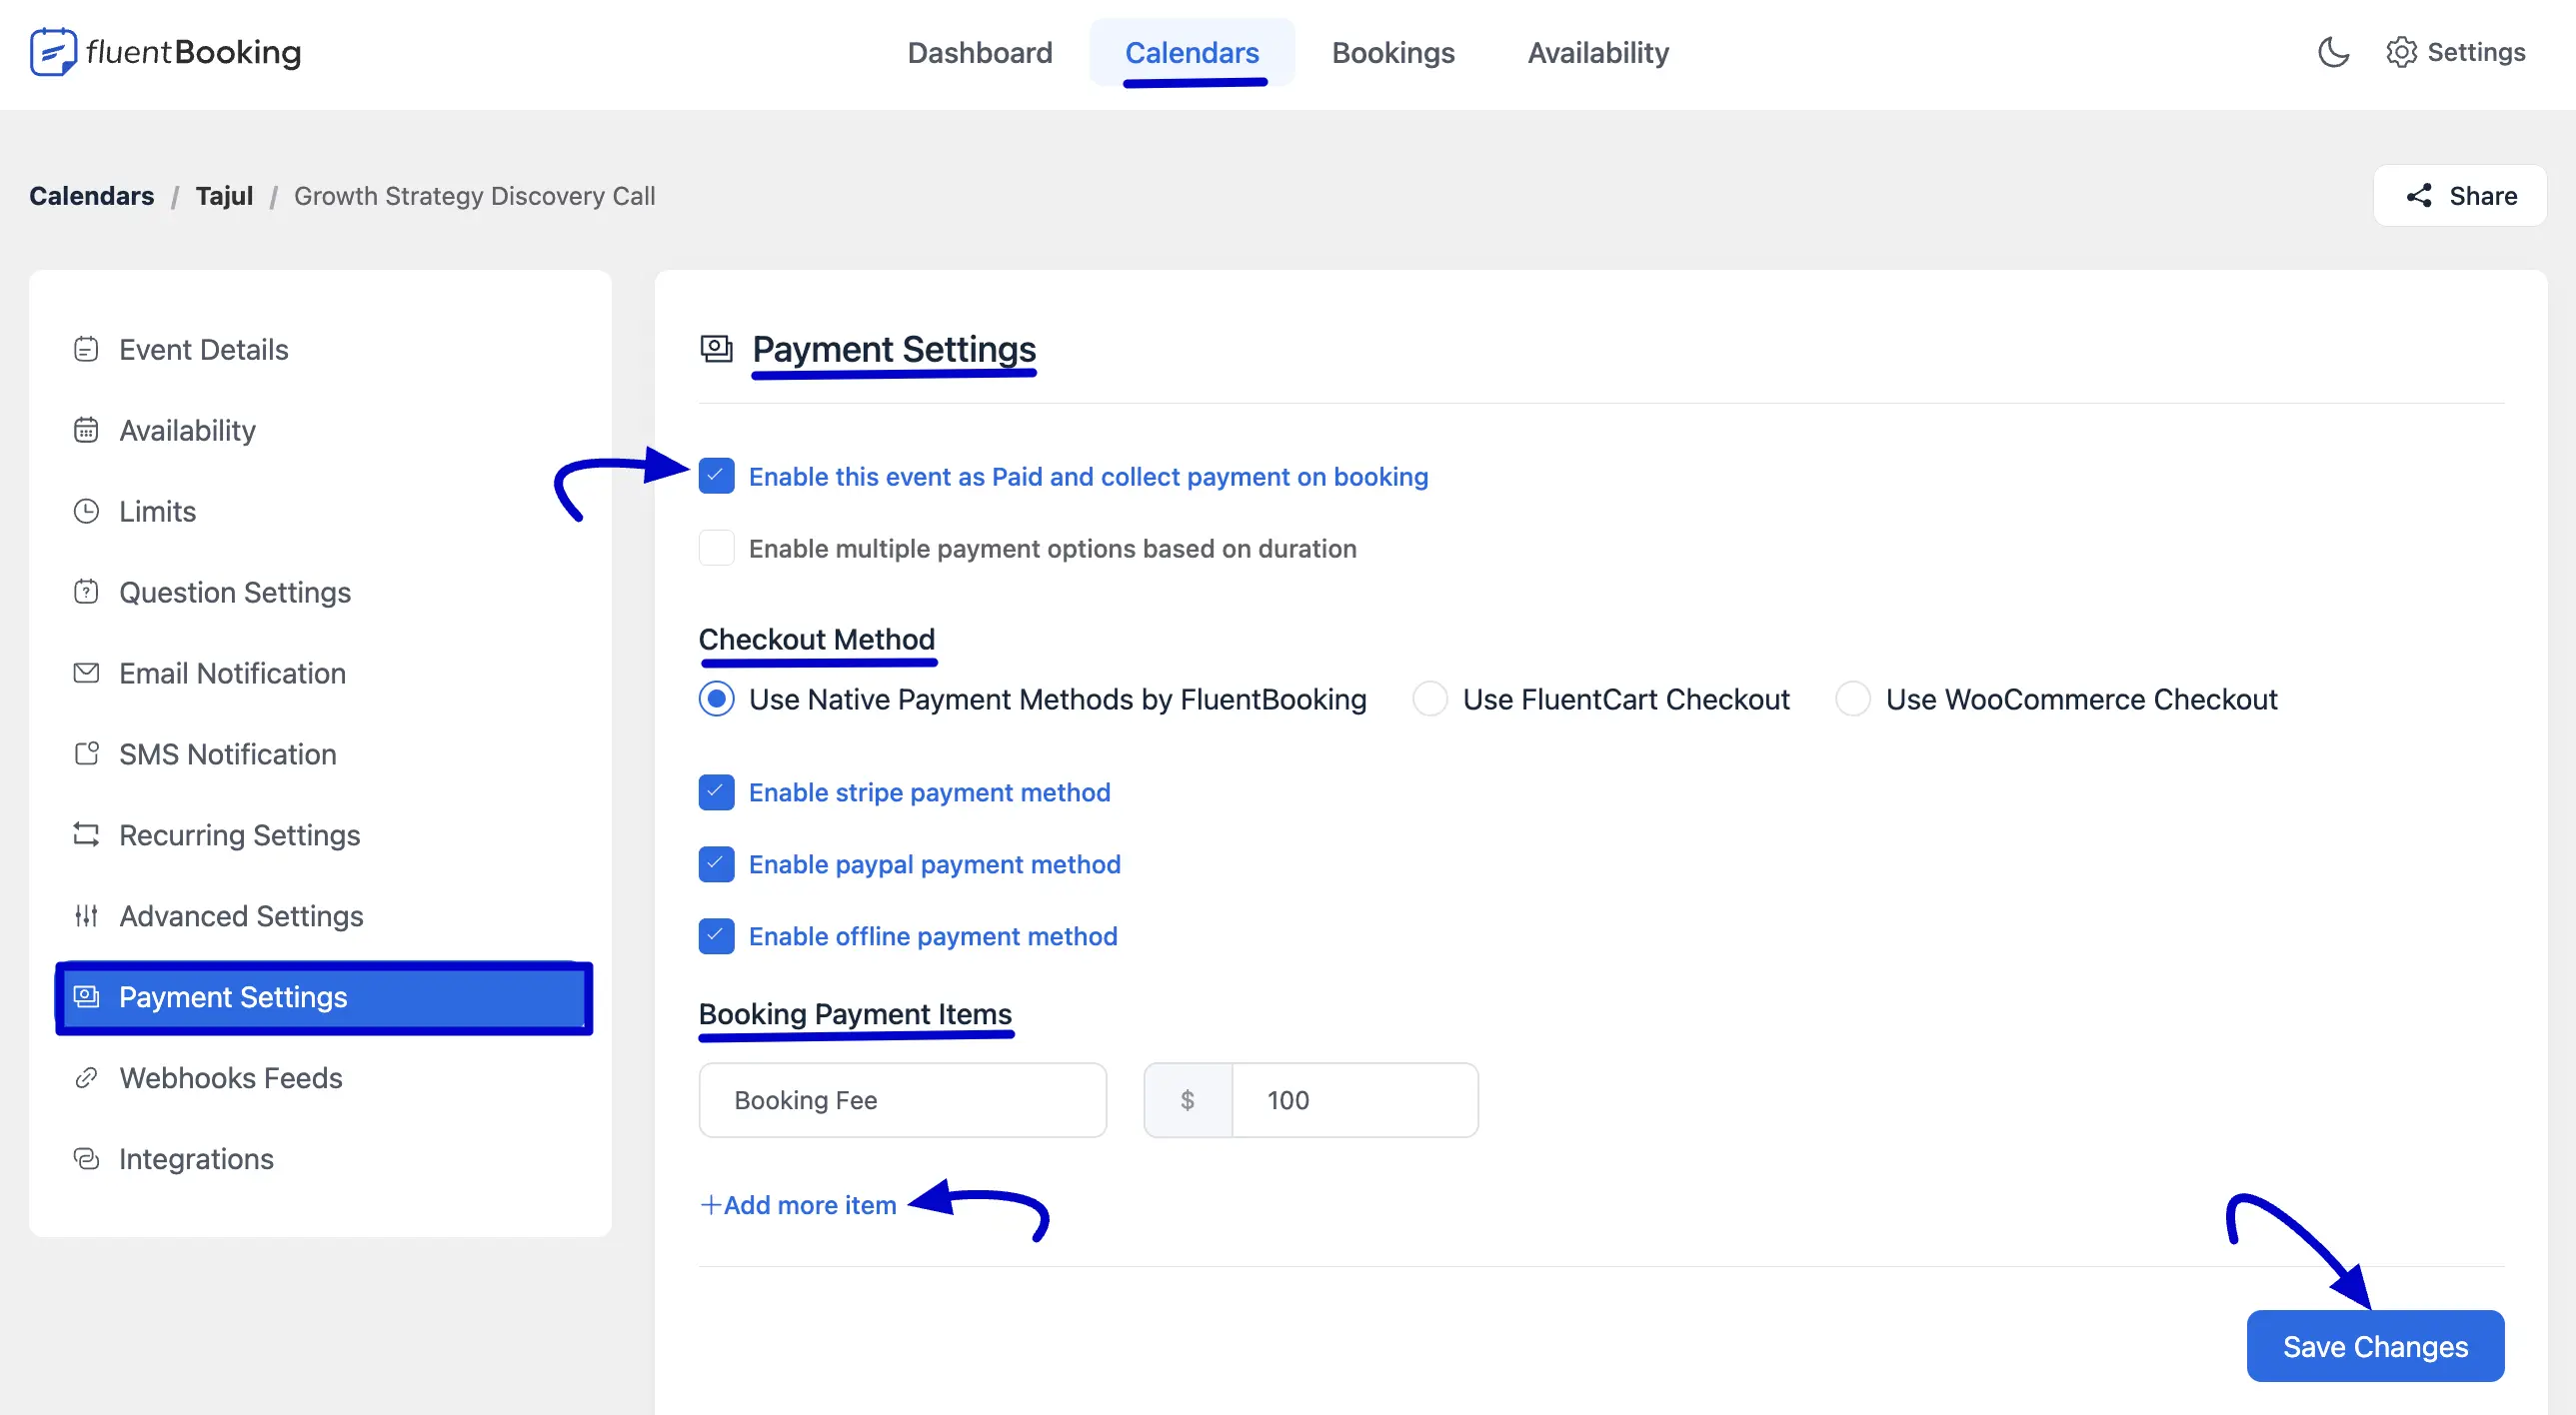
Now, select the Payment Settings option and choose the checkbox that says Enable this event as Paid and collect payment on booking.
After that, you will see two payment Checkout Methods. Choose one option for your event Booking.
Use Native Payment Methods by FluentBooking
FluentBooking lets you accept payments using built-in options like Stripe,PayPal, or even Offline payments.
Once you’ve selected your preferred payment method, head to the Booking Payment Items section. Here, you can enter the name of your service or items and set the price.
If you need to add more services or items, click the Add More Item button and fill in the details. After setting everything up, click the Save Changes button to save your settings.
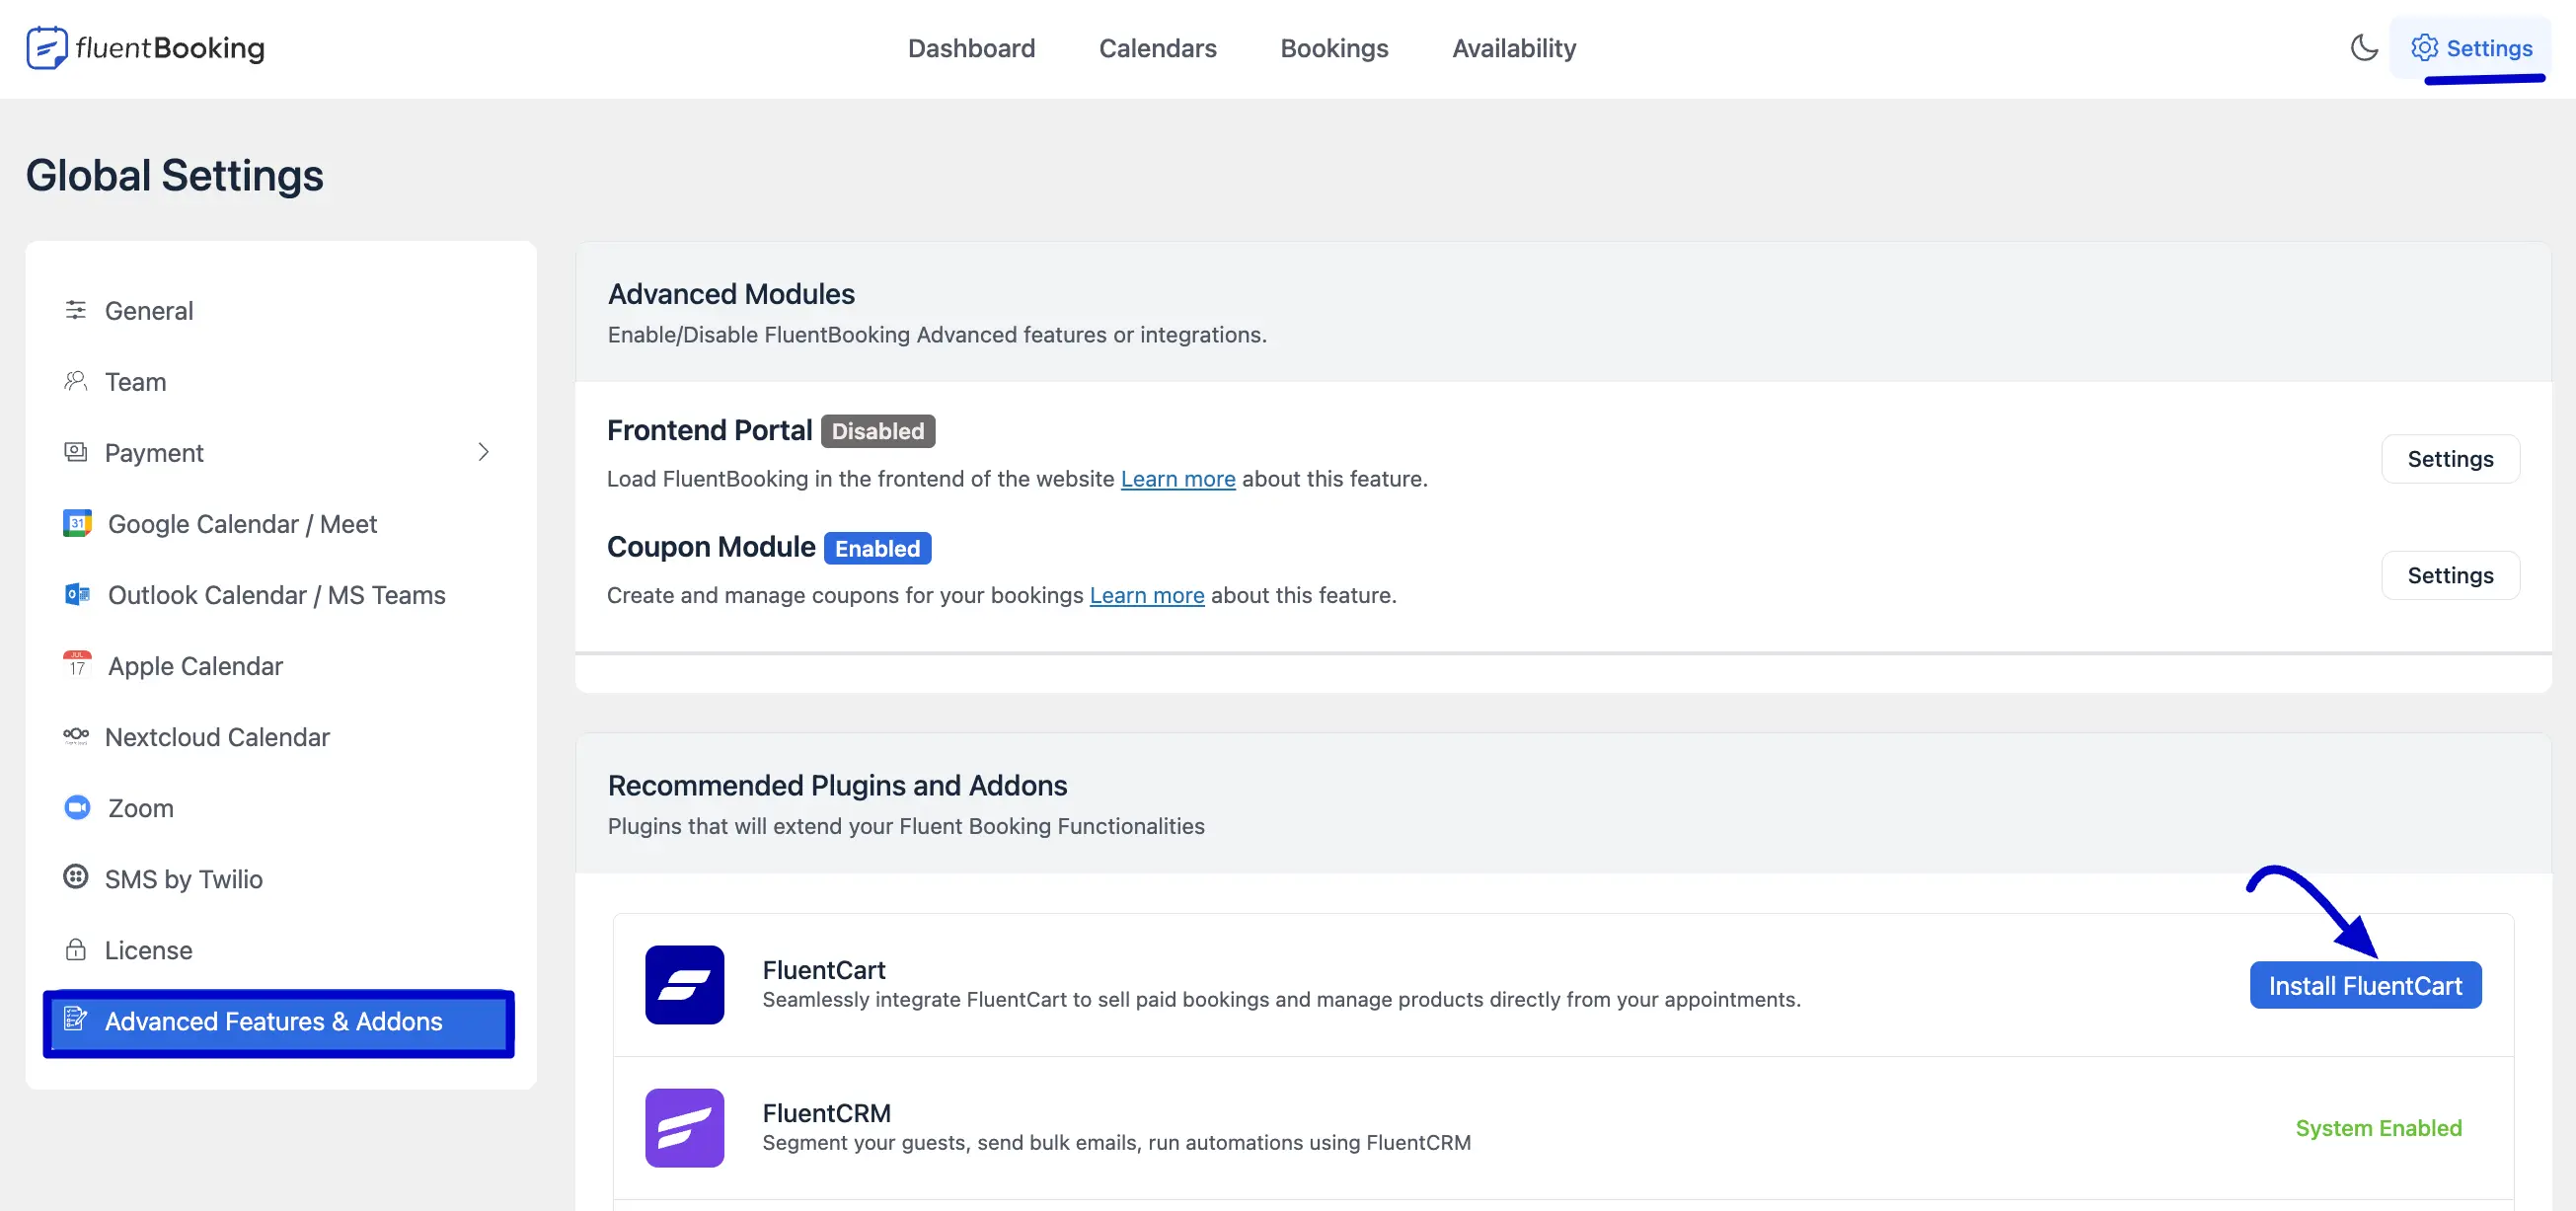
Use FluentCart Checkout (Recommended)
If you want a modern, high-converting checkout experience, use the FluentCart integration. You must have the FluentCart plugin installed and activated to use this feature.
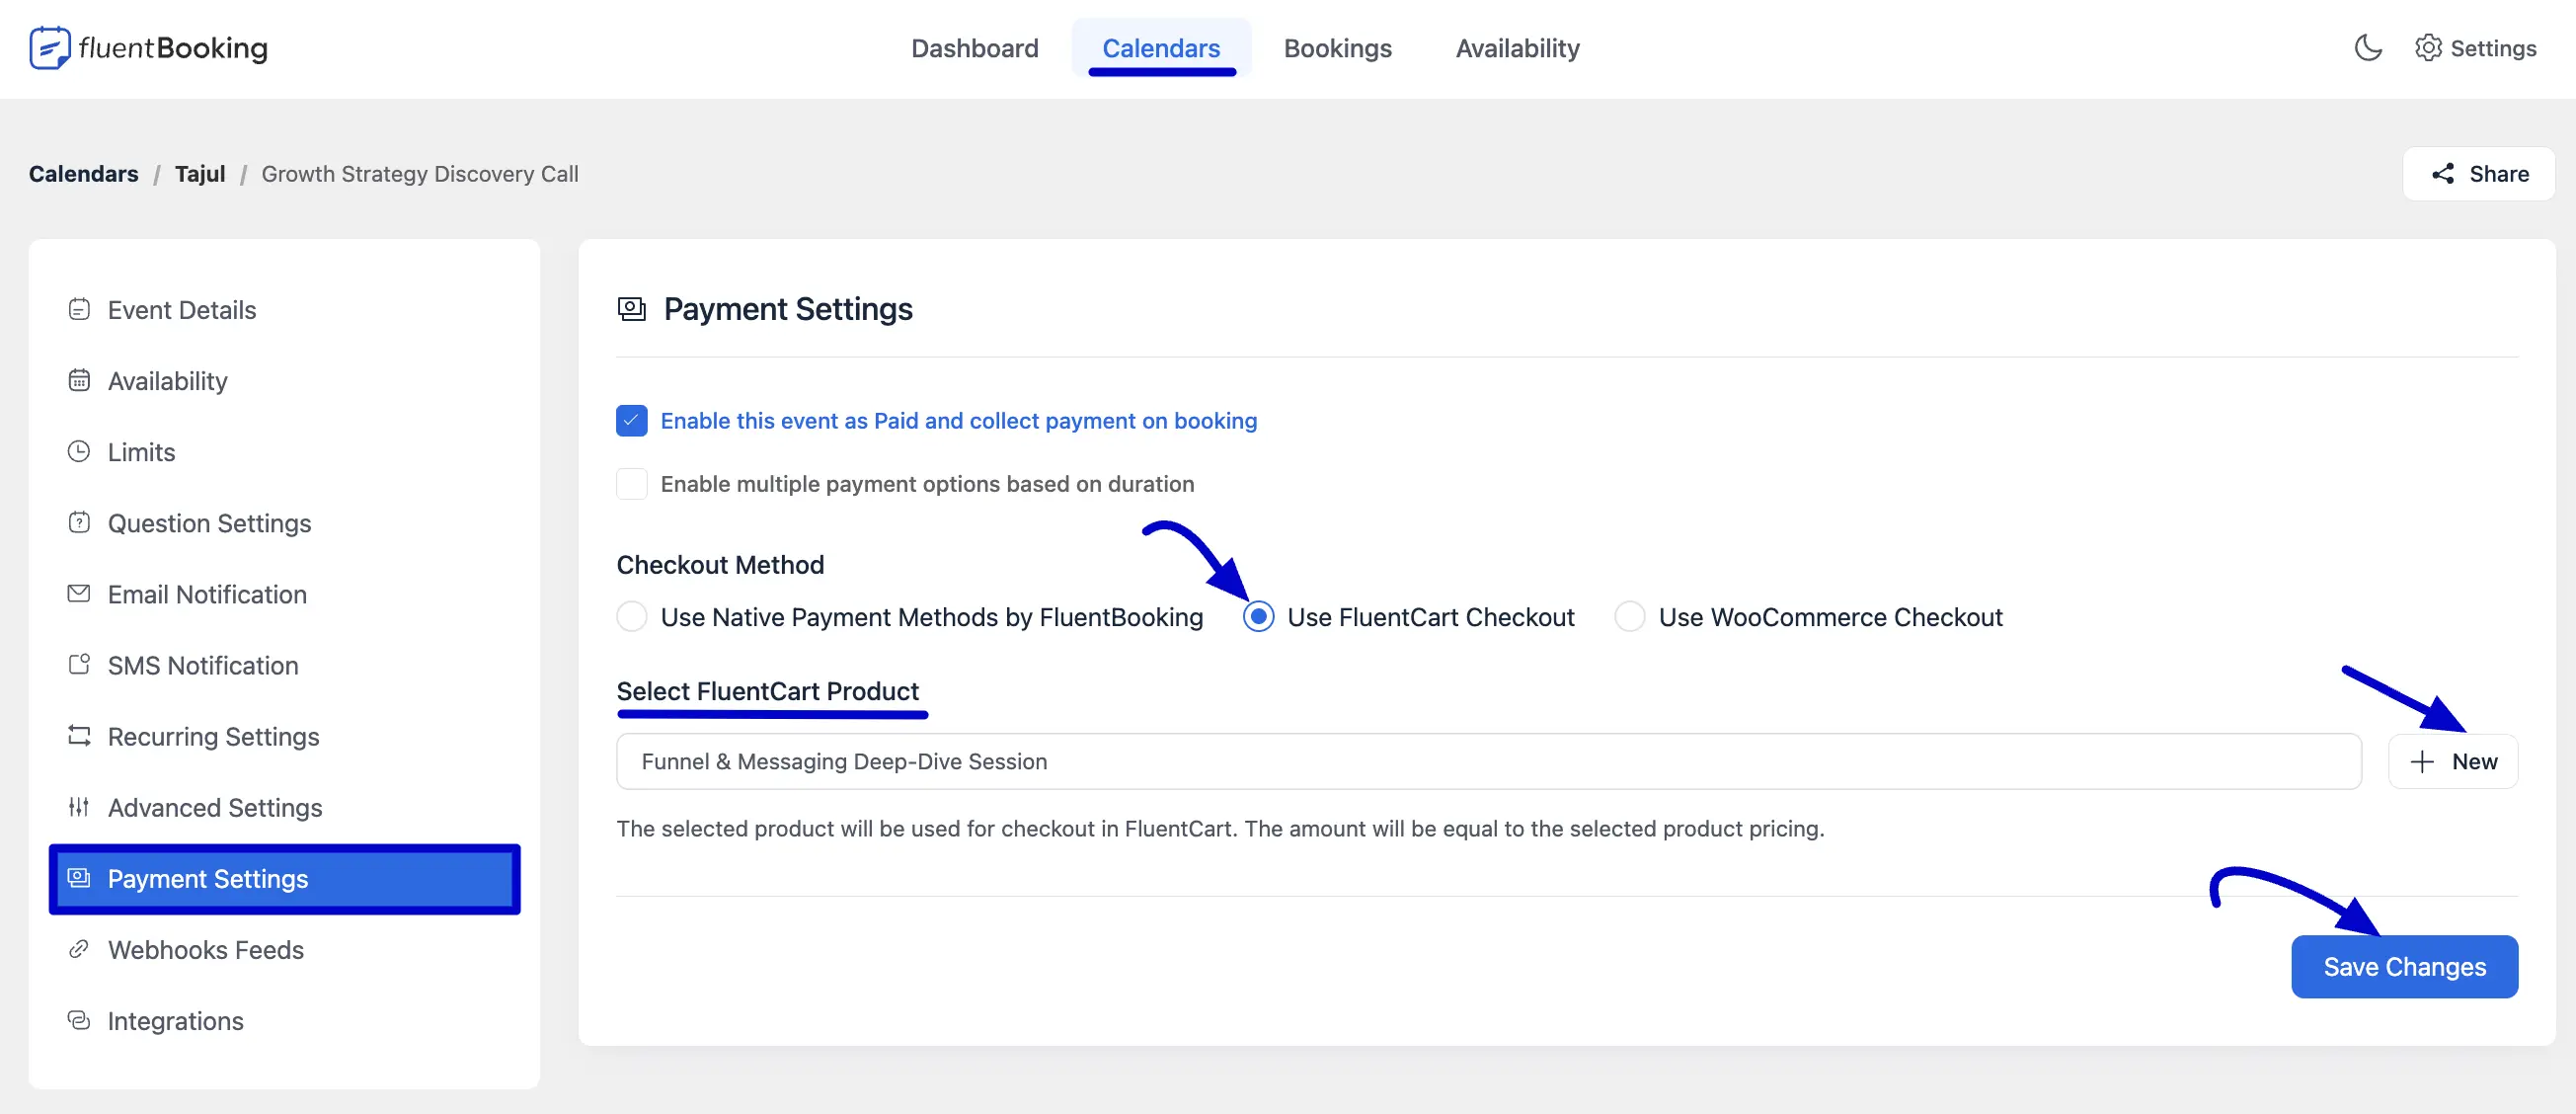
Now, select Use FluentCart Checkout from the Checkout Method options. Choose from your existing FluentCart Products. The booking price will automatically sync with the product price set in FluentCart.
This method allows you to leverage FluentCart’s advanced features like Order Bumps and Coupons. You can also create new product by clciking the +New button.
After that, click Save Changes button to finalize.
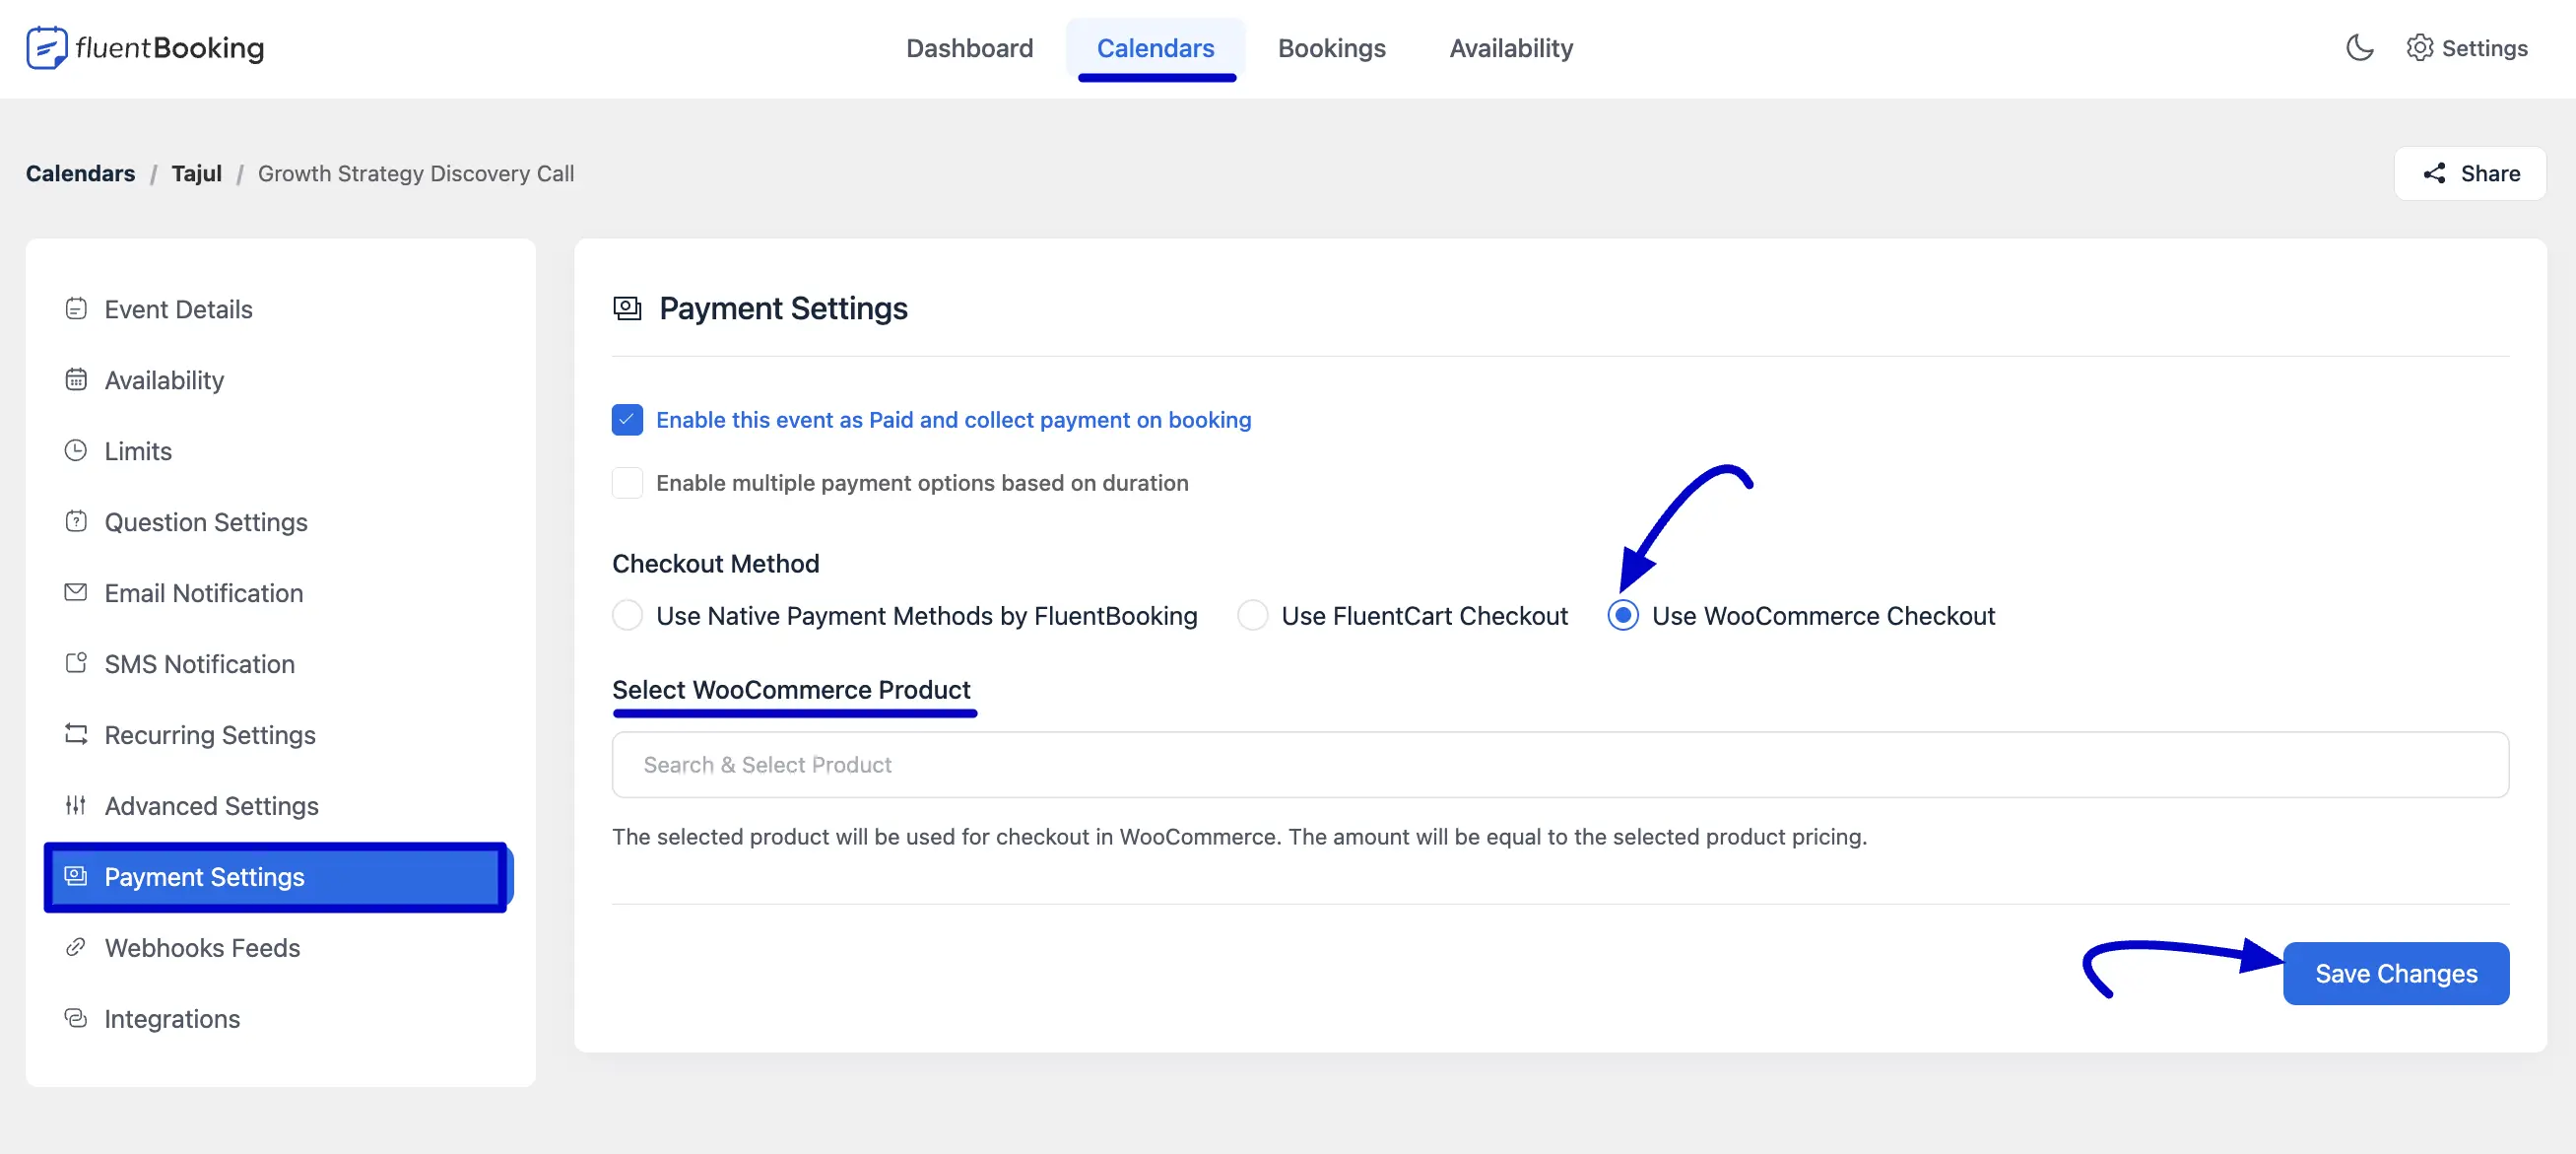
Use WooCommerce Checkout
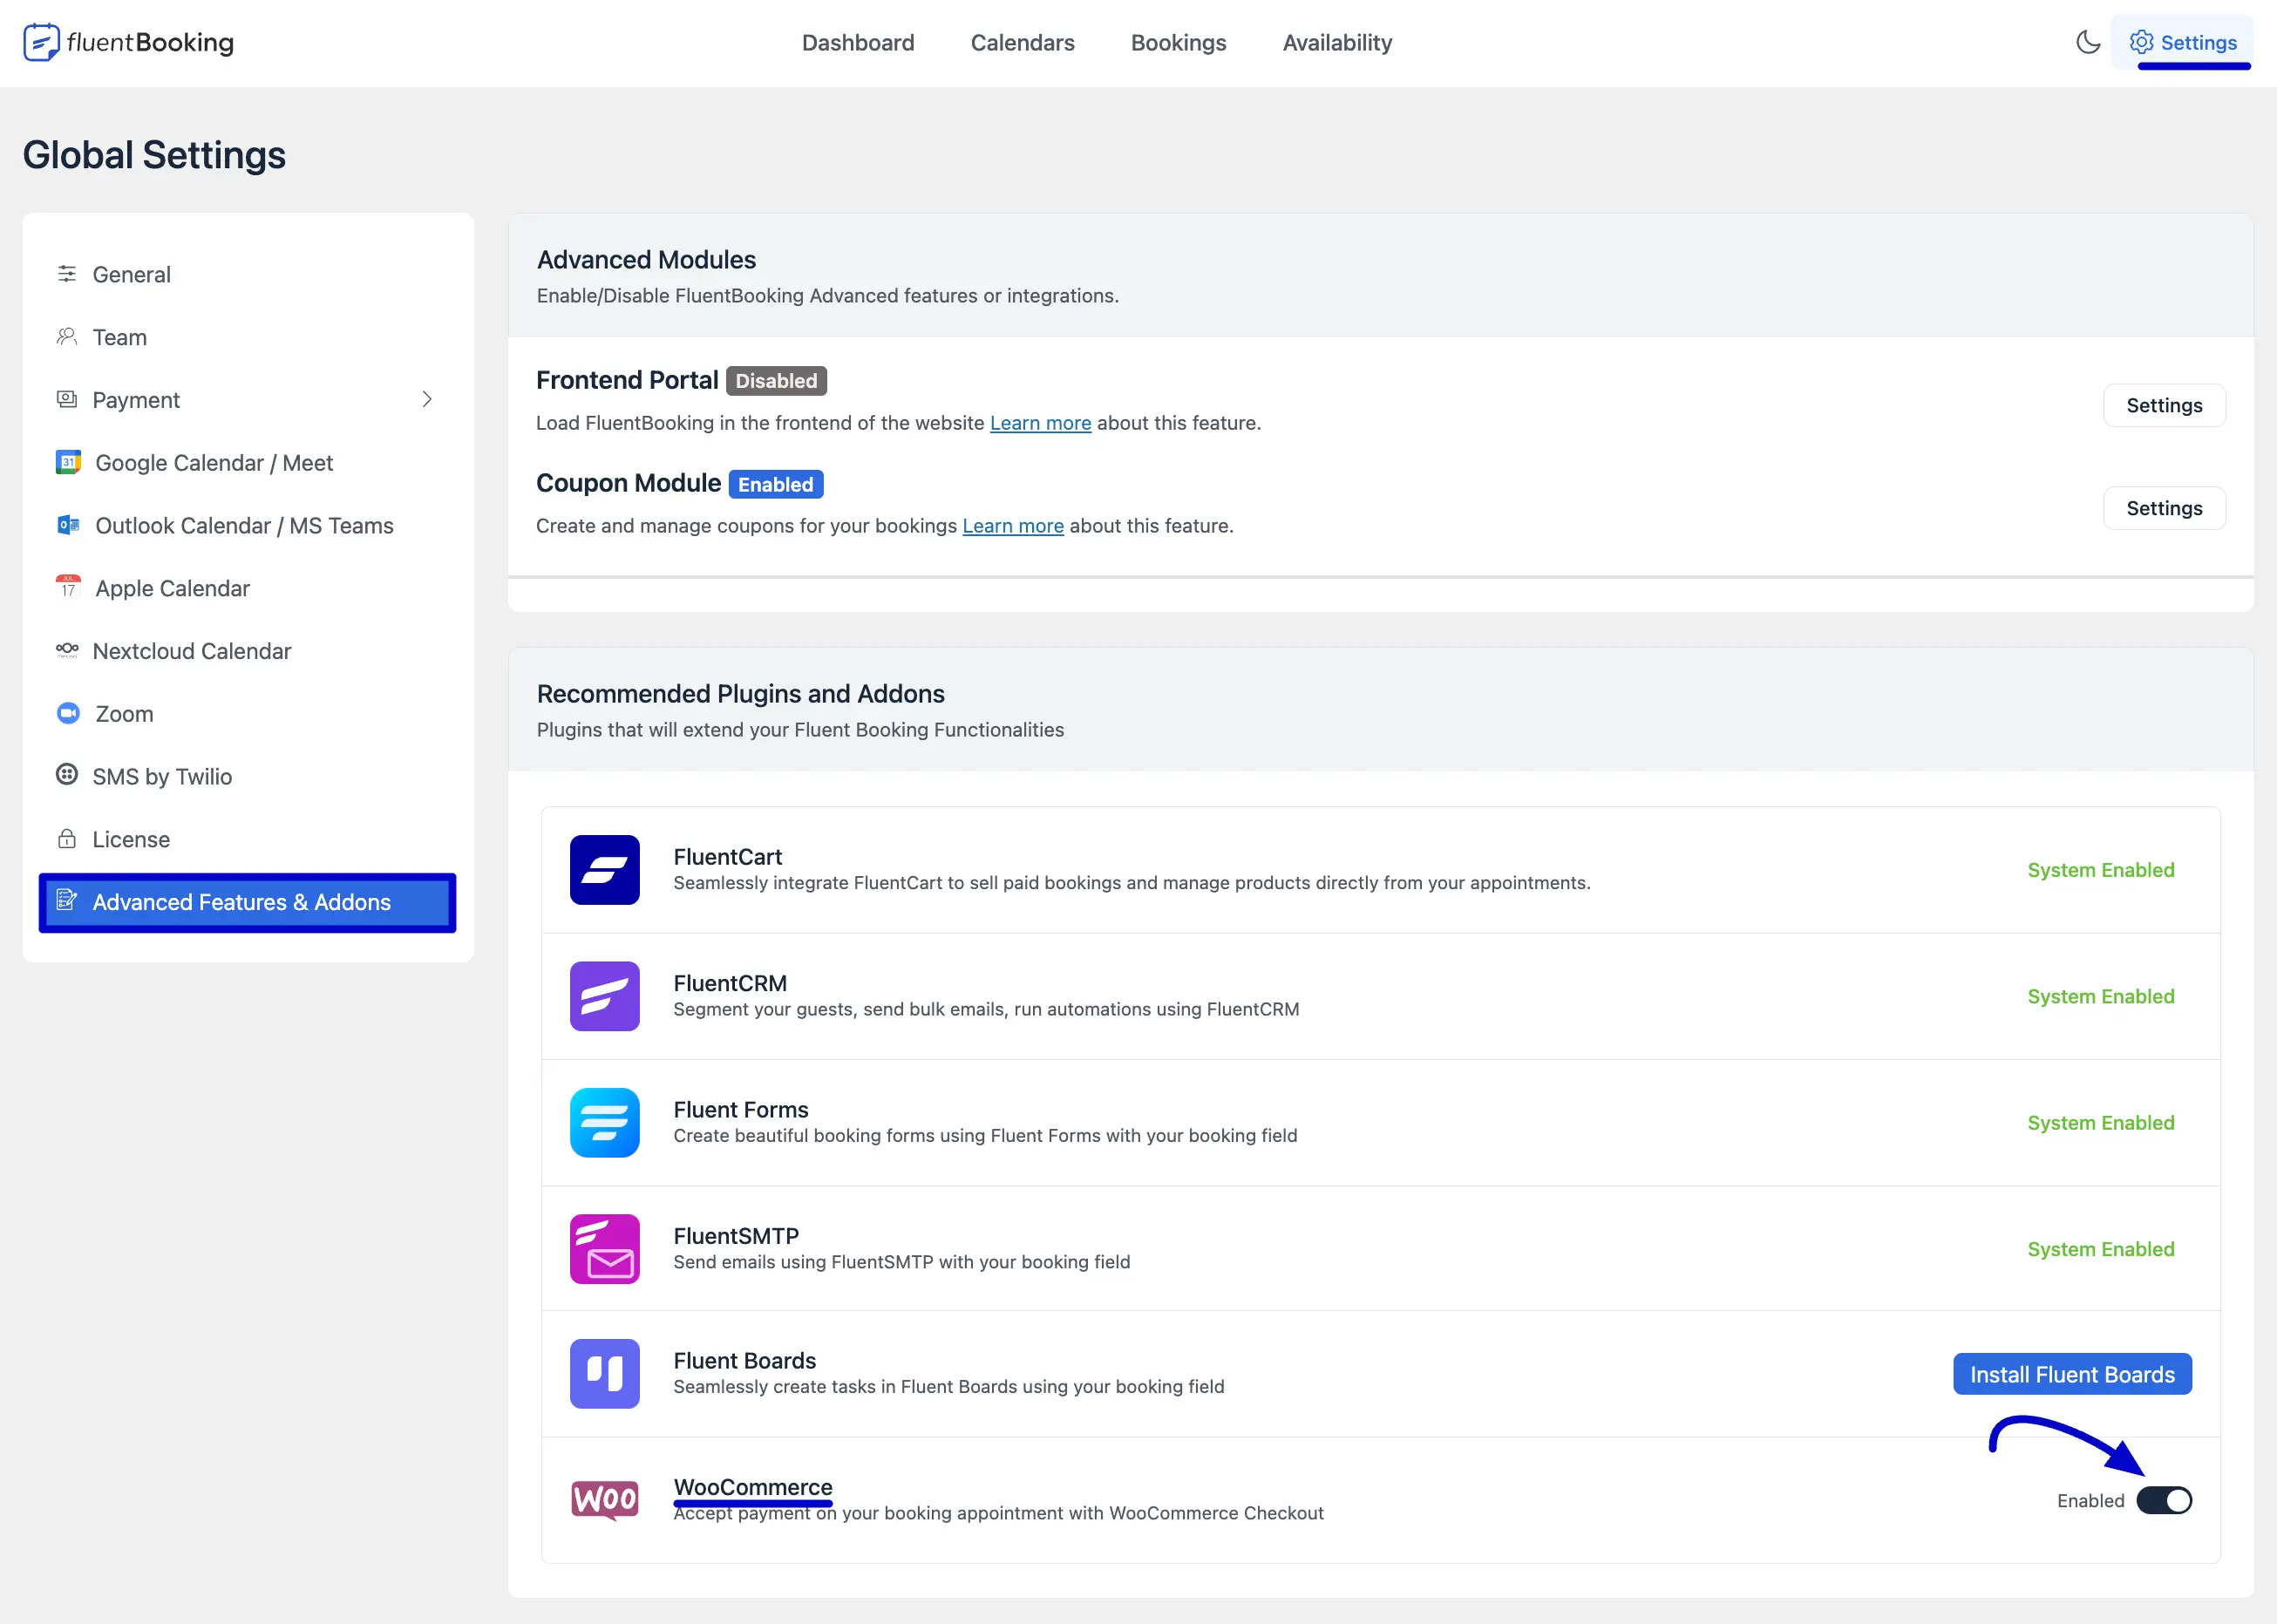
If you’d like to use WooCommerce Checkout to accept payments for your bookings, you’ll first need to enable the WooCommerce Addon.
To do this, go to Settings from the top menu, then scroll down and click on Advanced Features & Addons on the left side. Find the WooCommerce option and turn it on by clicking the Radio button.
Now, go back to your booking event and select Use WooCommerce Checkout. You can only choose from existing products in your WooCommerce store. The booking price will match the product price in your store.
When all is done, click the Save Changes button.