Appearance
Stripe Integration with FluentBooking
FluentBooking seamlessly integrates with Stripe to provide a secure and reliable way to accept credit card payments for your bookings. This guide will walk you through the simple process of connecting your Stripe account.
The Stripe Payment feature is only available in FluentBooking Pro. You’ll need the FluentBooking Pro plugin to access this feature.
Accessing the Stripe Payment Method
Before proceeding, make sure the main Payment Module is enabled.
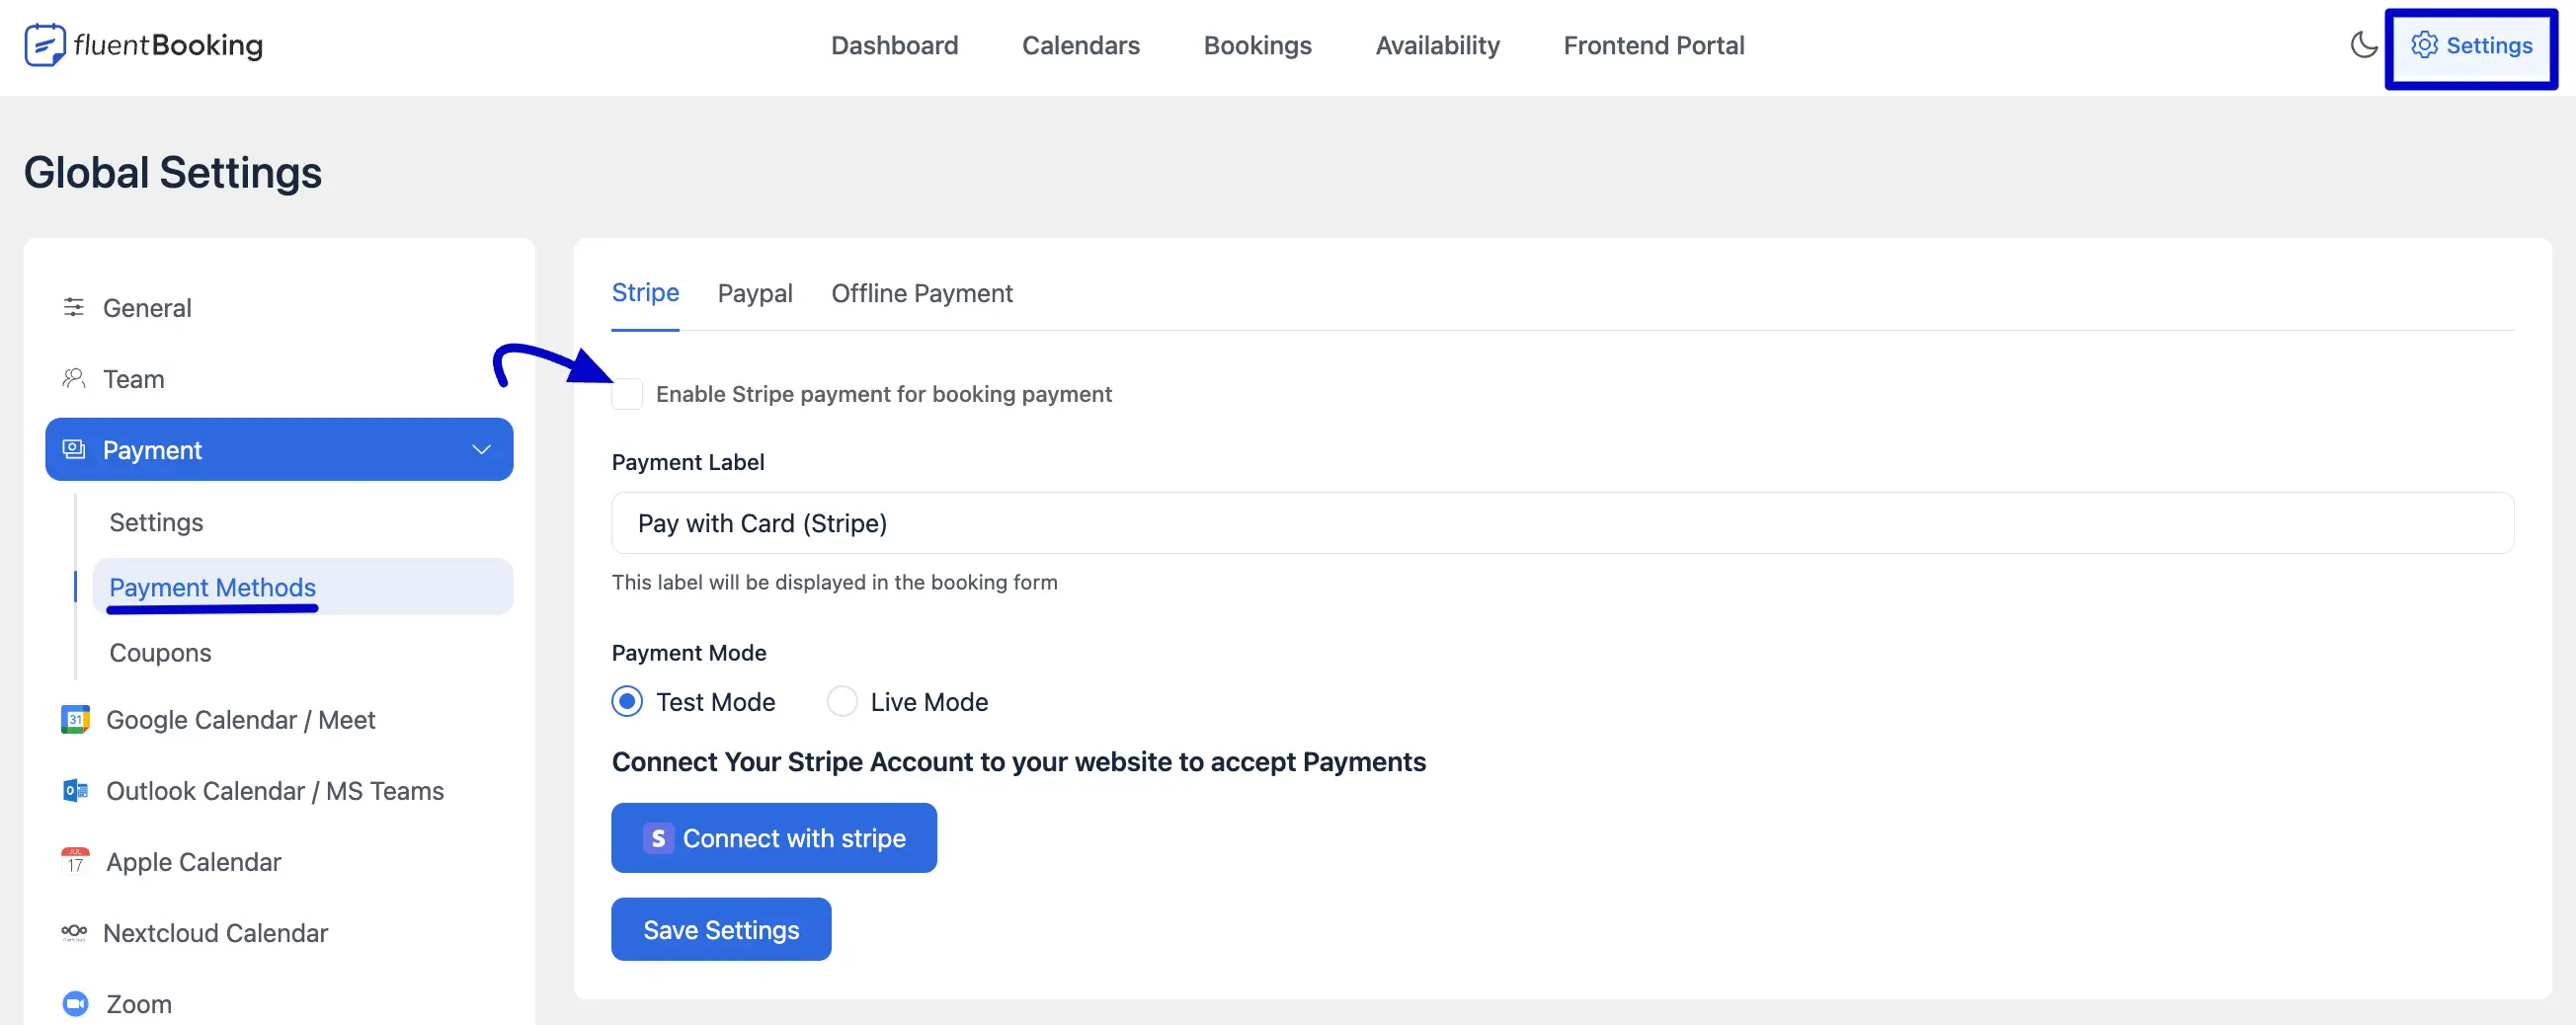
First, you need to locate the Stripe configuration area within your dashboard. From your WordPress dashboard, go to Fluent Booking → Settings. Click on the Payment tab from the left-hand menu. Select the Payment Methods sub-menu. Click on the Stripe tab to open the integration settings.
Configuring and Connecting Stripe
Follow these steps to enable and authorize the connection to your Stripe account.
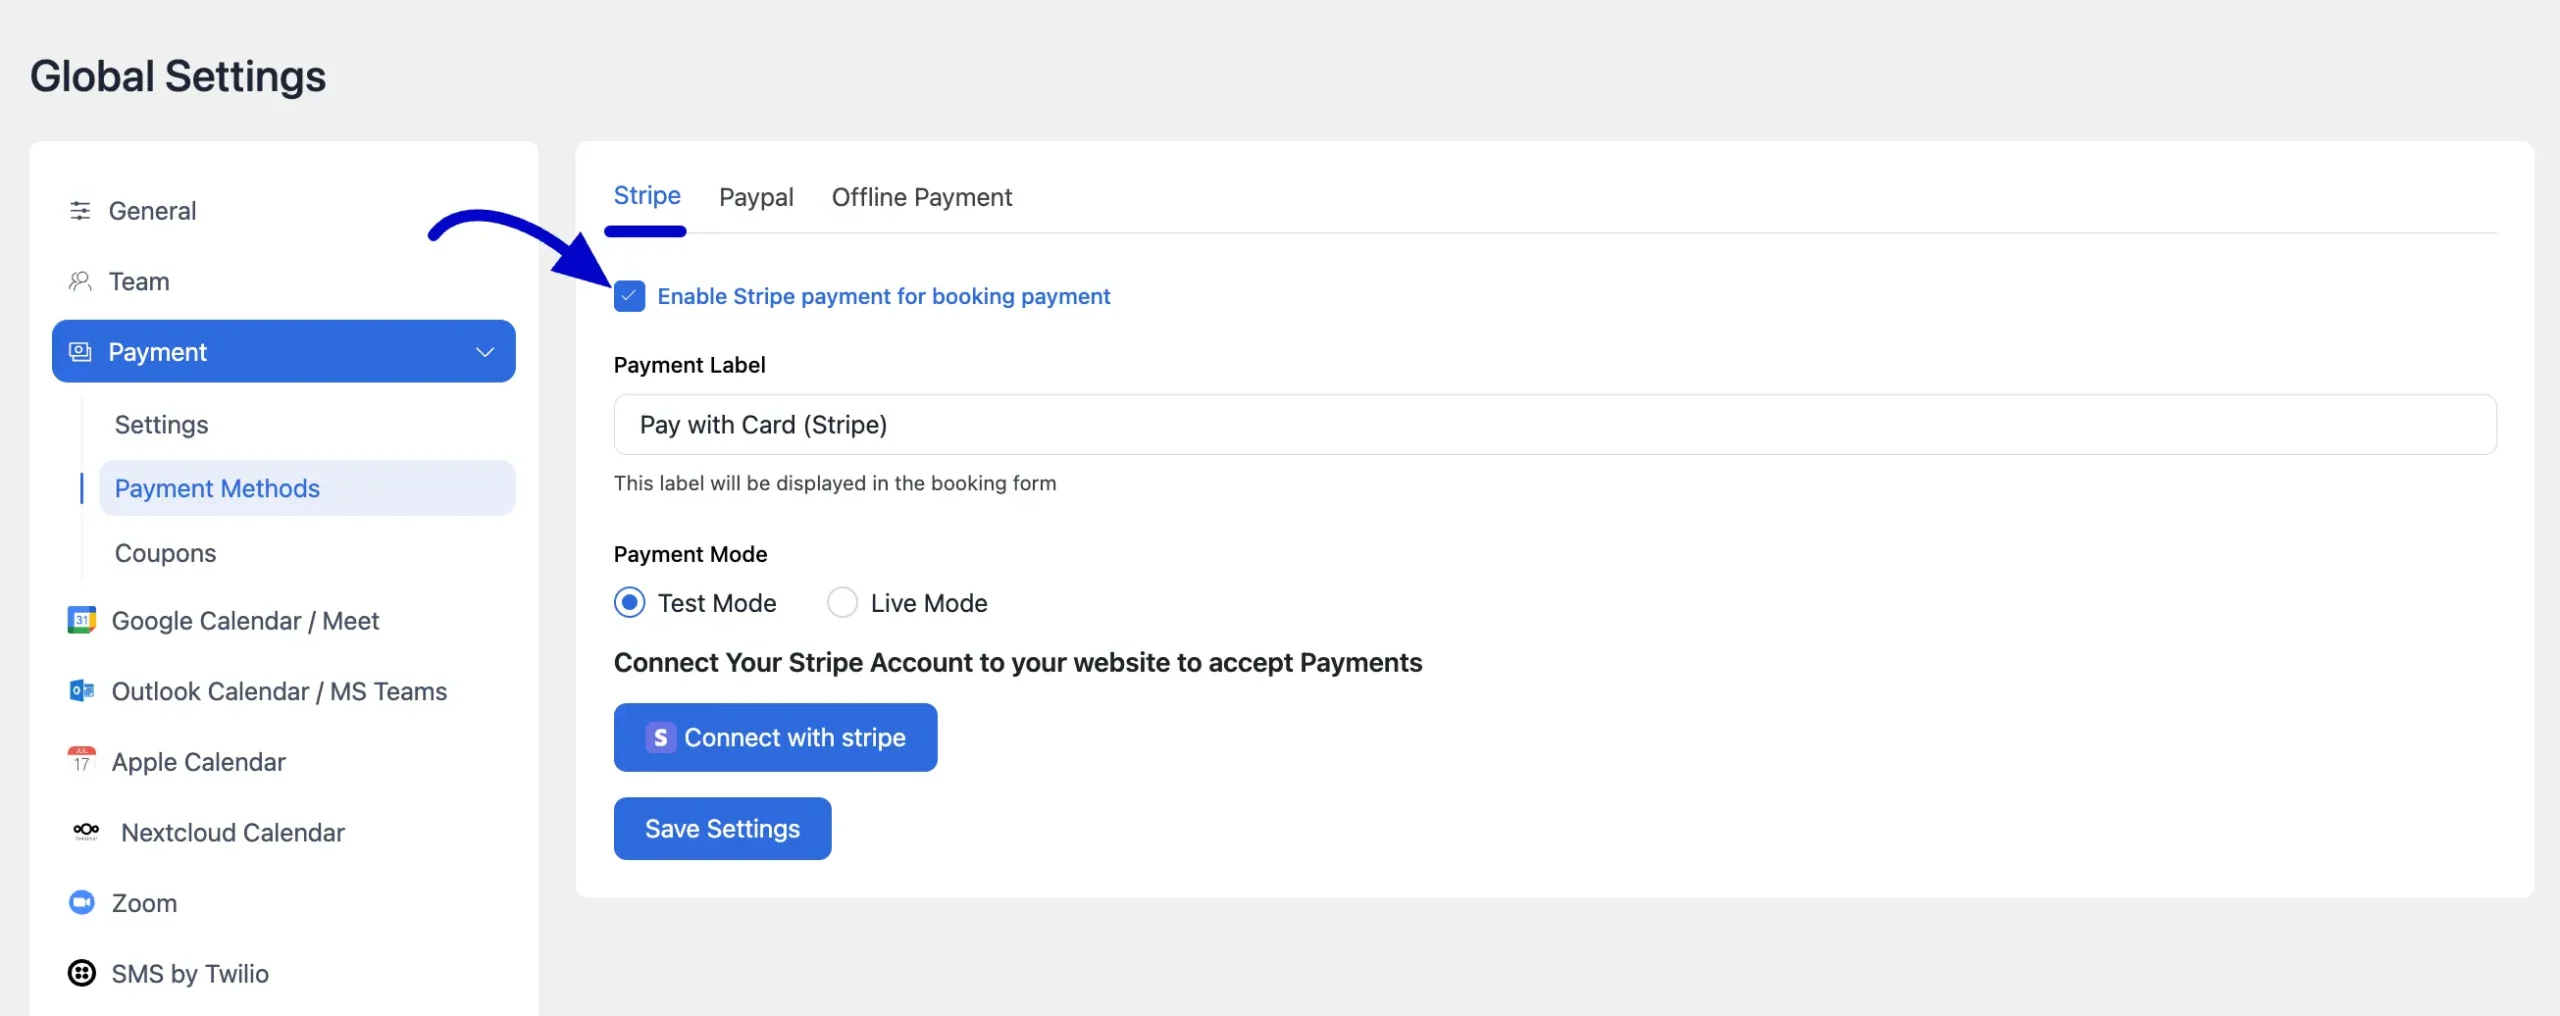
- Enable Stripe: Check the box labeledEnable Stripe payment for booking payment.
- Payment Label: You can customize the text your clients will see on the booking form. The default is "Pay with Card (Stripe)".
- Payment Mode: Choose your desired payment mode.
- Test Mode: Select this to perform test transactions and ensure the integration is working correctly without processing real payments.
- Live Mode: Select this when you are ready to accept actual payments from your clients.
Connect Your Account: Click the Connect with Stripe button. You will be redirected to the official Stripe website.
Connecting with Stripe
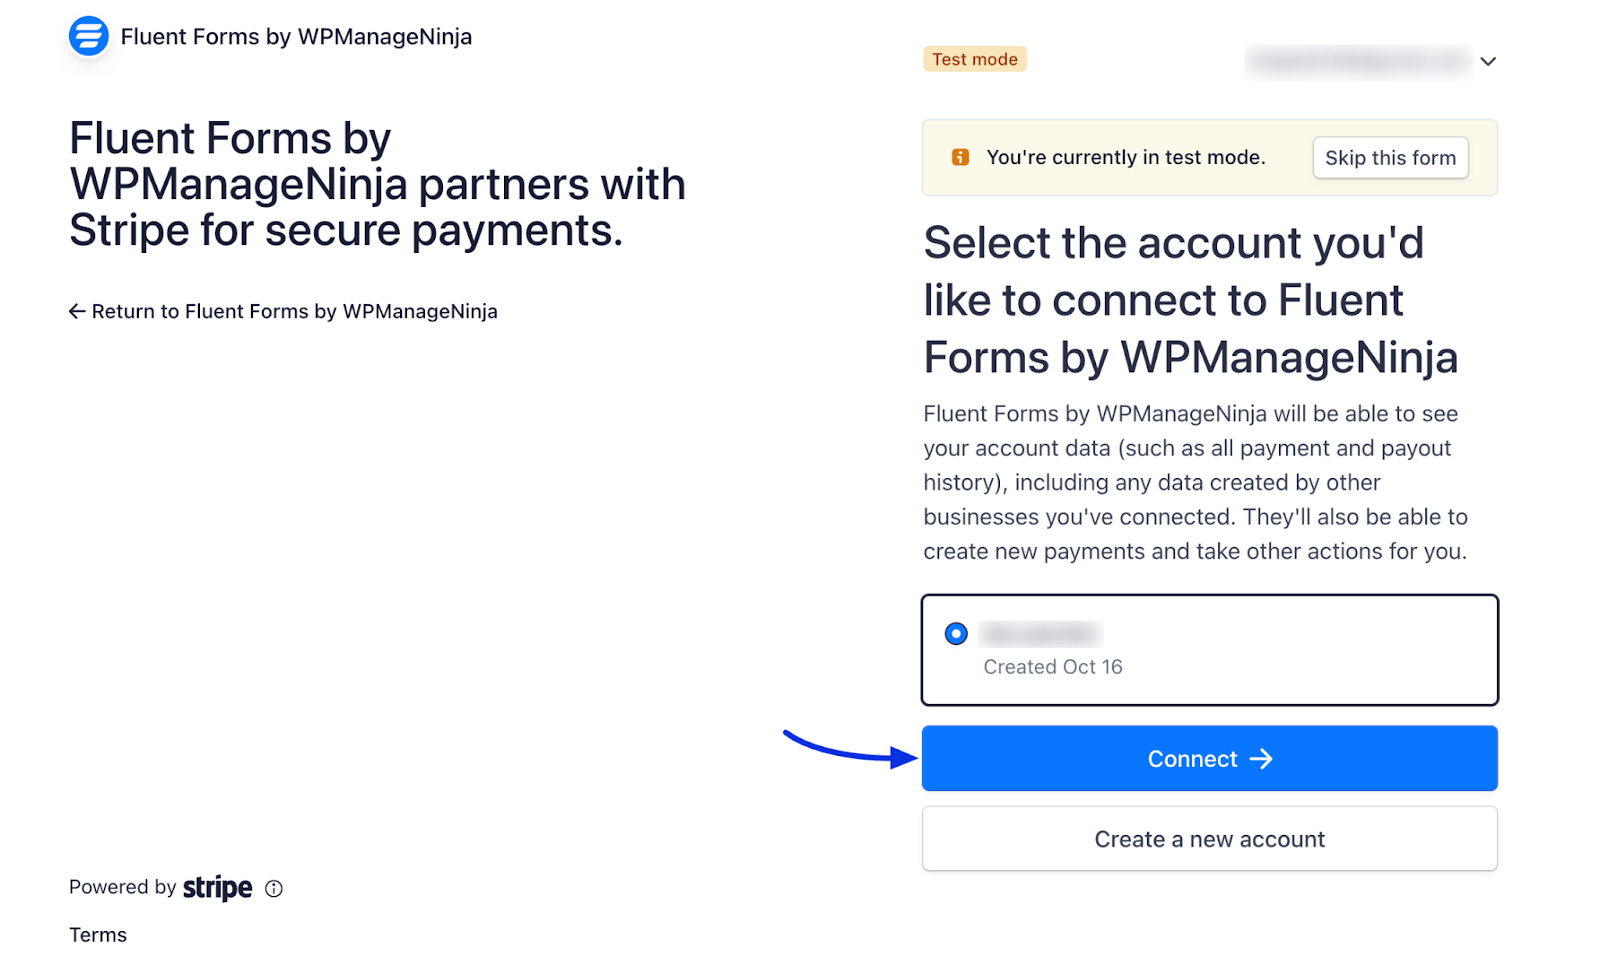
You will be directed to the Stripe connection page. If you have a Stripe account, then log in to your existing account. If you don't have one, you can easily create a new account. Since we already have a Stripe account logged in, we'll simply click the Continue button.
Your Stripe Payment and FluentBooking will be effortlessly connected after a successful login.
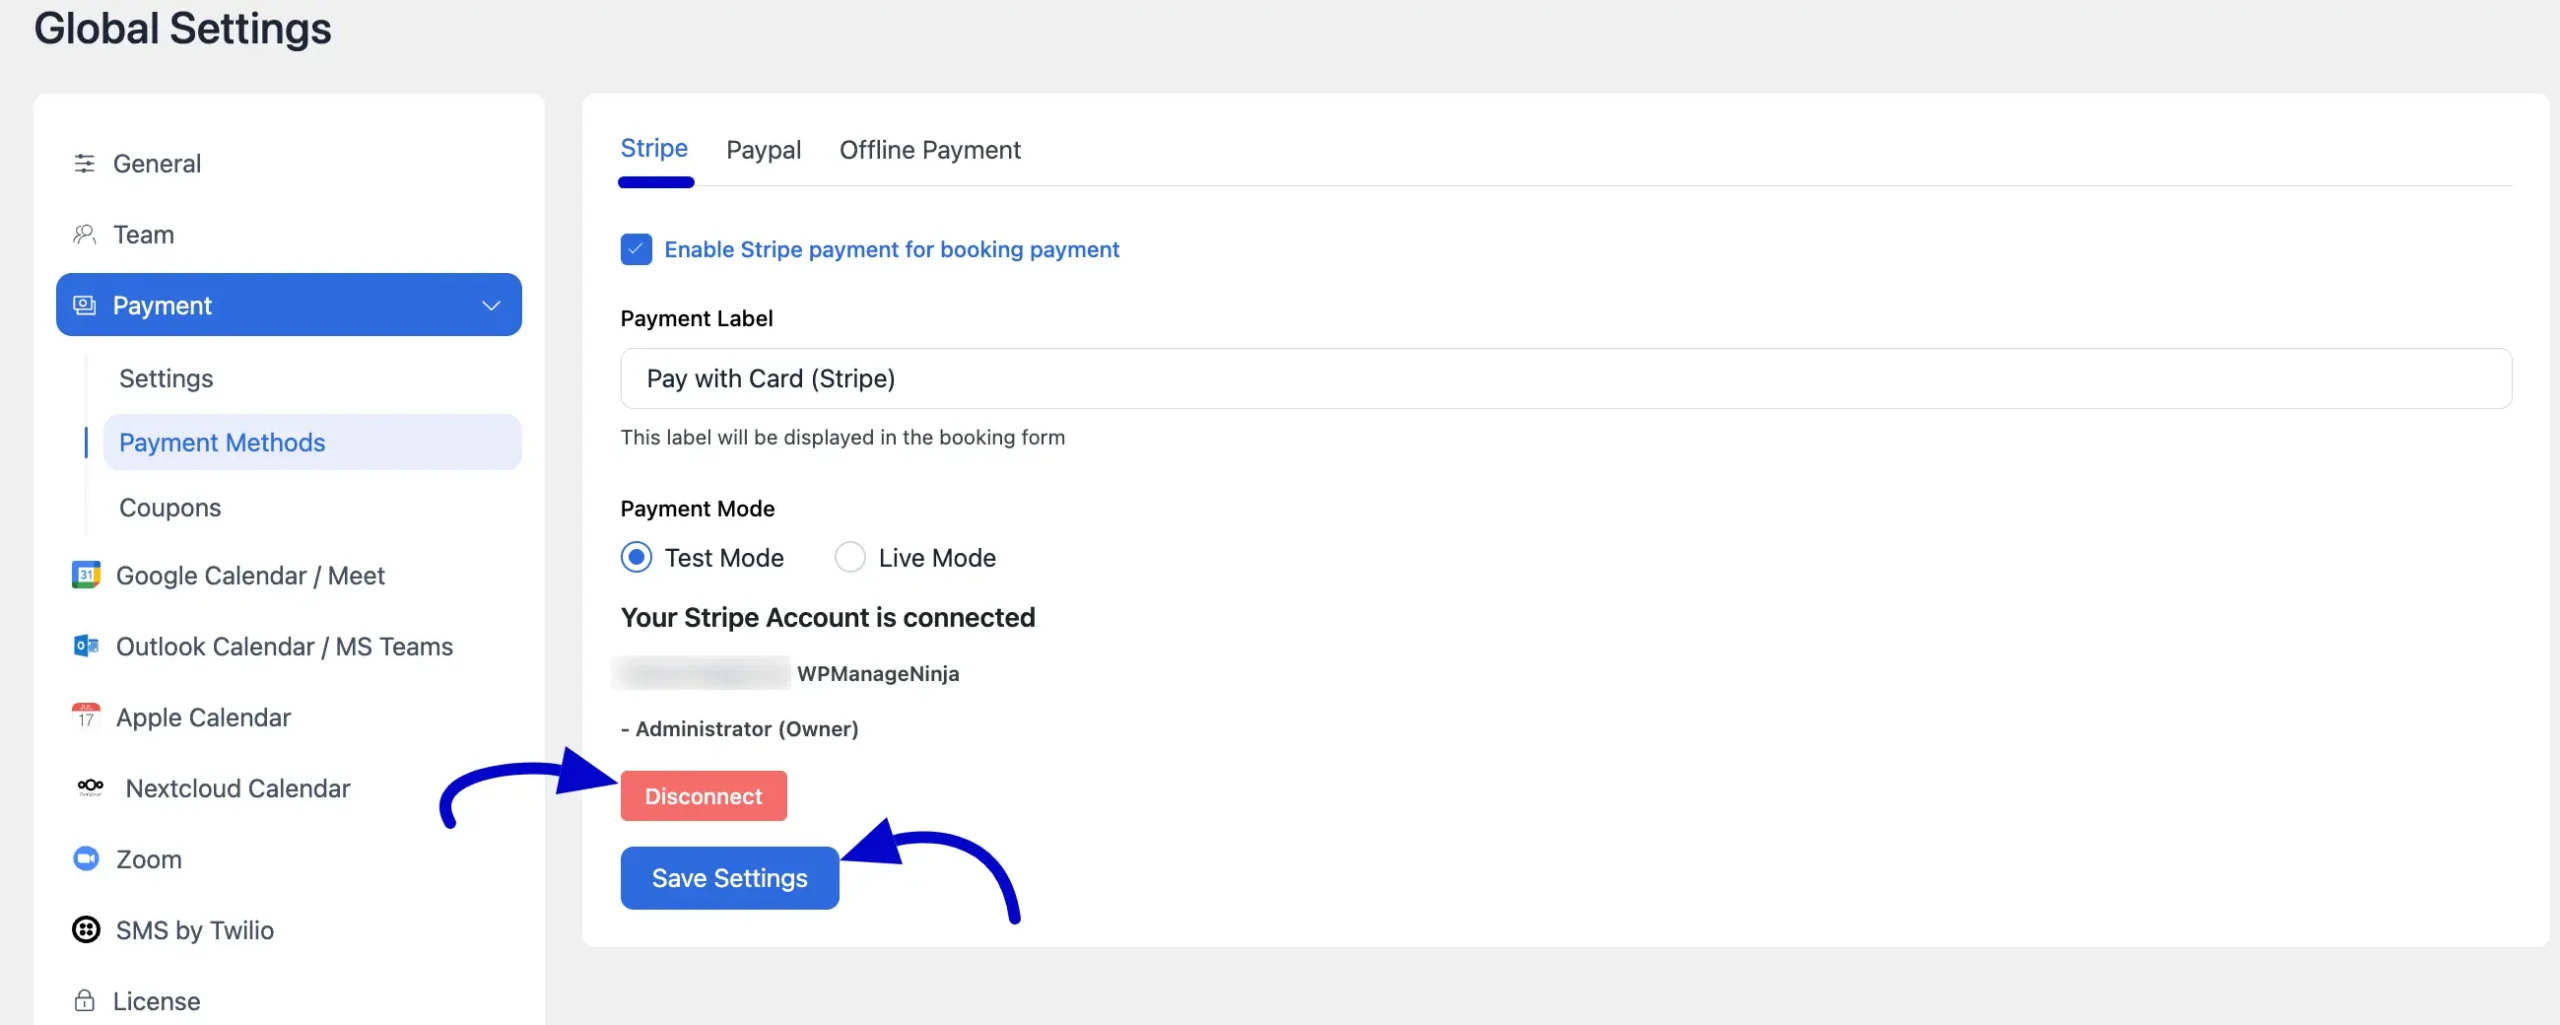
Finally, click the Save Settings button to save your changes.
If you want to add payment to your bookings, please read this doc.