Appearance
Outlook Calendar Integration with FluentBooking
Integrating your Outlook Calendar with FluentBooking allows you to automatically sync your booking events with your Outlook schedule. This helps you manage appointments more efficiently and keeps your availability up to date.
Follow the step-by-step guide below to connect your Outlook Calendar and start syncing your booking events seamlessly.
The Outlook Calendar integration is only available in FluentBooking Pro. You will need the FluentBooking Pro plugin to access this feature.
Important
Before connecting Outlook Calendar, make sure you have created at least one host in FluentBooking.
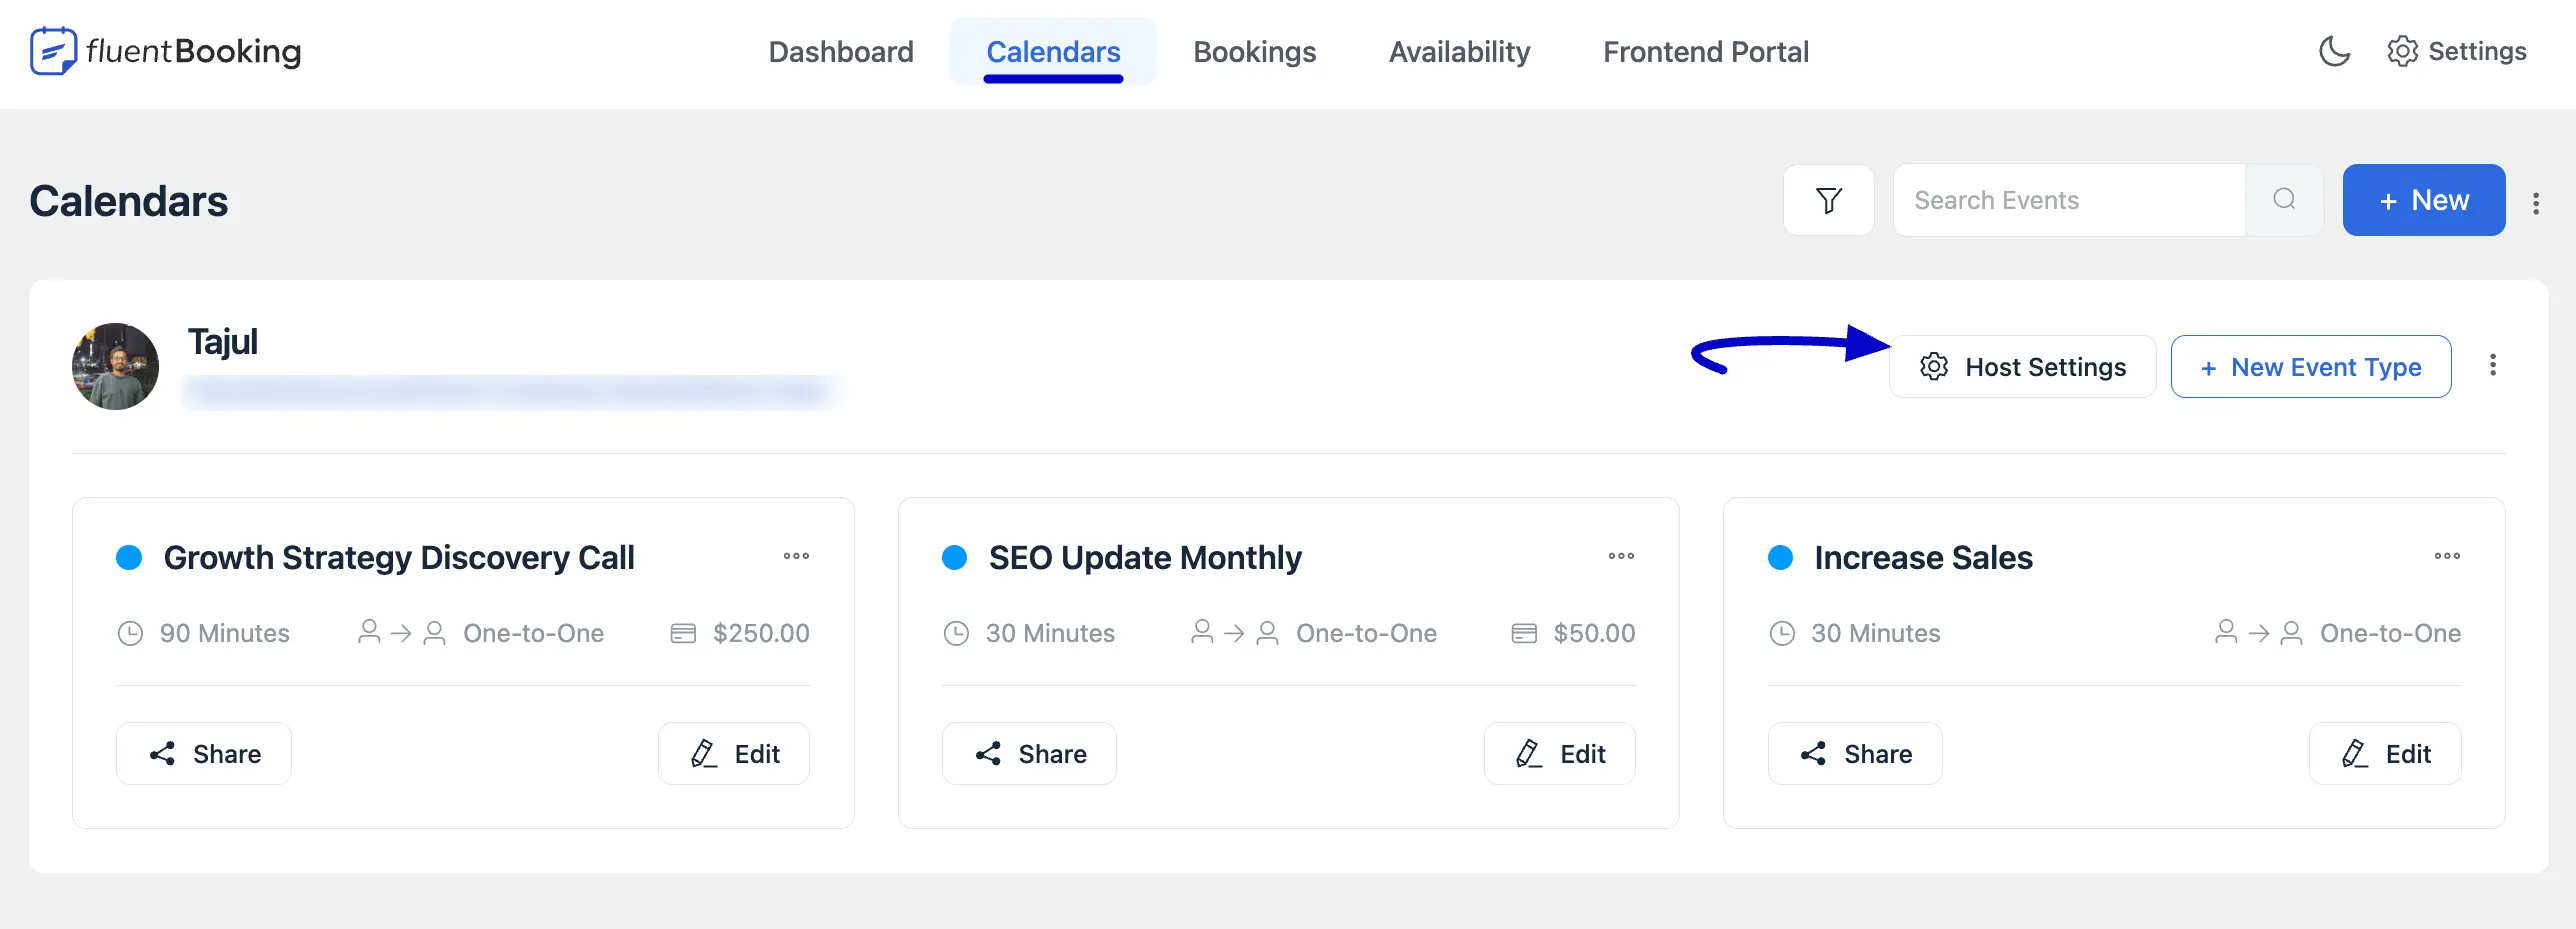
Select Your Calendar
Start by selecting the Calendar you want to integrate and access its Host settings.
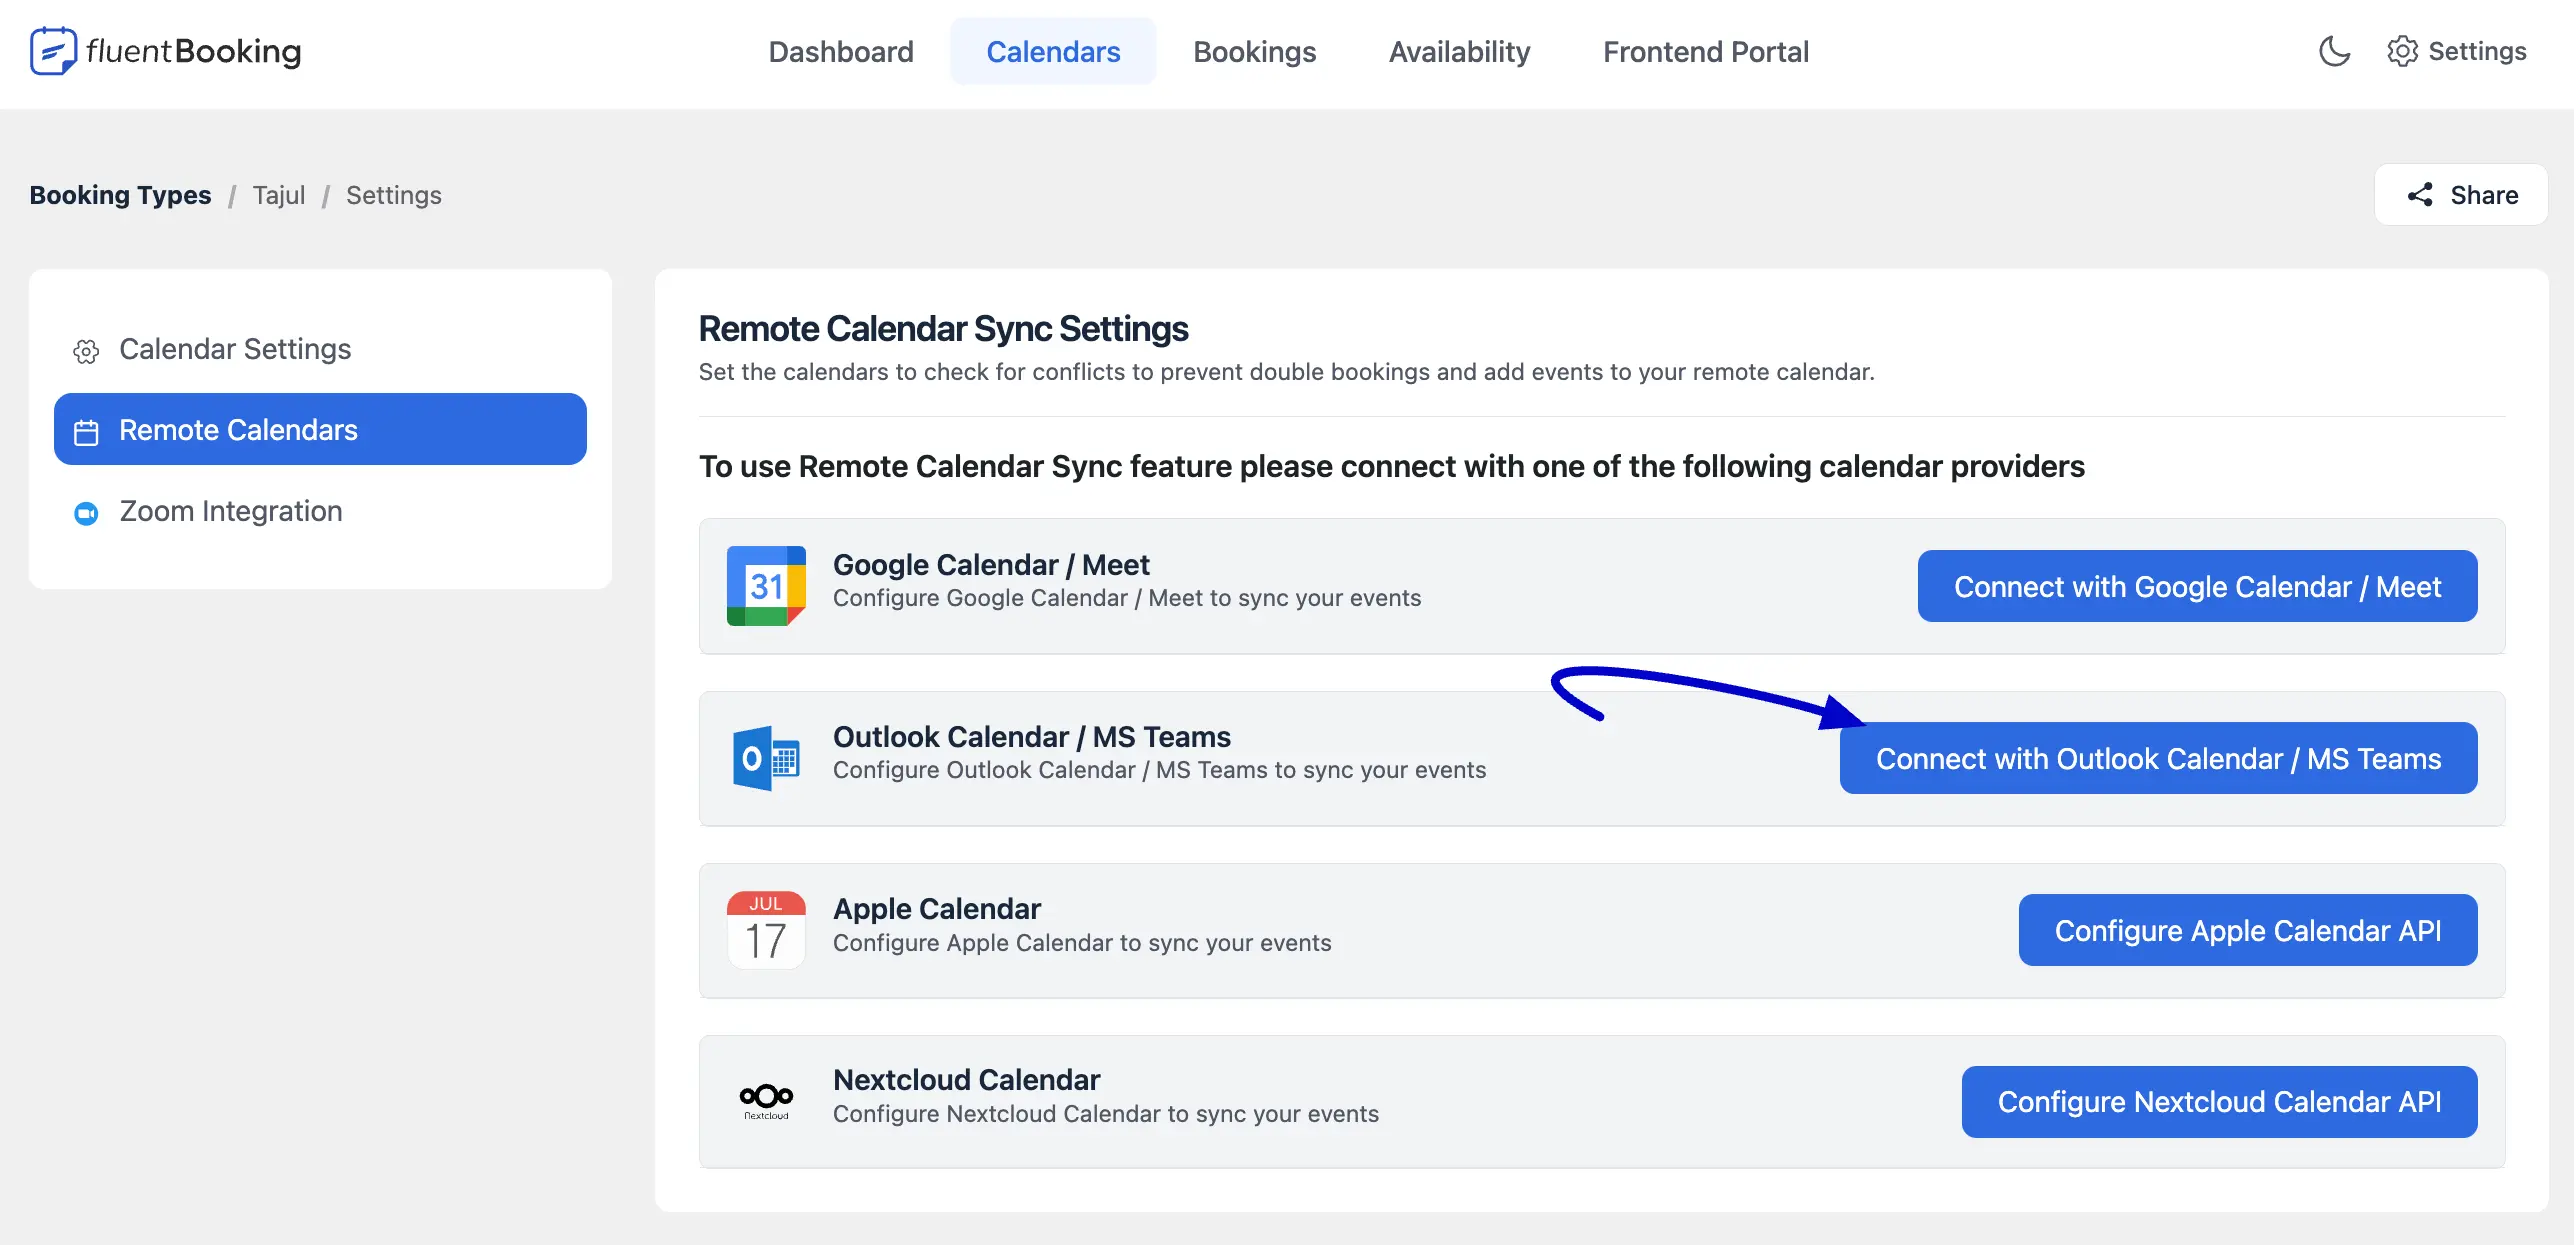
Connect with Outlook Calendar
Choose the Remote Calendar now, where you'll find the Outlook Calendar option. Click on the Connect with Outlook Calendar button.
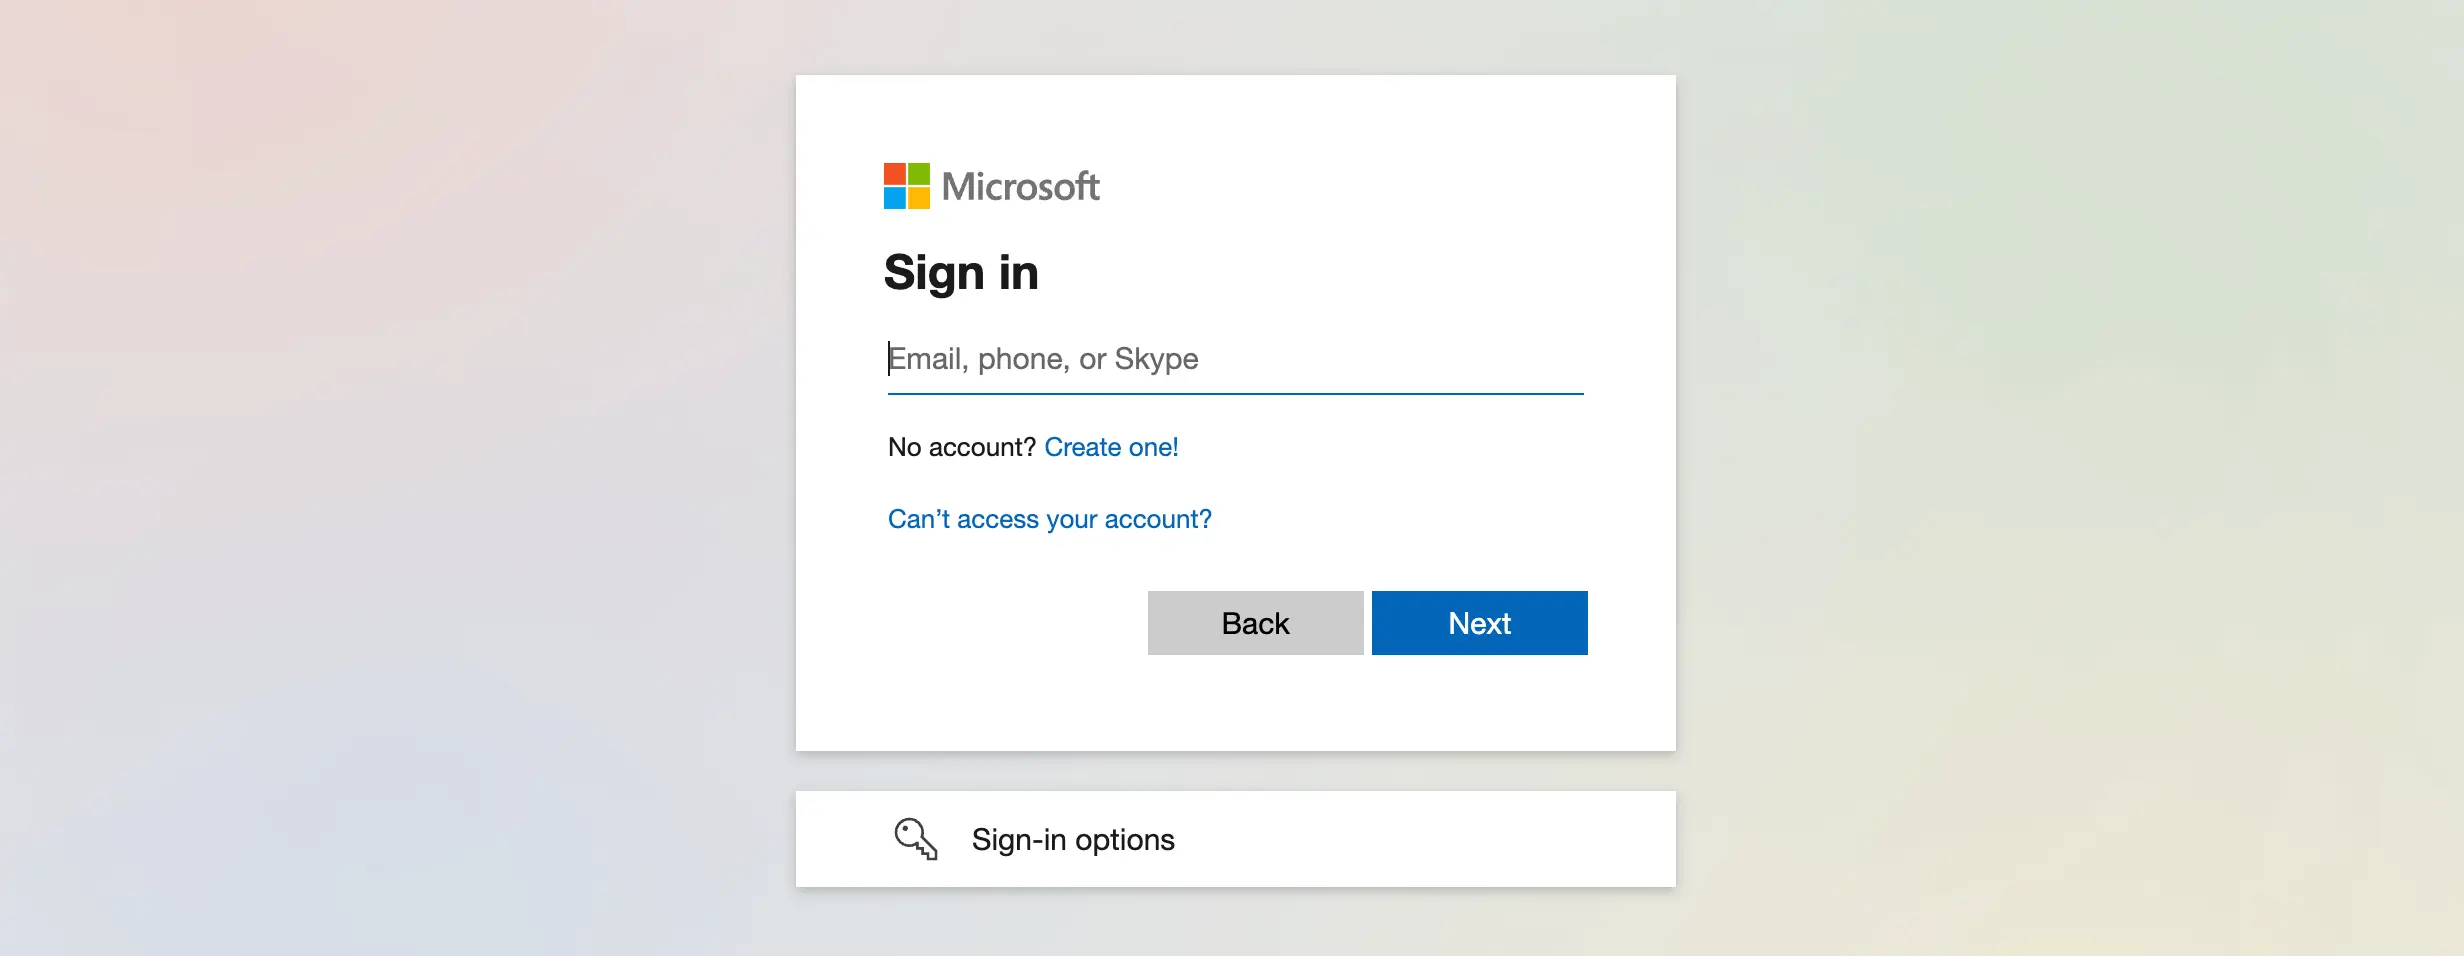
Log in to Your Outlook Account
You will be prompted to log in to your Microsoft Outlook account. Enter your login credentials to continue.
After logging in, grant access permission by clicking on the Accept button.
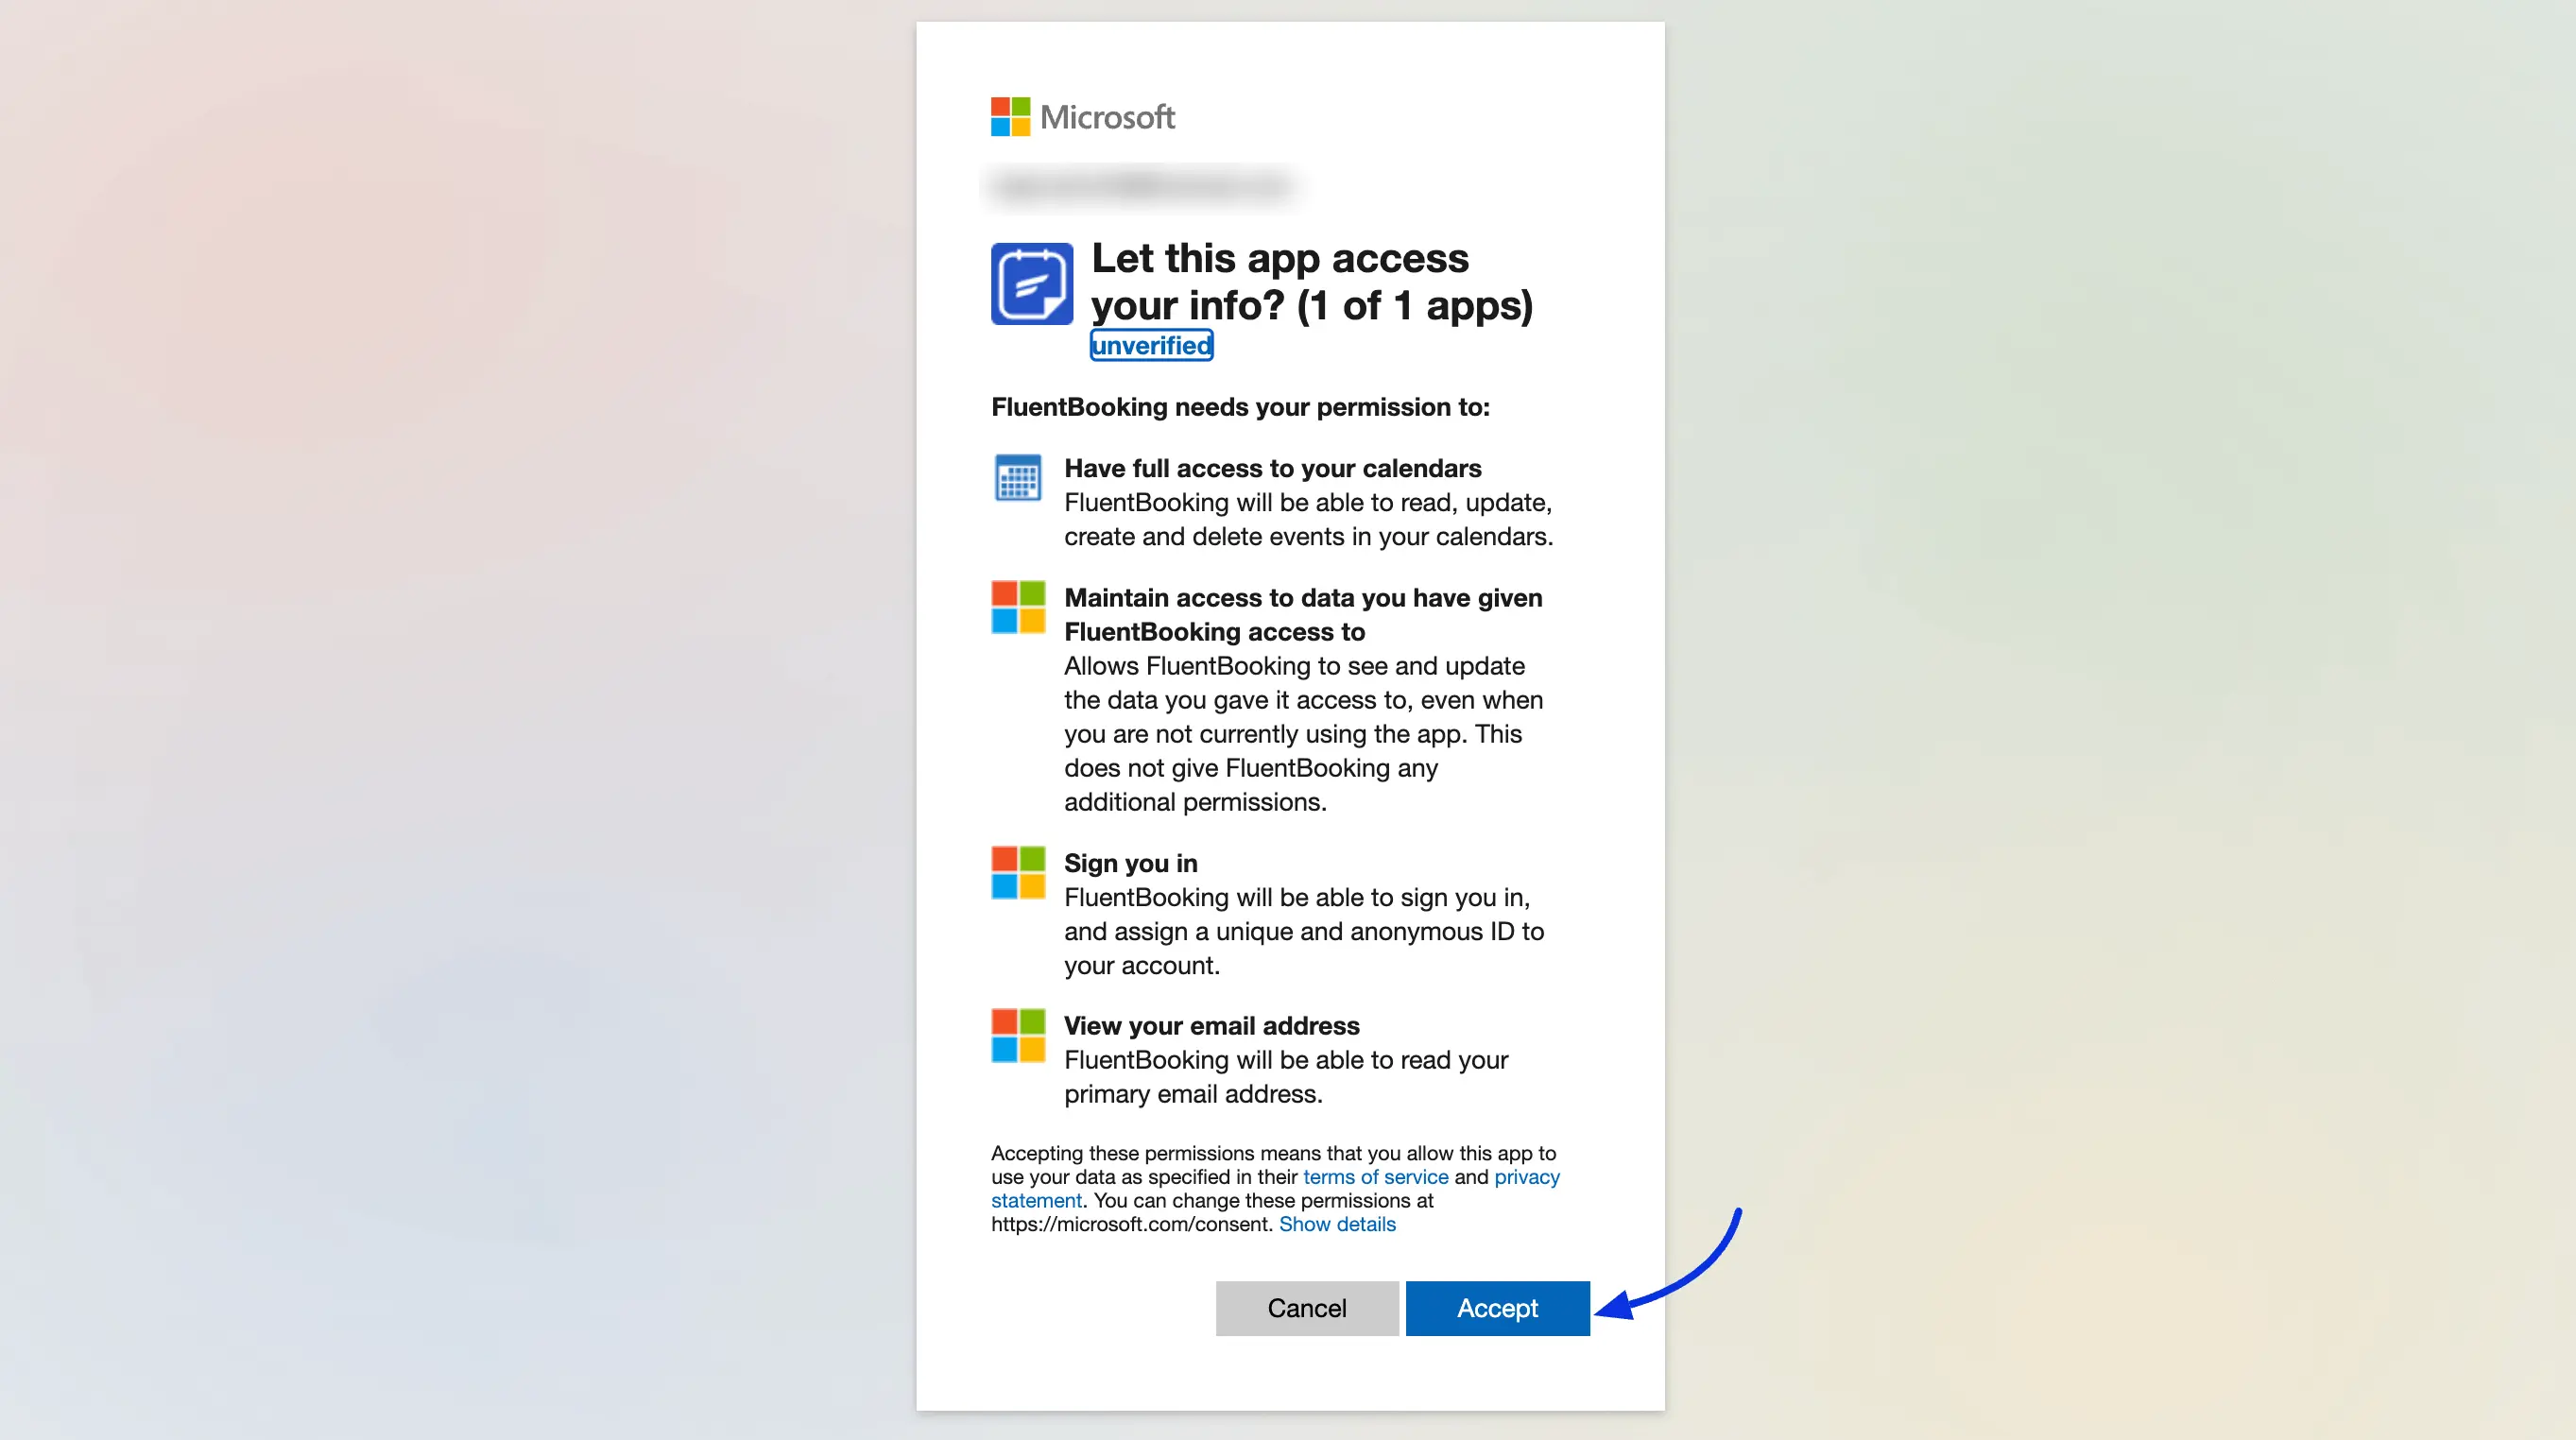
Once approved, your Outlook account will be successfully connected.
Outlook Calendar Account Selection
You can add multiple Outlook accounts to sync your booking events on your Outlook Calendar. Just click on the Add button to add another new account and follow the above steps.
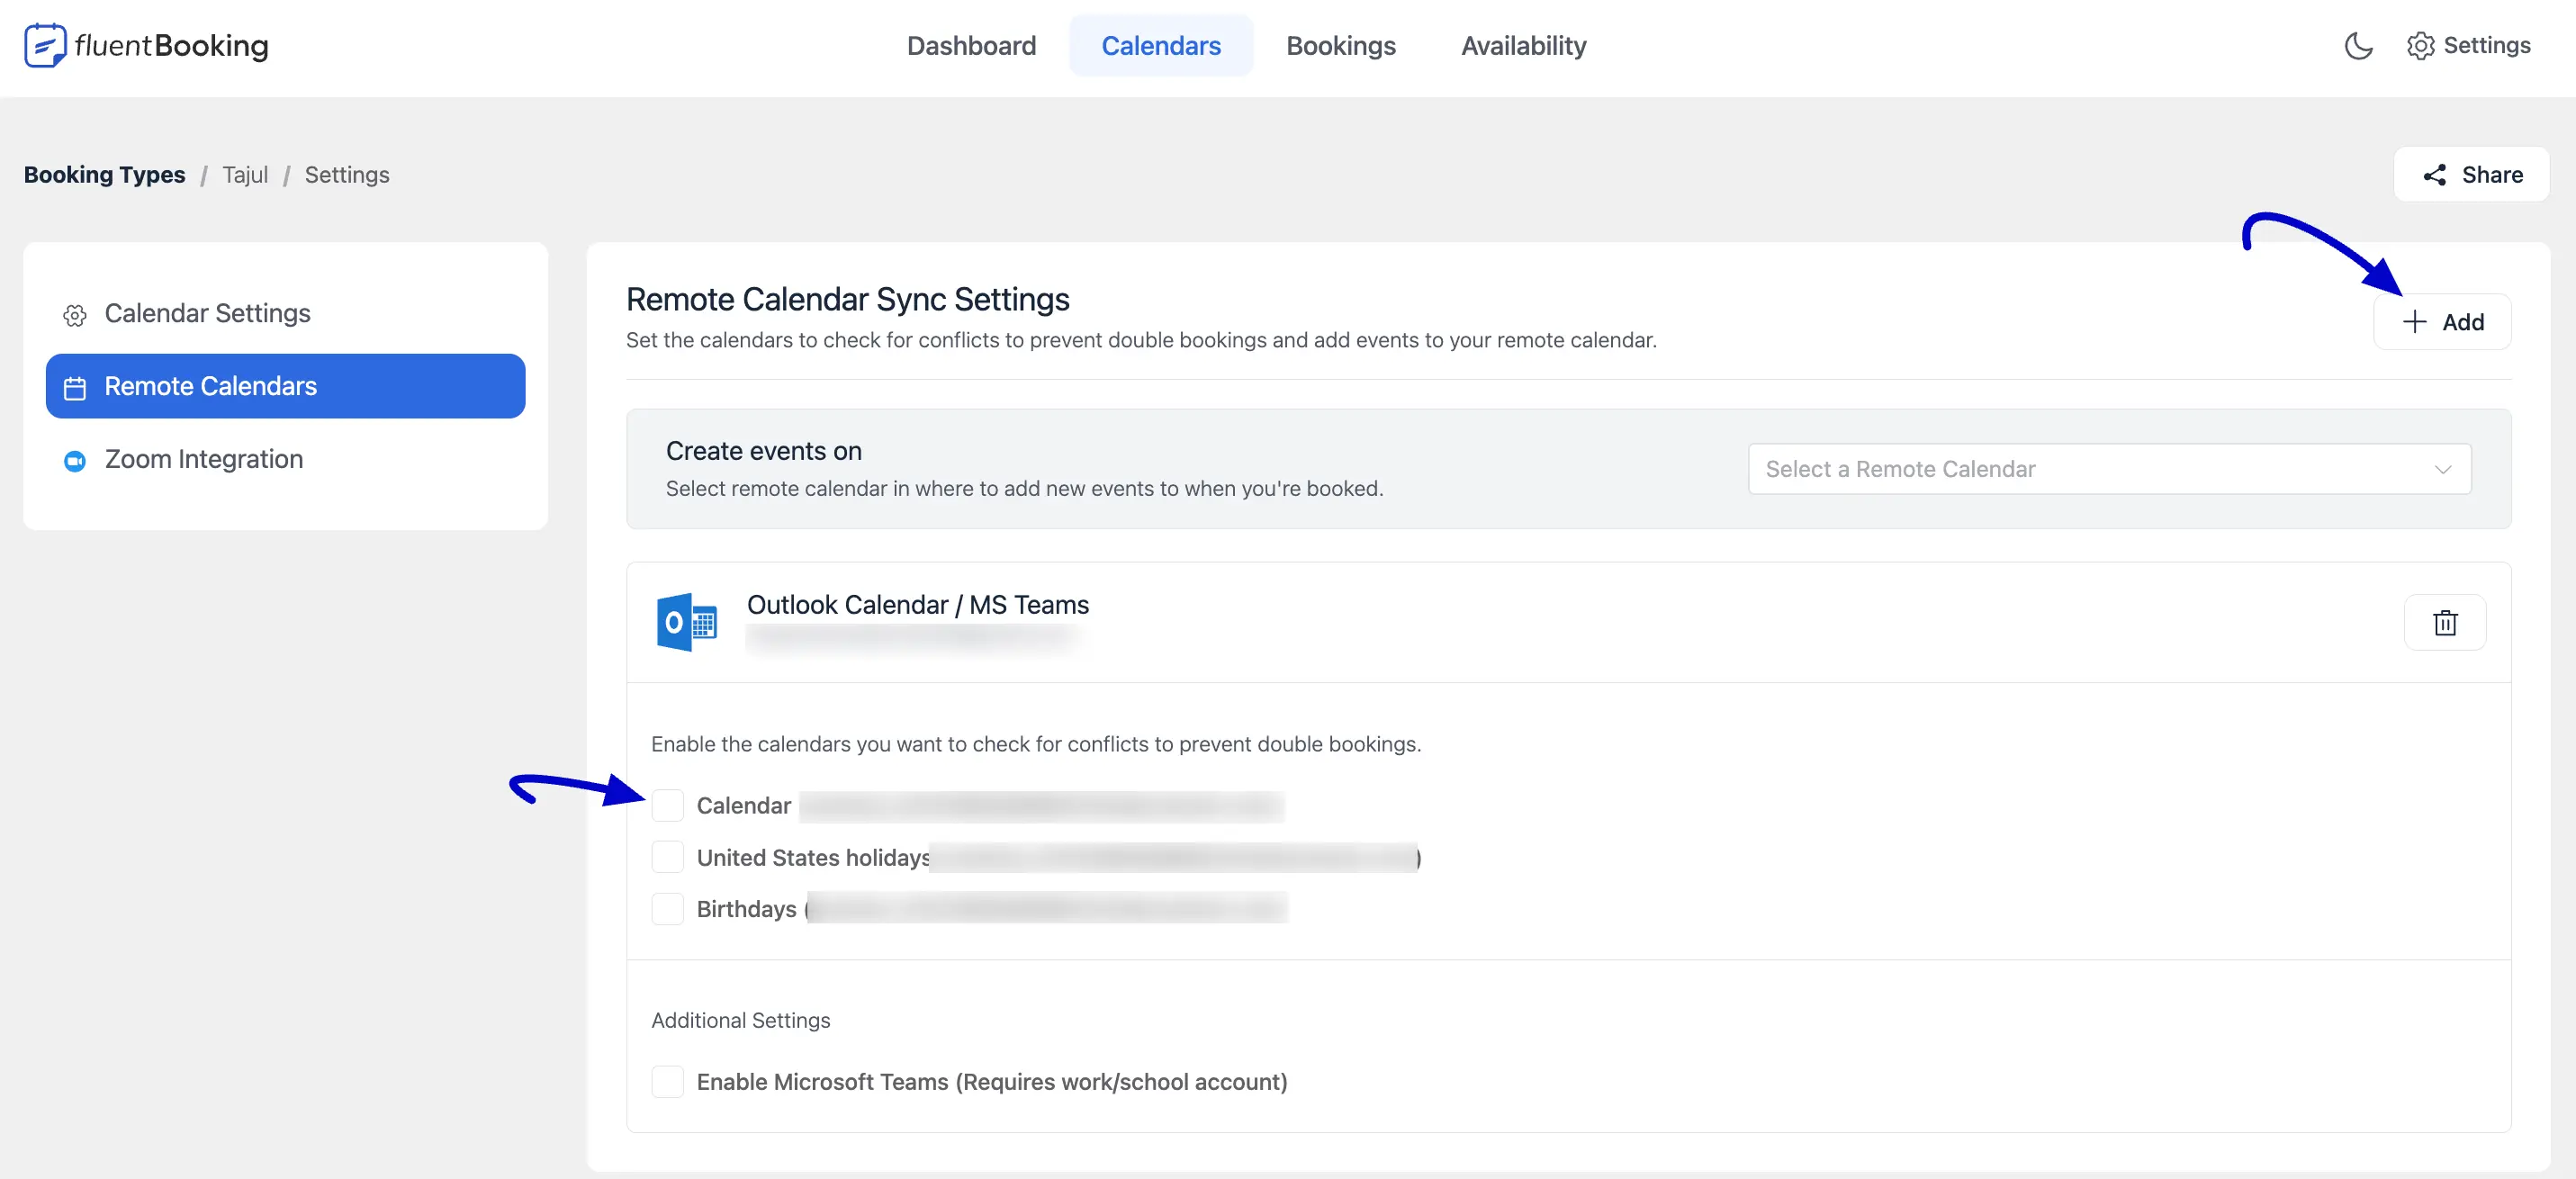
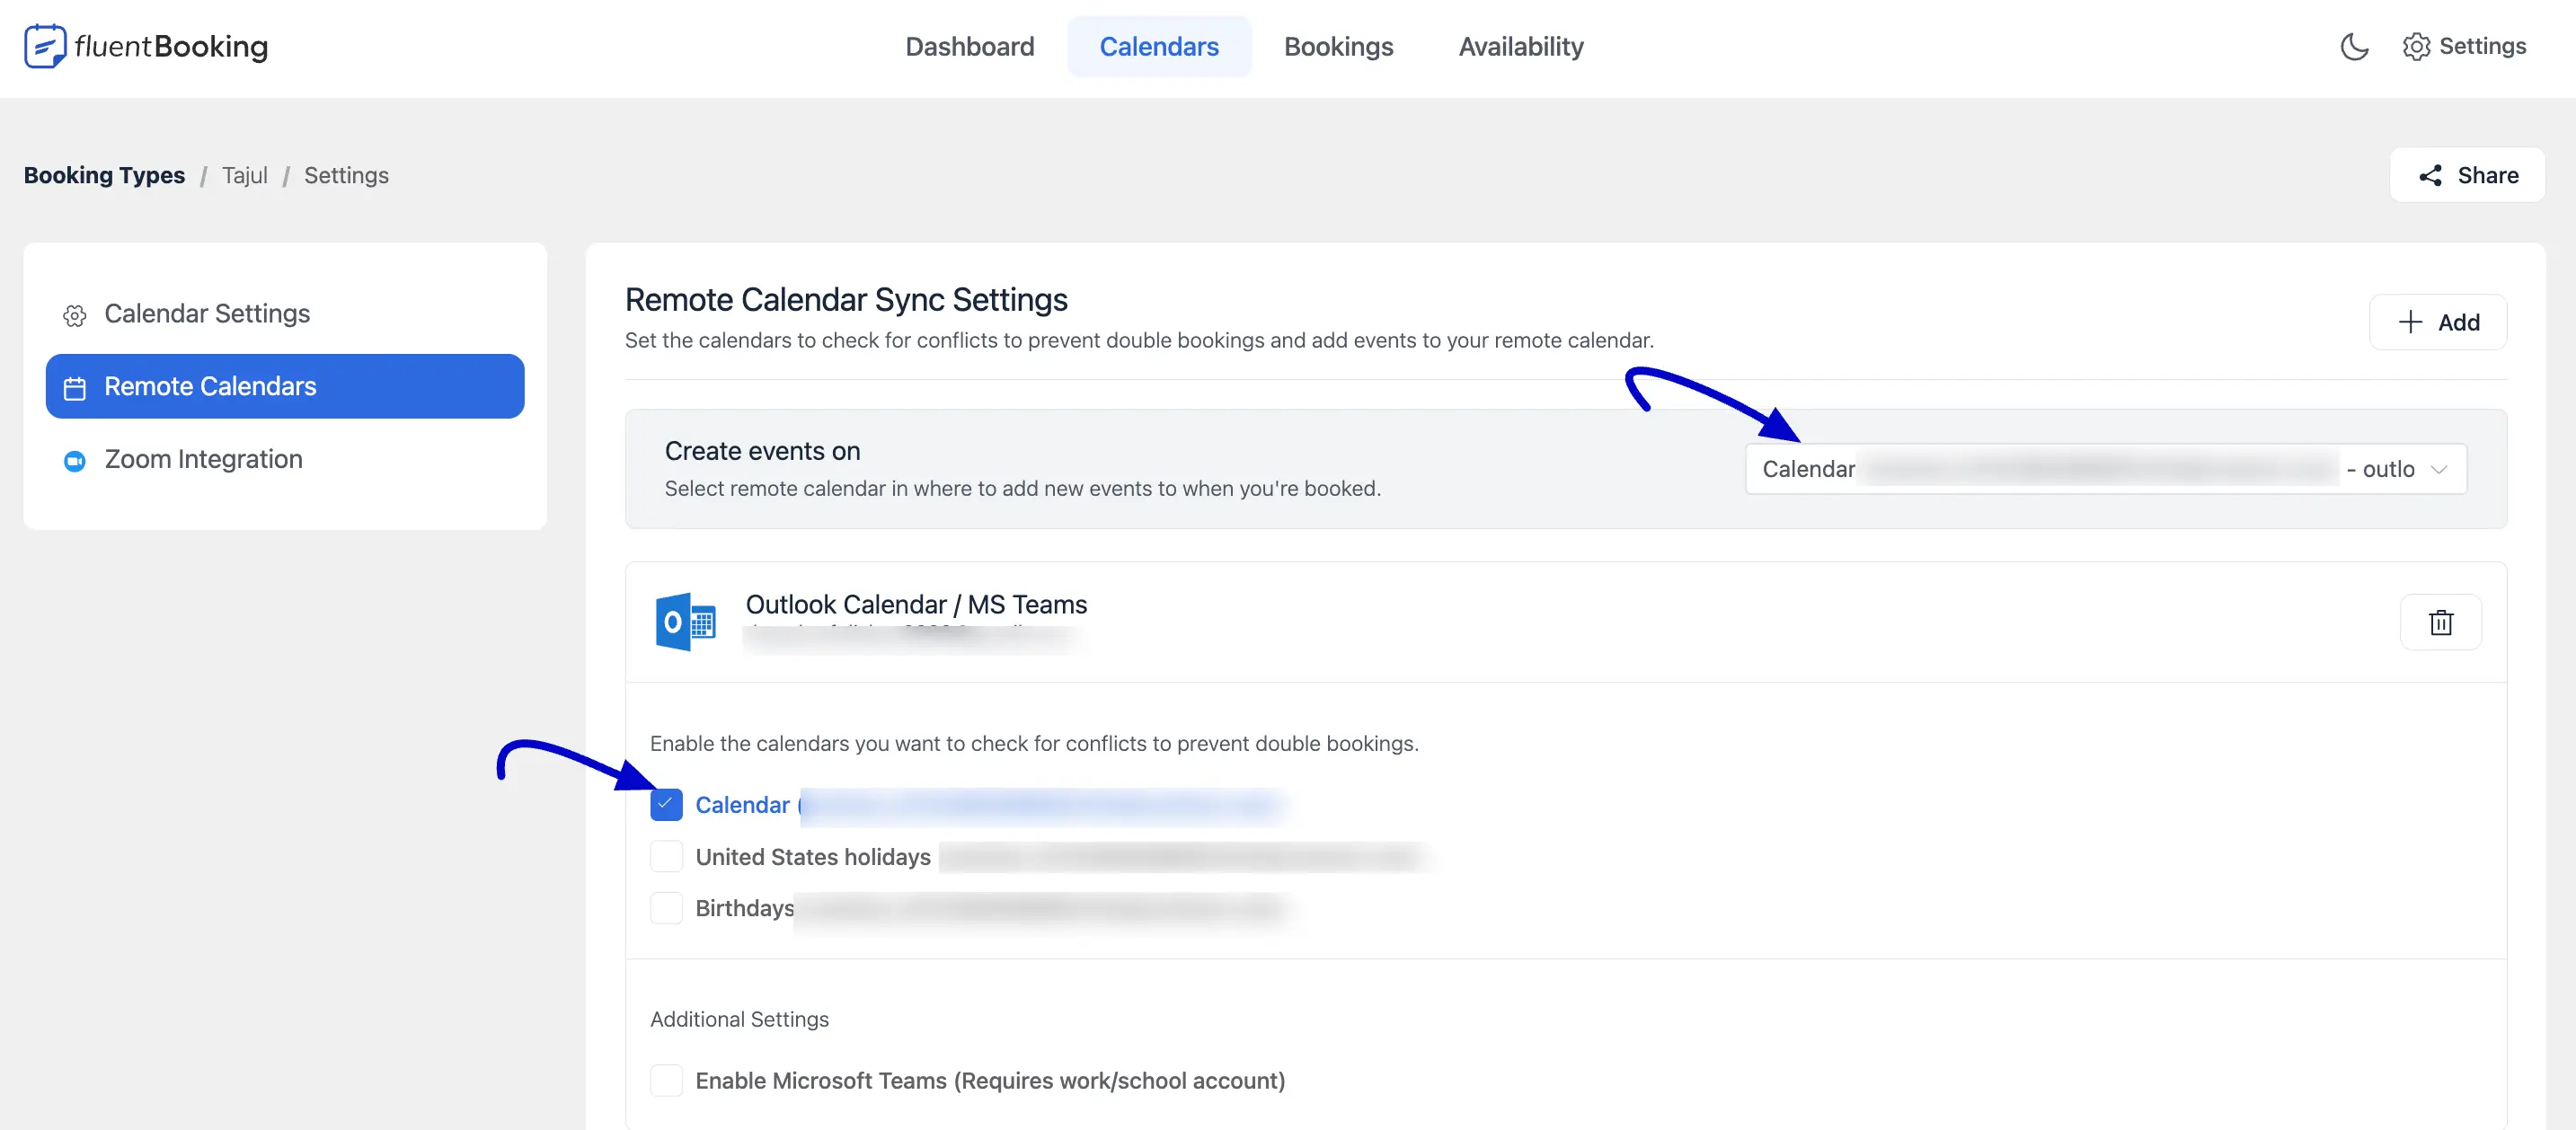
Choose the Outlook Calendar account from the Create Events On section in which you intend to schedule an event when you are booked.
Enable the calendar checkbox you wish to monitor for conflicts to avoid double bookings.
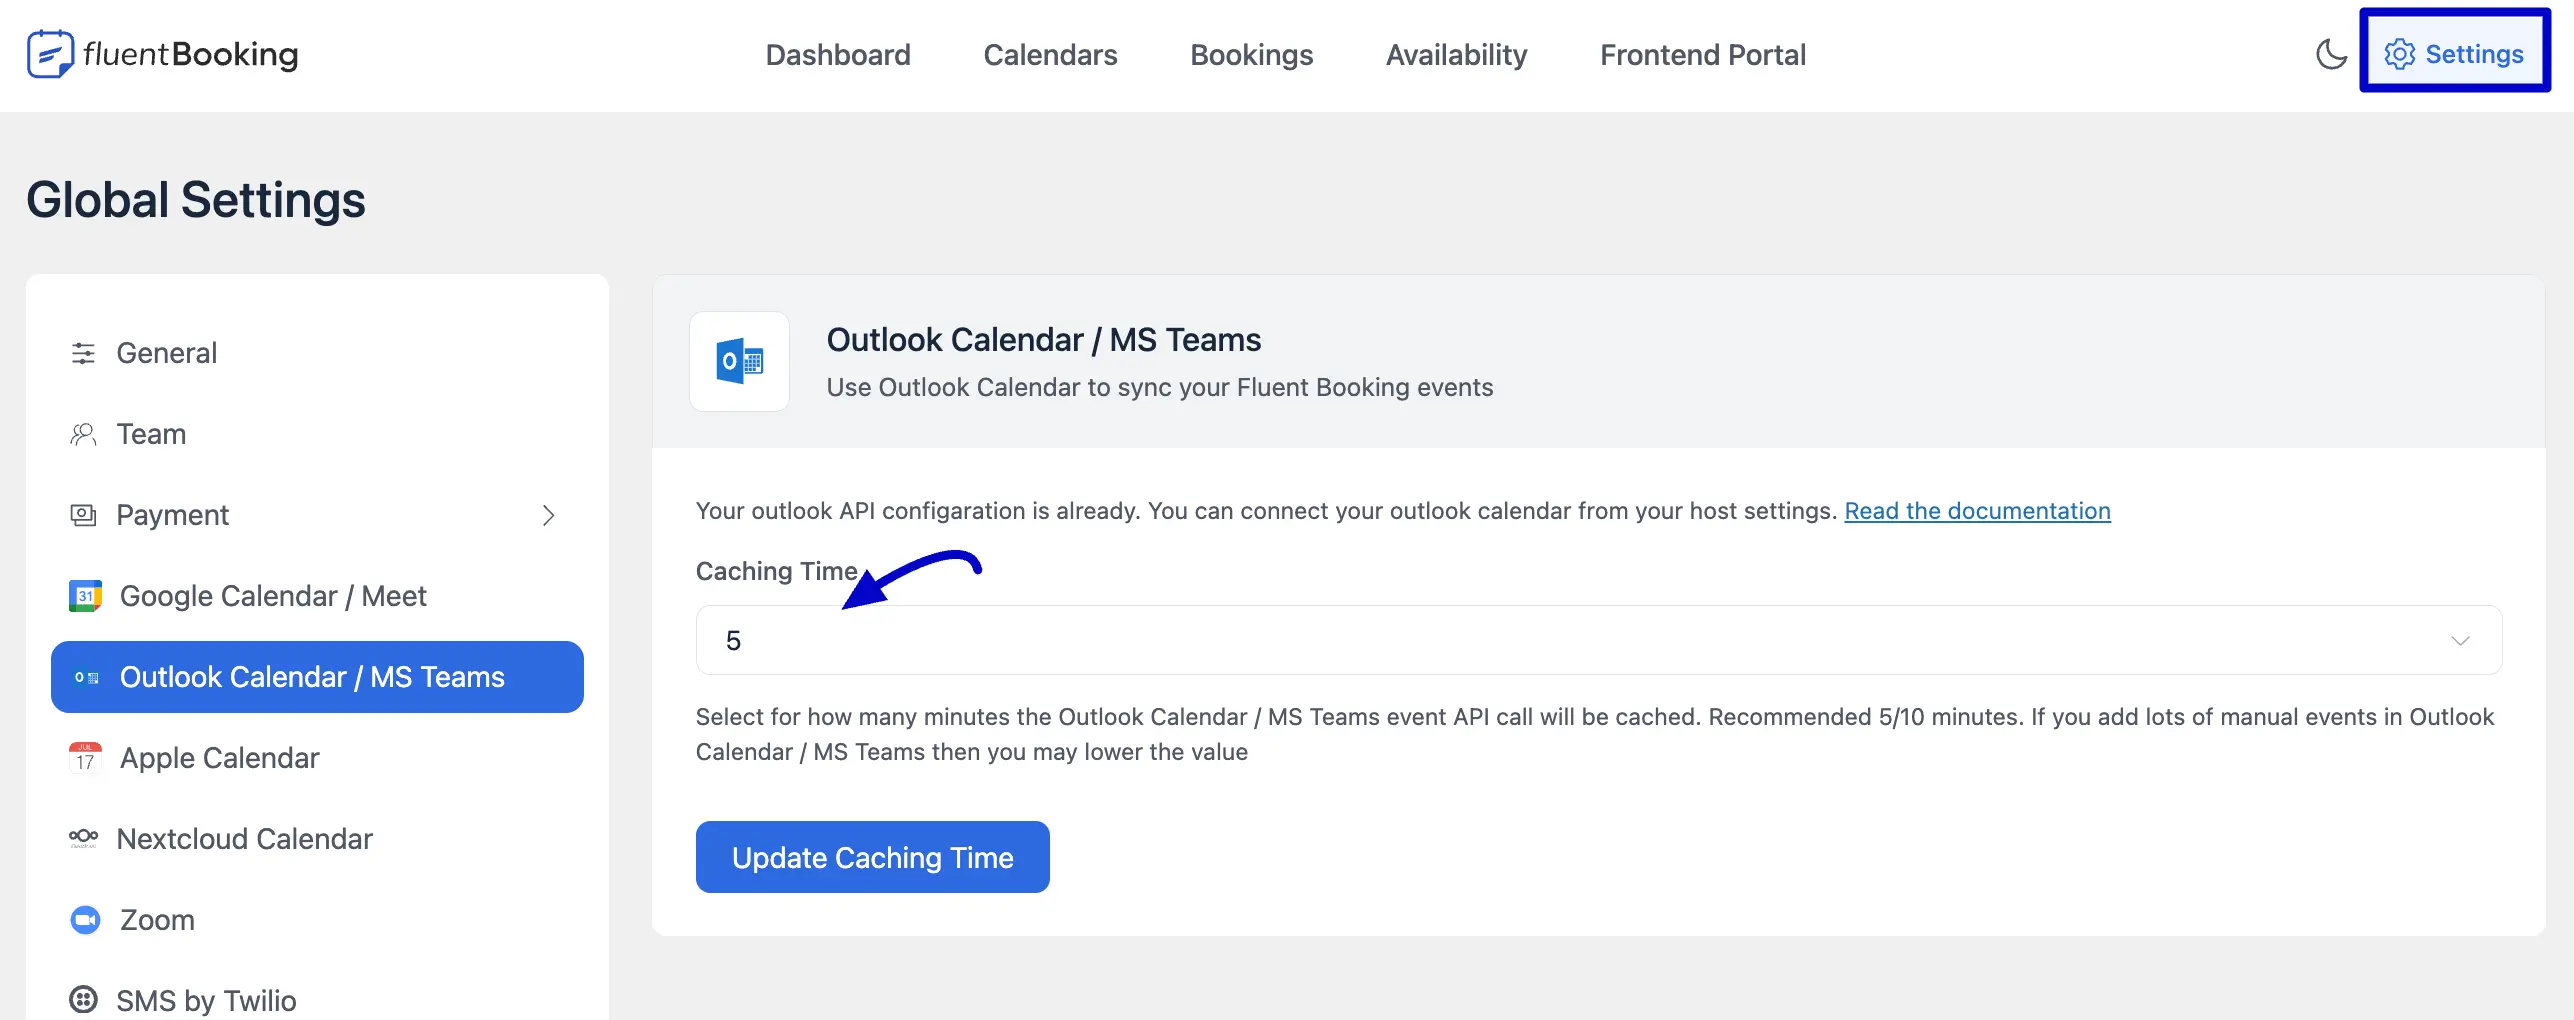
Customize Caching Time
To customize the caching time for Outlook Calendar events, navigate to Settings > Outlook Calendar. From the drop-down menu, select your preferred caching time. We recommend a caching time of 5 to 10 minutes. Adjust this value if you frequently add manual events to your Outlook Calendar.
Congratulations, your Outlook Calendar Integration is finished!